
When Entry Point open check value comes back OPEN | CLOSED | HOLIDAY | CLOSURE
-
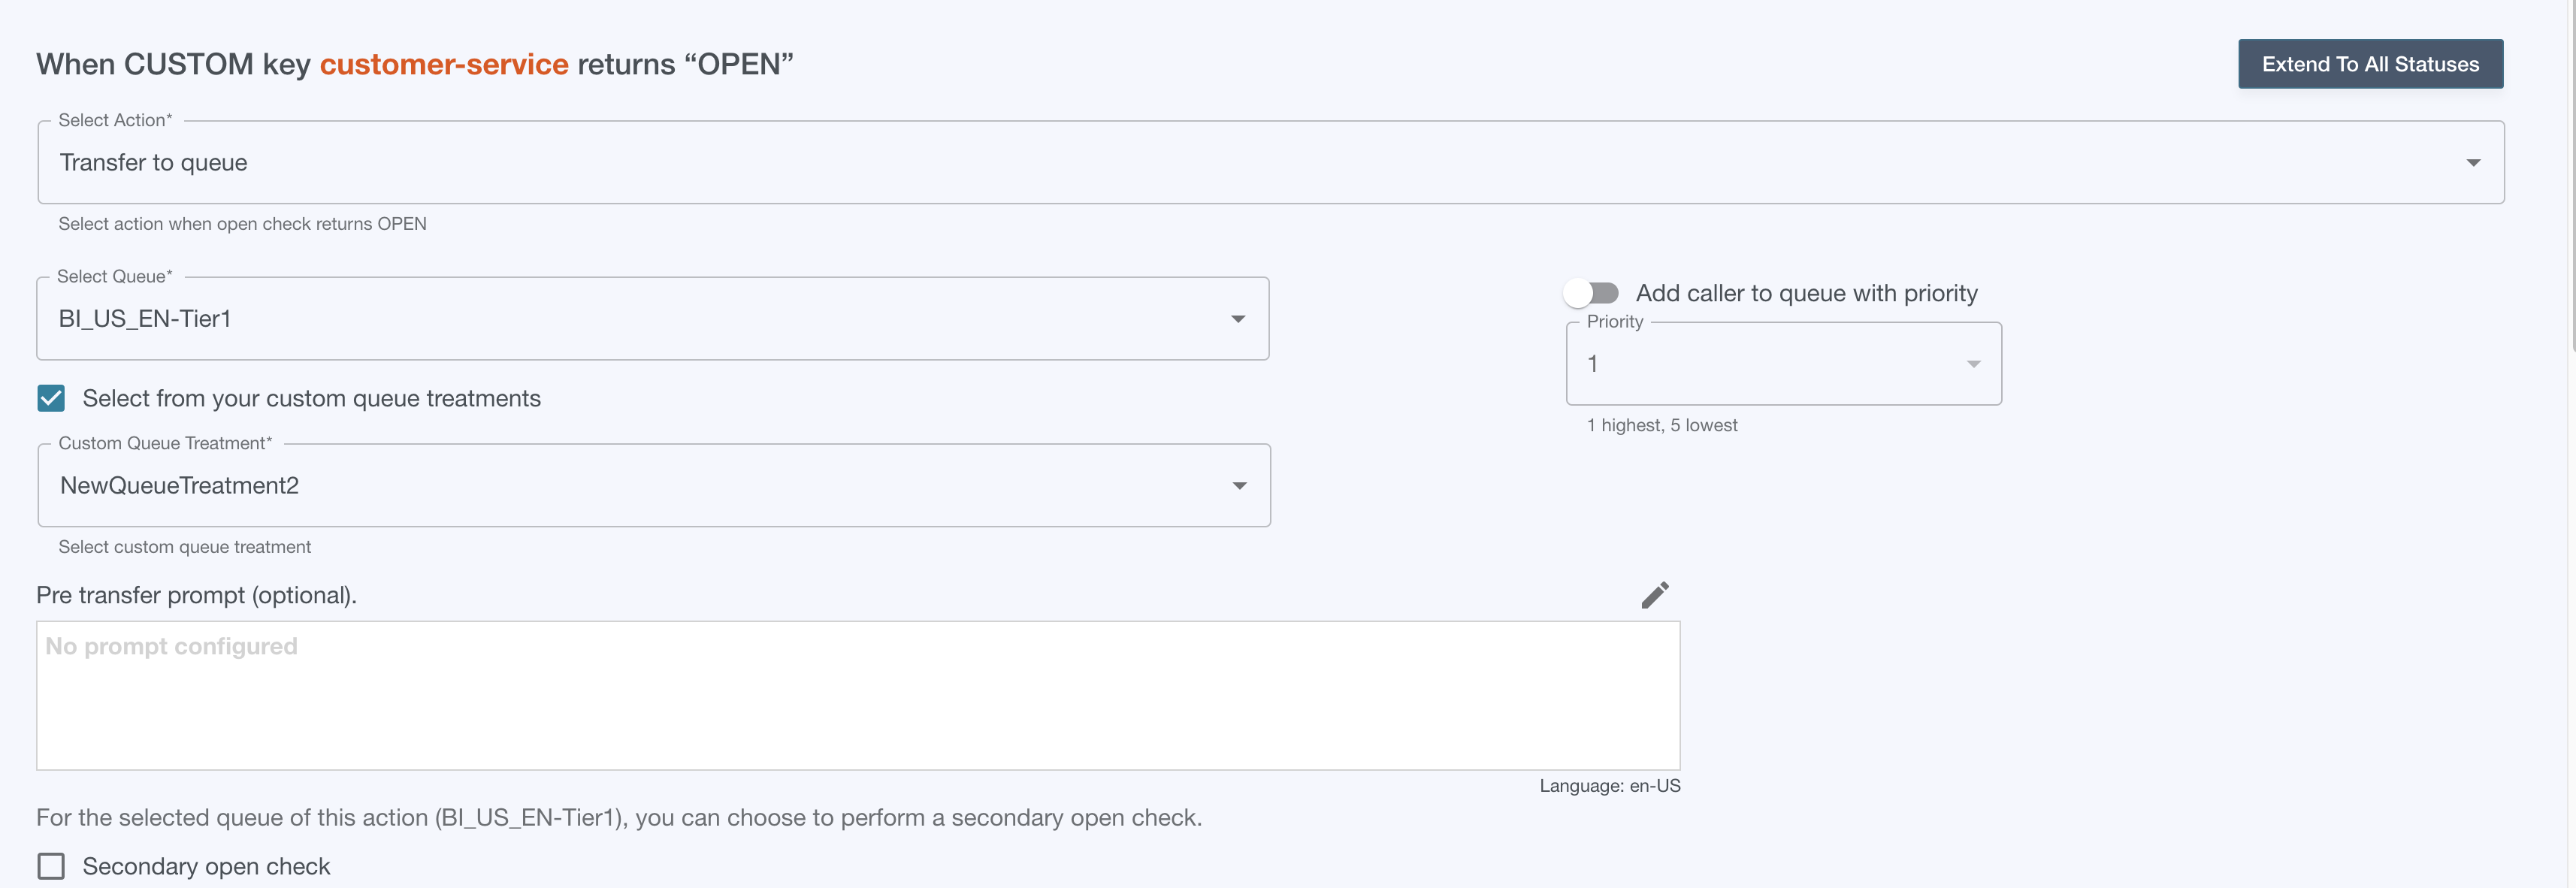
Choose “Transfer to Queue” from the dropdown and the queue action configurations will appear.
-
Select the queue you wish to transfer to from the queue dropdown.
-
Select the queue treatment flow you wish to use from the queue treatment dropdown.
-
If you wish to use a Flow Engine Queue Treatment, check the box that says “Select from your custom queue treatments then select your custom queue treatment.
-
-
If you wish to change the priority of the call, toggle the “Add caller to the queue with priority” switch and select a priority 1-5 (1 highest 5 lowest).
-
If you have chosen a separate initial open check value in Basic Setup Step 1.3 from the queue you have selected for transfer, you may choose to perform a “secondary” open check on the selected queue. The secondary open check is terminating, meaning if the queue is not open, the call will disconnect. If you don’t choose to do a secondary open check on the selected queue, the transfer to queue will be made no matter the queue's current operating status.
-
Check “Secondary open check”
-
The open check will be performed on the queue based on how its hours are configured in Calendar Management.
-
If you wish to use the Holiday/Closure messages from Calendar Management leave the “Holiday” and “Closure” box to the left clicked. If you wish to override the Calendar Management message for either holiday or closure, un-check the boxes and write in your message by clicking on the edit icon. Since calendar management does not return a message for a CLOSED status, you can also write in an optional message if the queue comes back closed.

-