Environment Sync Management
The Environment Sync Management pages allow the Contact Flows and Configuration sets created in one instance to be moved to another instance.
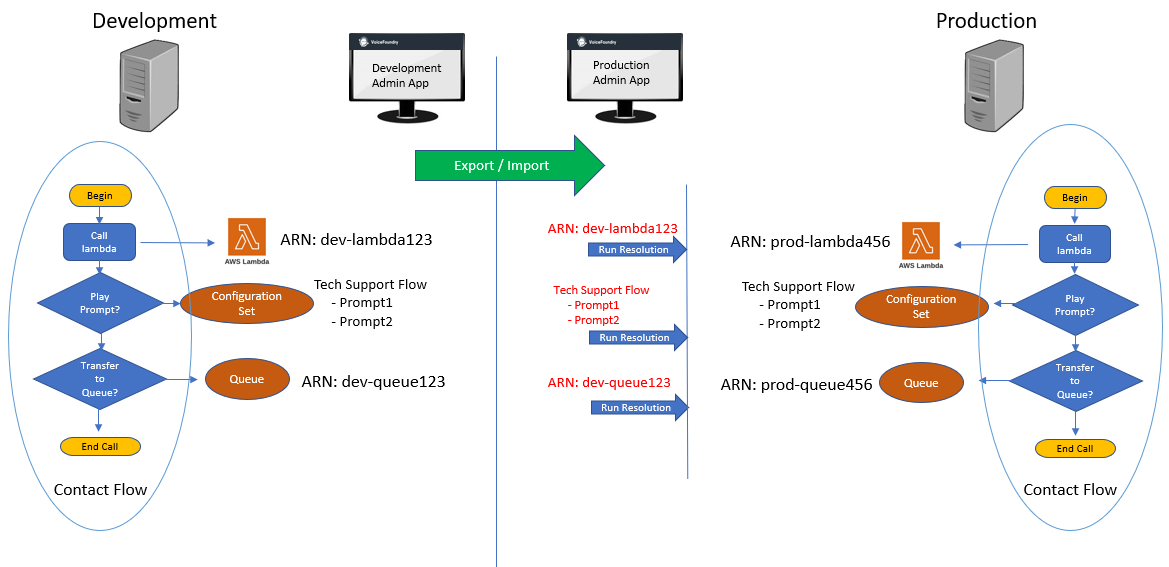
There are three groups of objects that need to be moved in order to get the Contact Flows from one environment to another. There should be a separate application running for each environment’s Connect instance, and the objects will be exported from one instance, using the application’s Export functionality, and imported into the new instance using the Connect Admin Application’s Environment Sync Management.
Path / Attribute Mappings
Path Attribute Mappings allow users to match data between instances.
When a Contact Flow is created in a Connect instance, it identifies the Connect objects through an ARN, which is a “Amazon Resource Number”. This number is unique across all instances, so when you import that Contact Flow into the new instance, it will not match any of the objects created in that instance.
In order to move the Contact Flow to a new environment’s instance, we need to map the object to it’s new ARN.
Use the Export Local Path Attributes button to export the data from an instance and save it on your local computer as a JSON file.

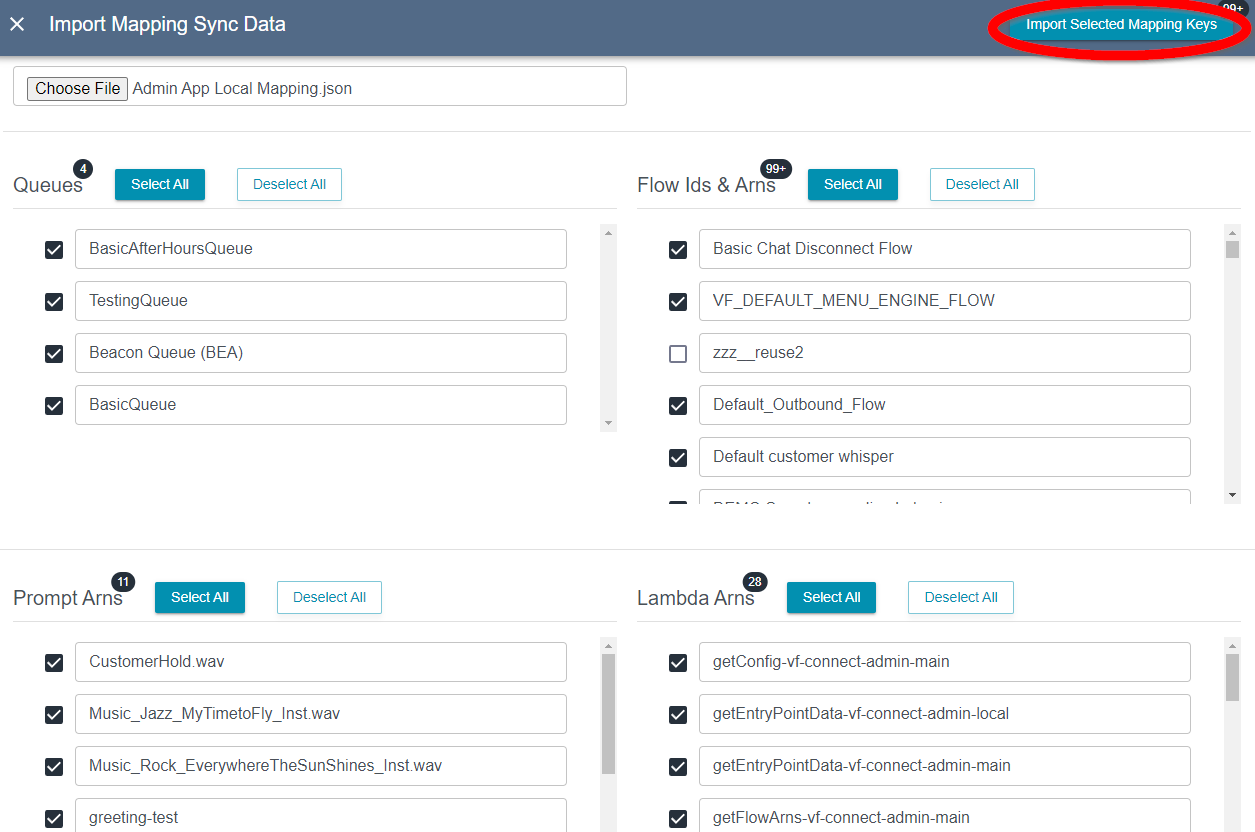
Then import the data into the new instance by clicking Import Mapped Path Attributes. This will bring up a form that will allow you to review the object being imported to allow individual objects to be selected/deselected. By default everything that was exported will be imported.

To import the objects, click Import Selected Mapping Keys.
Mapping Associations
The Mapping Associations section is a table that displays the Contact Flow, Queue and Prompt Objects that were imported from the file, and shows the local mappings. In these cases the names should be the same, so the import can automatically map the incoming objects with objects that already exist in the new Connect instance.

Lambda Mapping Associations
Because lambda names are often different when they’re deployed to different environments, lambdas need to be manually associated to their corresponding object in the new instance. This section lists the lambdas that have been created in the local Connect instance so that they can be mapped to an ARNs that have been loaded from the file loaded through the Import Mapped Path Attributes action.
To update the association, click the empty textbox in the Find (Incoming Value) column and match the name with the imported ARN, so that the local lambda will be called from the Contact Flow.
When you’ve found the correct match, click Update Lambda Mapping Associations to save the mapping.

Contact Flow Sync
Contact Flows are moved between environments in a similar manner to the Path Attributes: they are exported to a local file from one instance and imported through the Connect Admin Application pointing to the new instance.
Existing Flows
On the Existing Flows tab, the actions that can be performed are: exporting the Contact Flow, and running a Resolution Check.

Export Selected Flows
To Export Flows, select the corresponding checkbox in the leftmost column, and click Export Selected Flows.
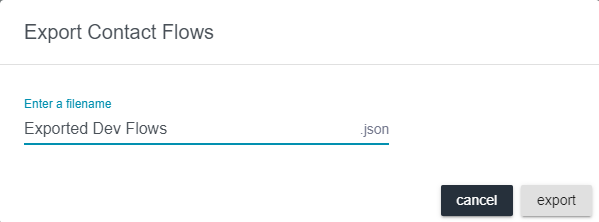
This will pop up a window to give the exported JSON file a name.
Click export.
Run Resolution Check
The Resolution Check will use the mappings done on the Path / Attribute Mappings page and apply them to the Contact Flows.
If this step is not run successfully, then the Contact Flows will not work properly because they won’t be able to access the Queues, Lambdas, and Flows referenced in the code.
The timeline at the top will walk you through the Resolution Check.
Select the Contact Flow whose dependencies you want to resolve based on the saved mappings, and click the Run Resolution Check button.

The resolution check will look at the objects that need to be mapped, and report whether or not a mapping was found. If the mapping looks correct, select the checkbox and click Run Replace on Selected Match Results to apply these objects to the Contact Flow.
After the replacement runs, you will get a short report of things that were replaced.

Import Flows
To import Contact Flows that have been exported through the Connect Admin Application from another instance, click on the Import Flows tab and chose a file.

The timeline will guide you through the process of importing the flows and updating the object mappings.
Once the file is selected, click Import Flows for Sync to begin processing the Contact Flows.

Once the file is imported, it will display a list of Contact Flows found in the file and display the results of a Resolutions Check, which looks for mappings to local objects for the dependent objects in the Contact Flows.
To replace the object IDs with local identifiers, select the Contact Flow Name and click Run Replace of Selected Match Results.
If this step is not run successfully, then the Contact Flows will not work properly because they won’t be able to access the Queues, Lambdas, and Flows referenced in the code.

Once the object IDs have been replaced, the Contact Flow is ready to be imported. If the flow being imported already exists in the new environment, use the Update Flow If Exists toggle to update the contact flow with the imported version.
Click Import Selected Valid Flows to complete the import process.

After the replacement runs, you will get a short report containing the import status.
Config Set Sync
Importing and Exporting Config Sets are similar to importing and exporting Contact Flows.
Existing Sets
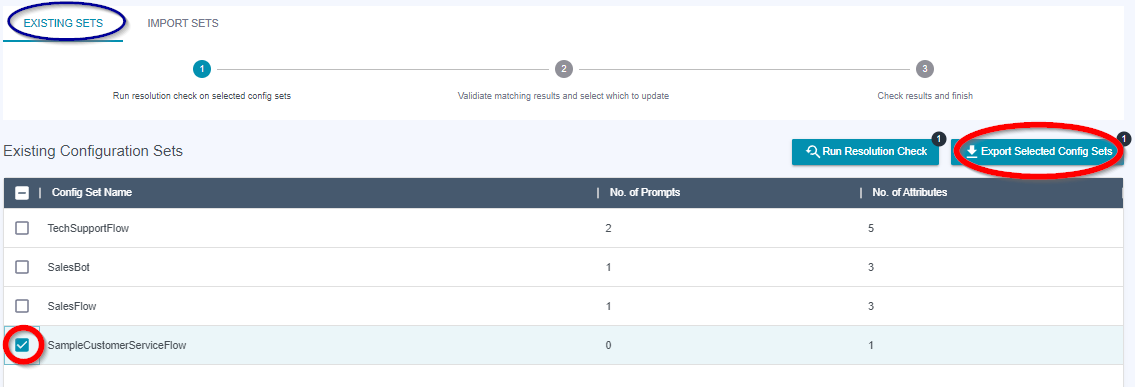
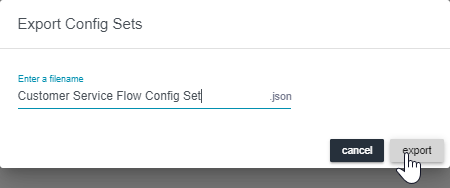
To Export an Existing Config Set, select from the list on the Existing Sets tab and click the Export Selected Config Sets button.
Enter the file name in the popup and click the Export button to save the file locally.
Import Sets
On the Import Sets tab, click the Choose File button to select a local file of exported Config Sets from another instance.
With a file selected the Import Config Sets for Sync button becomes active. Click that button to load the Config Sets in the file so that they can be imported.

Rename Config Set
Sometimes the name of the Config Set from one instance needs to be modified to be used in the new instance.

In order to change the name of the Config Set being imported, add the substring to be replaced in the String Subset box, and the new text in the Replace With box. Then press Update Selected Names to change the selected Config Set Name being imported.
Import
To continue with the next step in the timeline, click Run Resolution Check to get a list of Config Sets ready to Import.

Select the Config Sets that are READY FOR IMPORT and click Import Selected Valid Config Sets to complete the final import step.
The Results screen will display the status of the import.

