Calendar Management
The Calendar Management configuration pages are responsible for defining whether or not the office is open when the customer calls.
Holidays
The holidays section is used to administer scheduled closures for a predefined period of time, for example seasonal holiday closures, or half day closures for training.
There are two sections to the Holidays page: one section defines the Holidays and the other defines the prompts played when the office is closed due to the holiday.
The prompts must be defined first, so they can be used in the Holiday associations.
Create a Holiday
To create a new Holiday, click the New Holiday button.
This will pop up a new window to enter the information about the holiday.
Start with the Holiday Name, which needs to be unique.
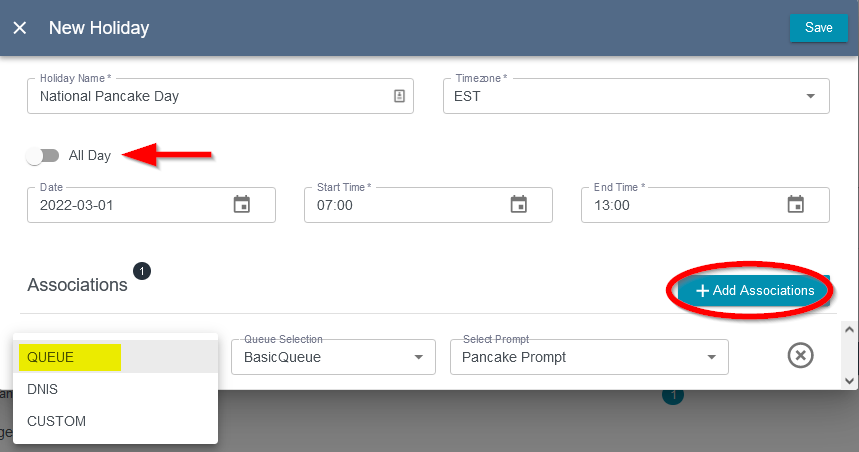
Holidays can be all day, or between a specified time period using 24 hour notation. When specifying a time period, a timezone should be selected. It is recommended to use “Europe/London” as the timezone to account for Daylight Savings.
To make a holiday span all day or change to a set time, use the All Day toggle.
Multi-Day Holidays
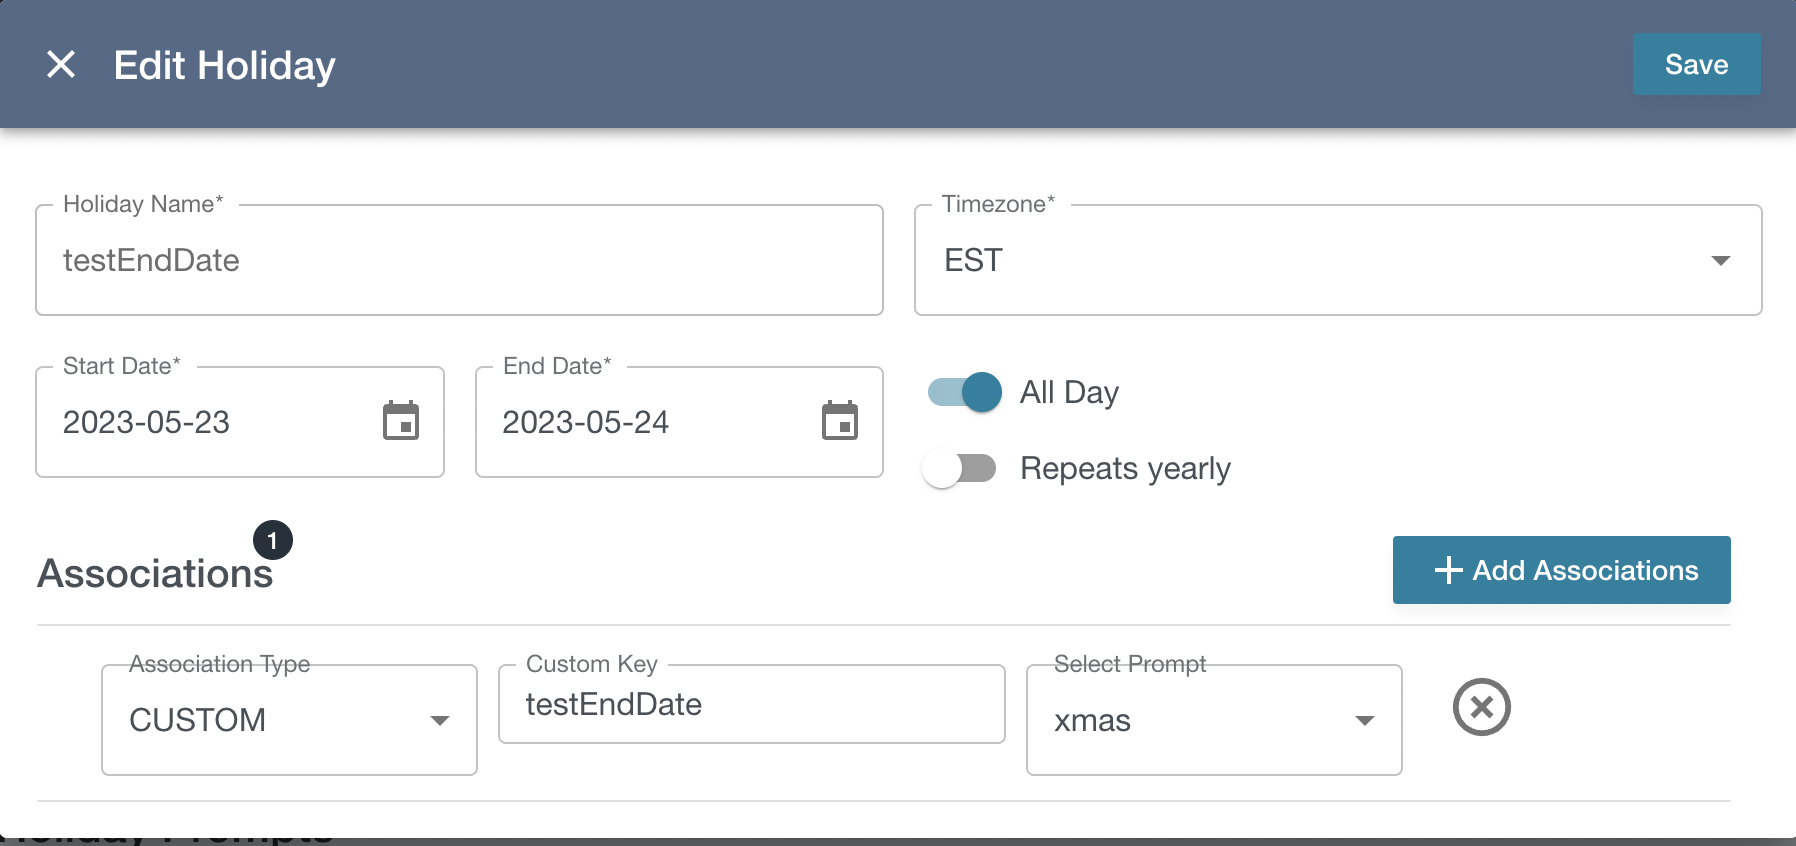
As of version 7.3.1, you can set holidays to span multiple days. This only applies when the All Day toggle is enabled.
Annual Holidays
You can also allow holidays to repeat yearly. Yearly holidays will repeat on the same month and day each year. New year’s day is a great example. You could set a holiday for 01/01/2022 and it would repeat every year on January 1st regardless of the year. You could also use both features and set a holiday from 12/30/2021 through 01/01/2022.
Holiday Associations
When a new Holiday is created, click Add Associations to configure what will drive the holiday check. The holiday can be associated with as many object as needed, and can be associated to a Queue, a DNIS or a custom value that will be added as an attribute to a Contact Flow.
If QUEUE is selected, the Queue Selection box will be populated with Queues that exist on the Connect instance.
If DNIS is selected, the Number Selection box becomes populated with AWS phone numbers that were claimed by the Connect instance.
To use the CUSTOM Association Type, populate the Custom Key field with the identifying information.
Once the Association Type is selected, use the Select Prompt drop-down to chose the prompt that will be played to the caller. The list of prompts available are those that have already been created in the Holiday Prompt section below.
Add the associations and click Save.
Holiday Prompts
Prompts are required when making a Holiday association.
To create a prompt, click New Prompt, add a unique Prompt Name and click Save.

The prompt will be saved, but it will need some text.
To add text, click New Language.

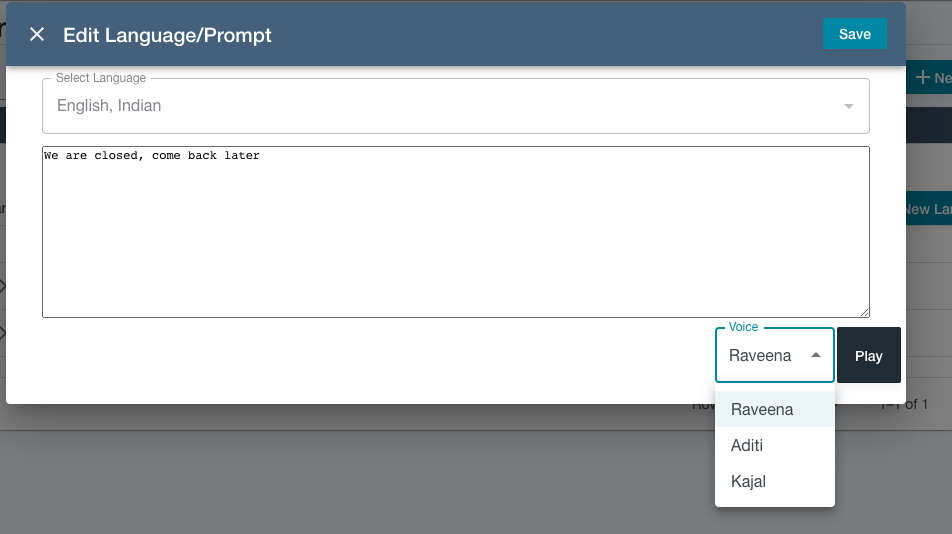
In the New Language / Prompt window, select the language of the prompt and add the prompt text. Then click Save to add it to the prompt.
Add translations in other languages by clicking New Language again.
Hours of Operation
Hours of operations determine the opening hours for different queues. Unlike closures and holidays, Hours of Operation do not have their own prompts section, but the message played is configurable with the appropriate prompt in the contact flows section.
To create new Hours of Operation, click the New Hours button and give the hours a unique Name.
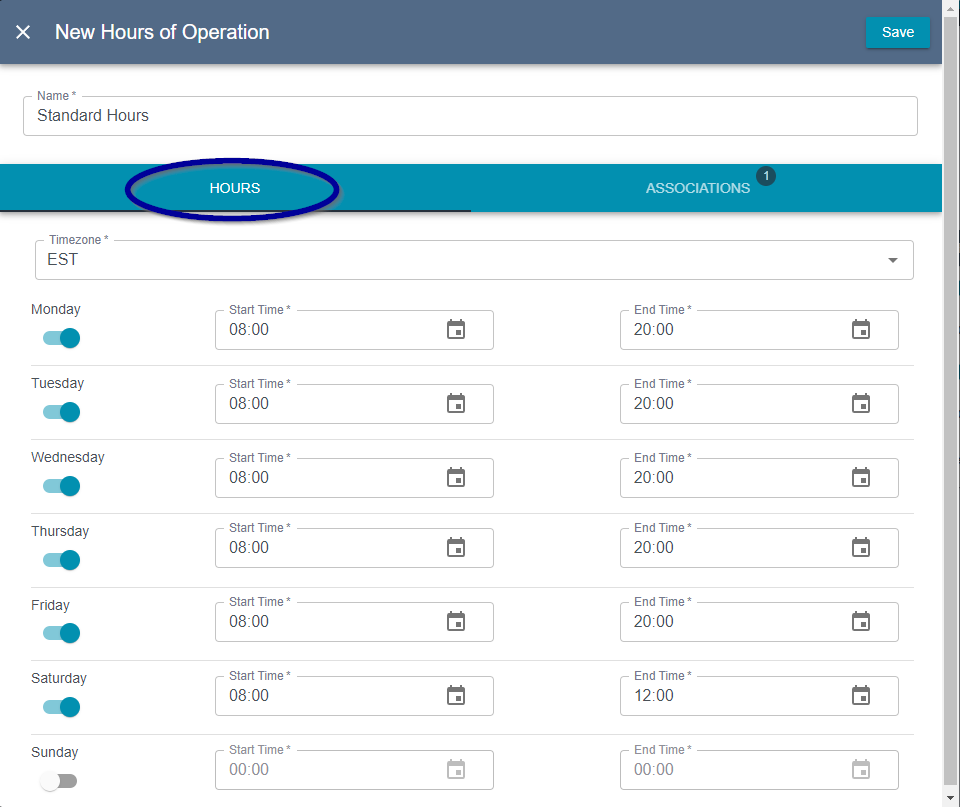
Open hours can be specified for each day by enabling the day and specifying the open/close time. It is recommended to use “Europe/London” as the timezone to account for Daylight Savings.
Hours Associations
To apply the Hours of Operation to a Contact Flow, an Association should be defined. Just as described in Holiday Associations, Hours Of Operation can be associated to a Queue, a DNIS or a custom value that will be added as an attribute to a Contact Flow. For Hours of Operation, an Association Type can only be assigned to one Hours definition. In the example below, the existing Queues have already been assigned to an Hours of Operation.
To add an association, click on the Associations tab and then click the button Add Association.
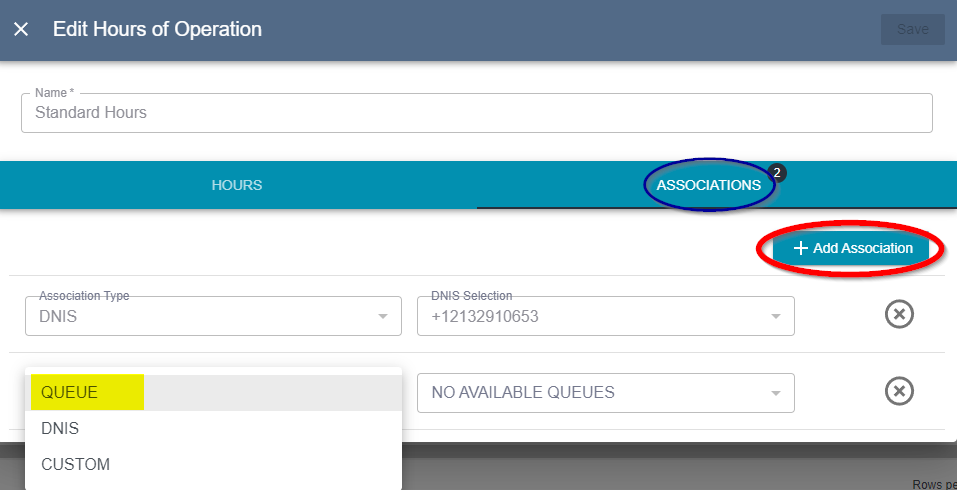
If QUEUE is selected, the Queue Selection box will be populated with Queues that exist on the Connect instance that haven’t yet been associated with Hours of Operation. If all of the queues have already been associated to an Hours of Operation definition, you’ll see the message NO AVAILABLE QUEUES.
If DNIS is selected, the Number Selection box becomes populated with AWS phone numbers that were claimed by the Connect instance but have not yet been associated with an Hours of Operation definition.
To use the CUSTOM Association Type, populate the Custom Key field with the identifying information.
Add the associations and click Save.
Closures
The closures option allows for the creation and administration of emergency or ad-hoc closures.
To create a new Closure, click the New Closure button, and give the closure a unique Name.

Enabling a closure will result in all new callers hearing the specified prompt and they will then be disconnected. Closures can be enabled and disabled by toggling the “Enabled” checkbox for the closure.
Callers will continue to be disconnected until the closure is disabled again.
Closure Associations
When a new Closure is created, click Add Associations to configure how Connect will identify what is closed. Just as described in Holiday Associations, Closures can be associated to a Queue, a DNIS or a custom value that will be added as an attribute to a Contact Flow.
If QUEUE is selected, the Queue Selection box will be populated with Queues that exist on the Connect instance.
If DNIS is selected, the Number Selection box becomes populated with AWS phone numbers that were claimed by the Connect instance.
To use the CUSTOM Association Type, populate the Custom Key field with the identifying information.
Once the Association Type is selected, use the Select Prompt drop-down to chose the prompt that will be played to the caller. The list of prompts available are those that have already been created in the Closure Prompts section below.
Add the associations and click Save.
Closure Prompts
To create a prompt, click New Prompt, add a unique Prompt Name and click Save.

The prompt will be saved, but it will need some text.
To add text, click New Language.
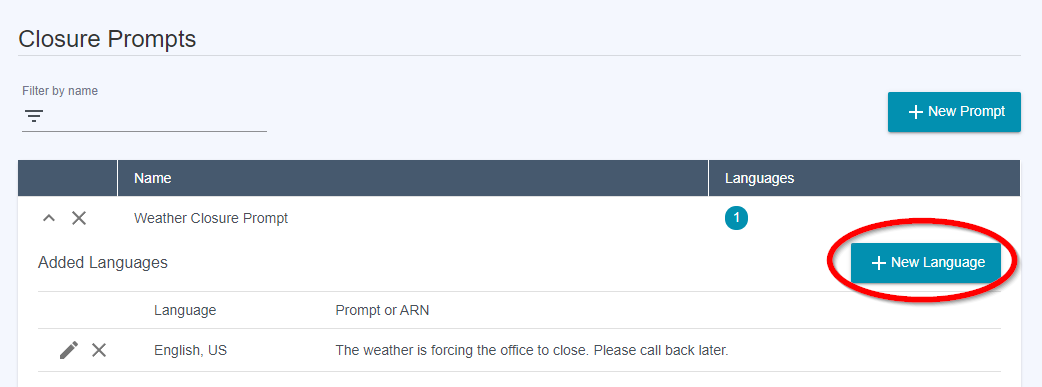
In the New Language / Prompt window, select the language of the prompt and add the prompt text. Then click Save to add it to the prompt.
Add translations in other languages by clicking New Language again.
Previewing a Prompt
When editing a prompt you can play back the SSML using polly. In the lower left corner of the Edit Language/Prompt window you can chose between the available voices for your selected language.
