No matter what type of menu, single DTMF, multi DTMF or Lex, they will all have the same basic configurations.
Step 1 Initiate Menu Creation
Start by clicking on the “Create New Menu” button at the top right of the Menu Management Dashboard.

Step 2 Creating the Menu
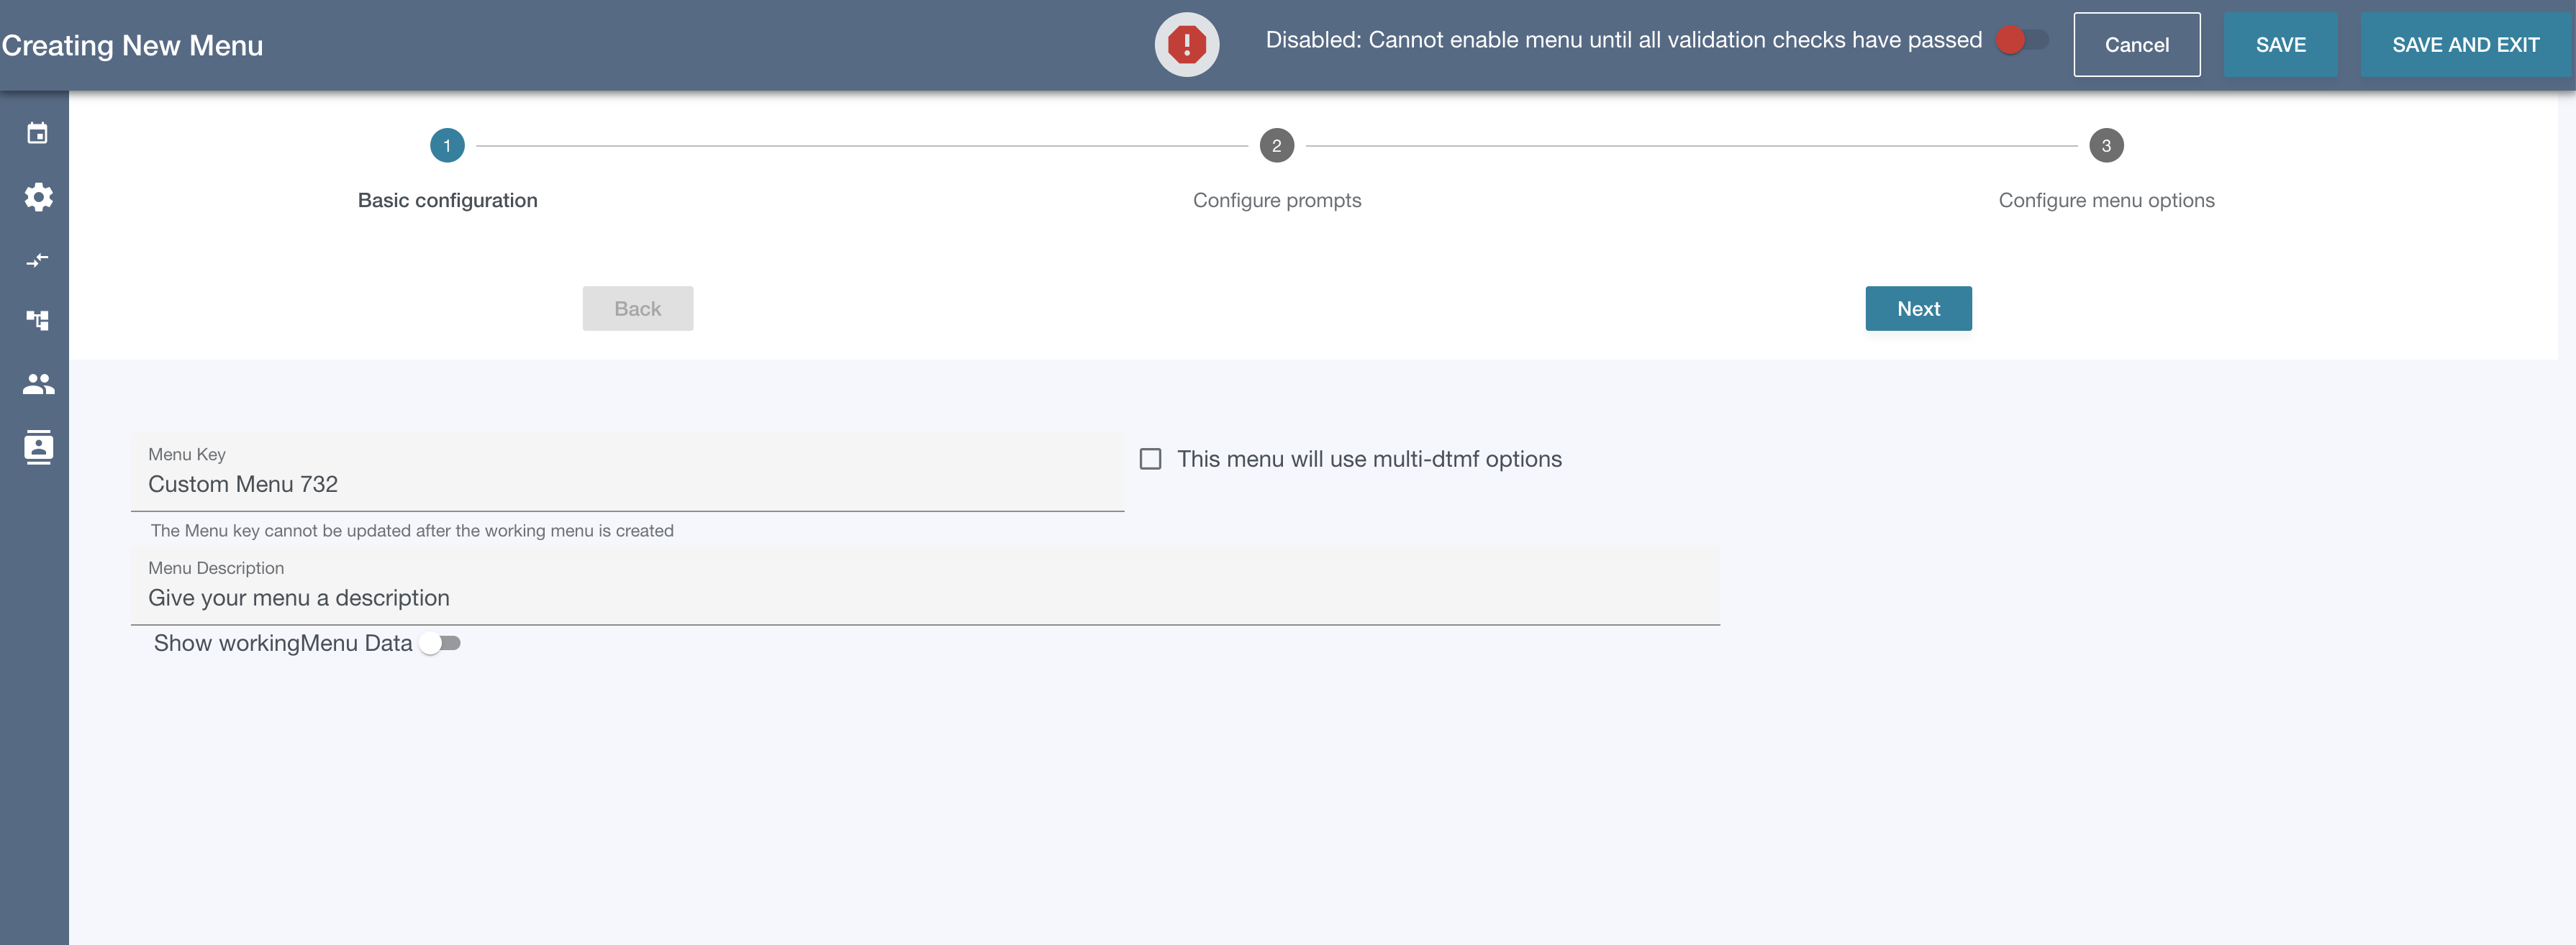
You will be presented with a stepper with 3 steps (5 for Lex) for creating the Flow Engine Menu. You will see a warning icon in the top navbar indicating your menu does not pass all validation checks. You can hover the icon to see which validation checks specifically are not passing. After you progress through the create menu stepper and fill out the required fields, the validation errors will disappear and you will be able to toggle the “enable menu” switch at the top.
2.1 Basic Configuration
Your new menu will auto-generate a random menu key. Delete this key and give your menu a more descriptive name. Add a description for your menu. The description will show in the dashboard of menu management.
Click “Next” and you will be taken to the Configure prompts step.
2.2 Configure Prompts
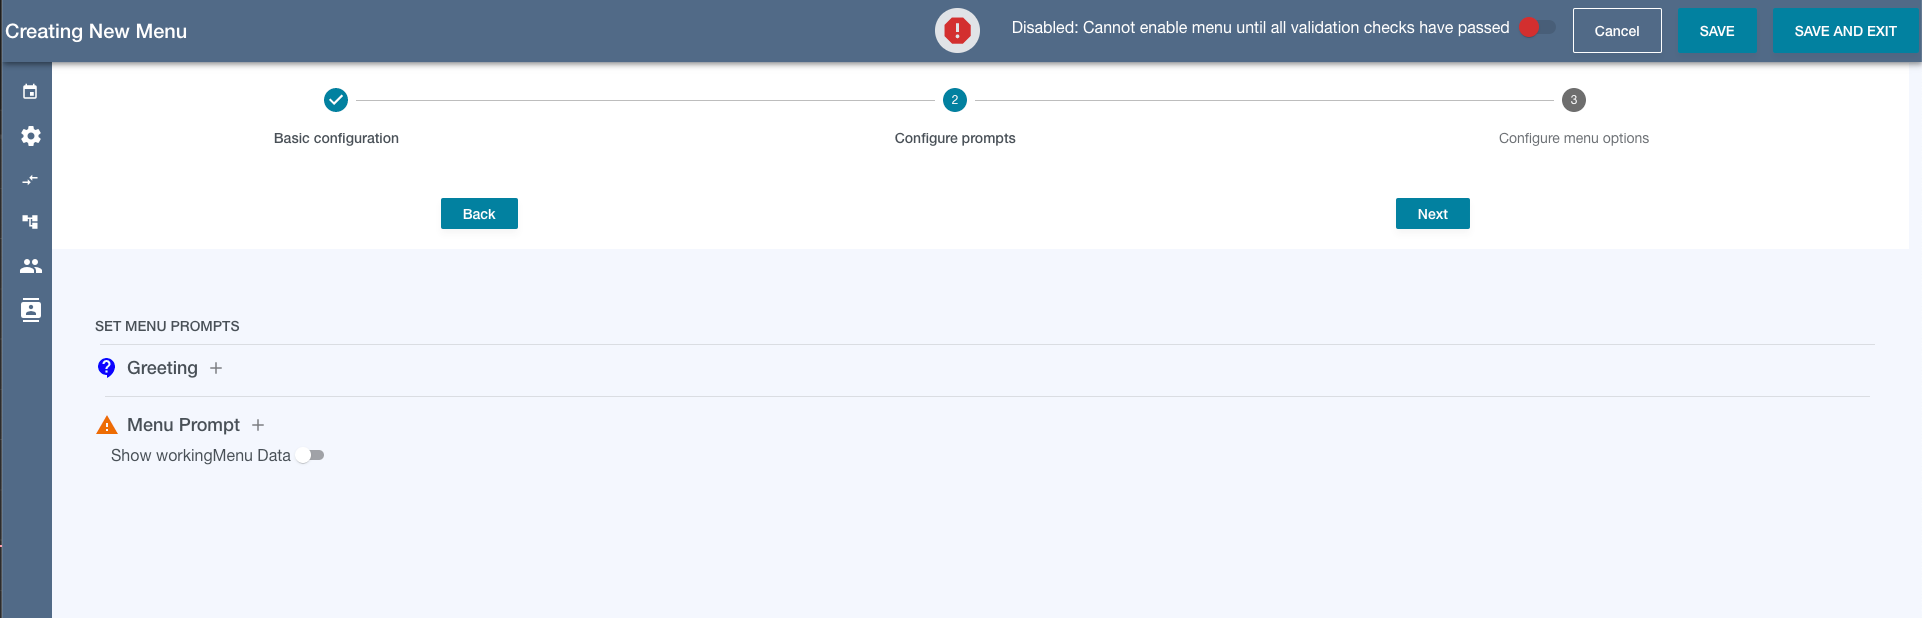
Menu prompts are created using the Polly Playback Prompt Dialog
Set an optional Greeting message:
The Greeting will be played before the menu prompt. If your menu is at the top of the phone tree, this might be a good place for things like call recording notifications, “thank you for calling” messages , etc. The Greeting will be played once as is non-interruptible.
Set a Menu Prompt:
The wording of the menu prompt should correspond to your options in the next step, Configure menu options.