Contact Entry Points
Contact Entry Points are a quick and easy way of associating call logic to your phone numbers in Amazon Connect.
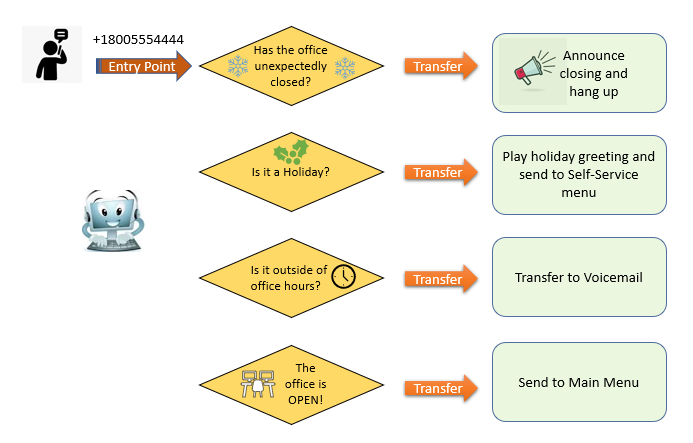
This feature allows for a one common contact flow to be configured differently based on the DNIS, and to be managed from within the OMP.
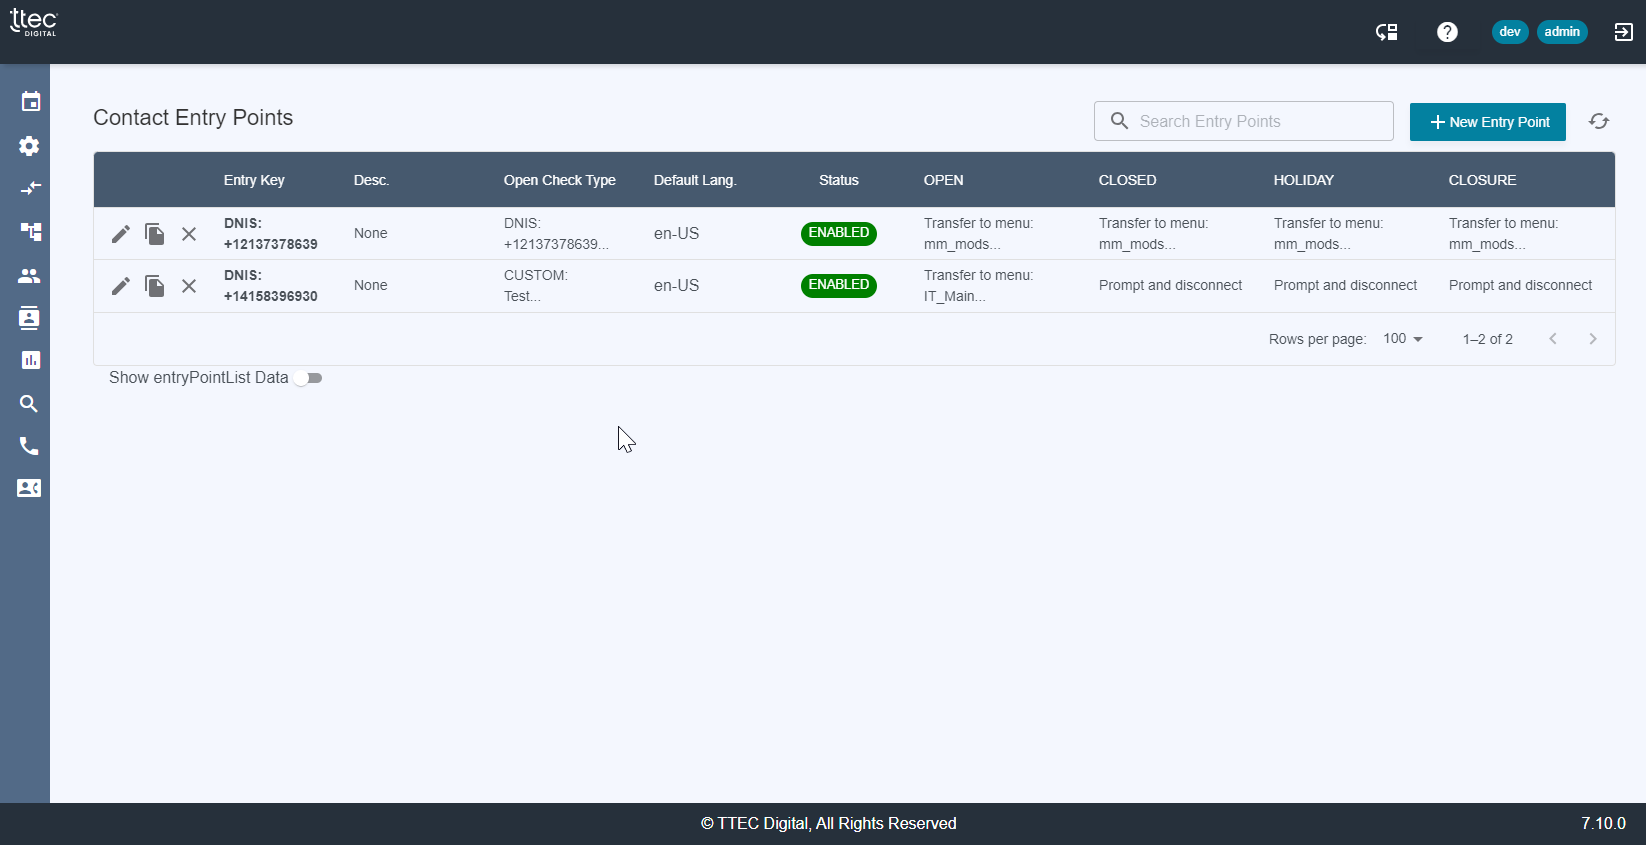
Create New Entry Point
To create a new Entry Point, click the New Entry Point button, and a screen will pop up to allow you to create definitions for a new phone number.
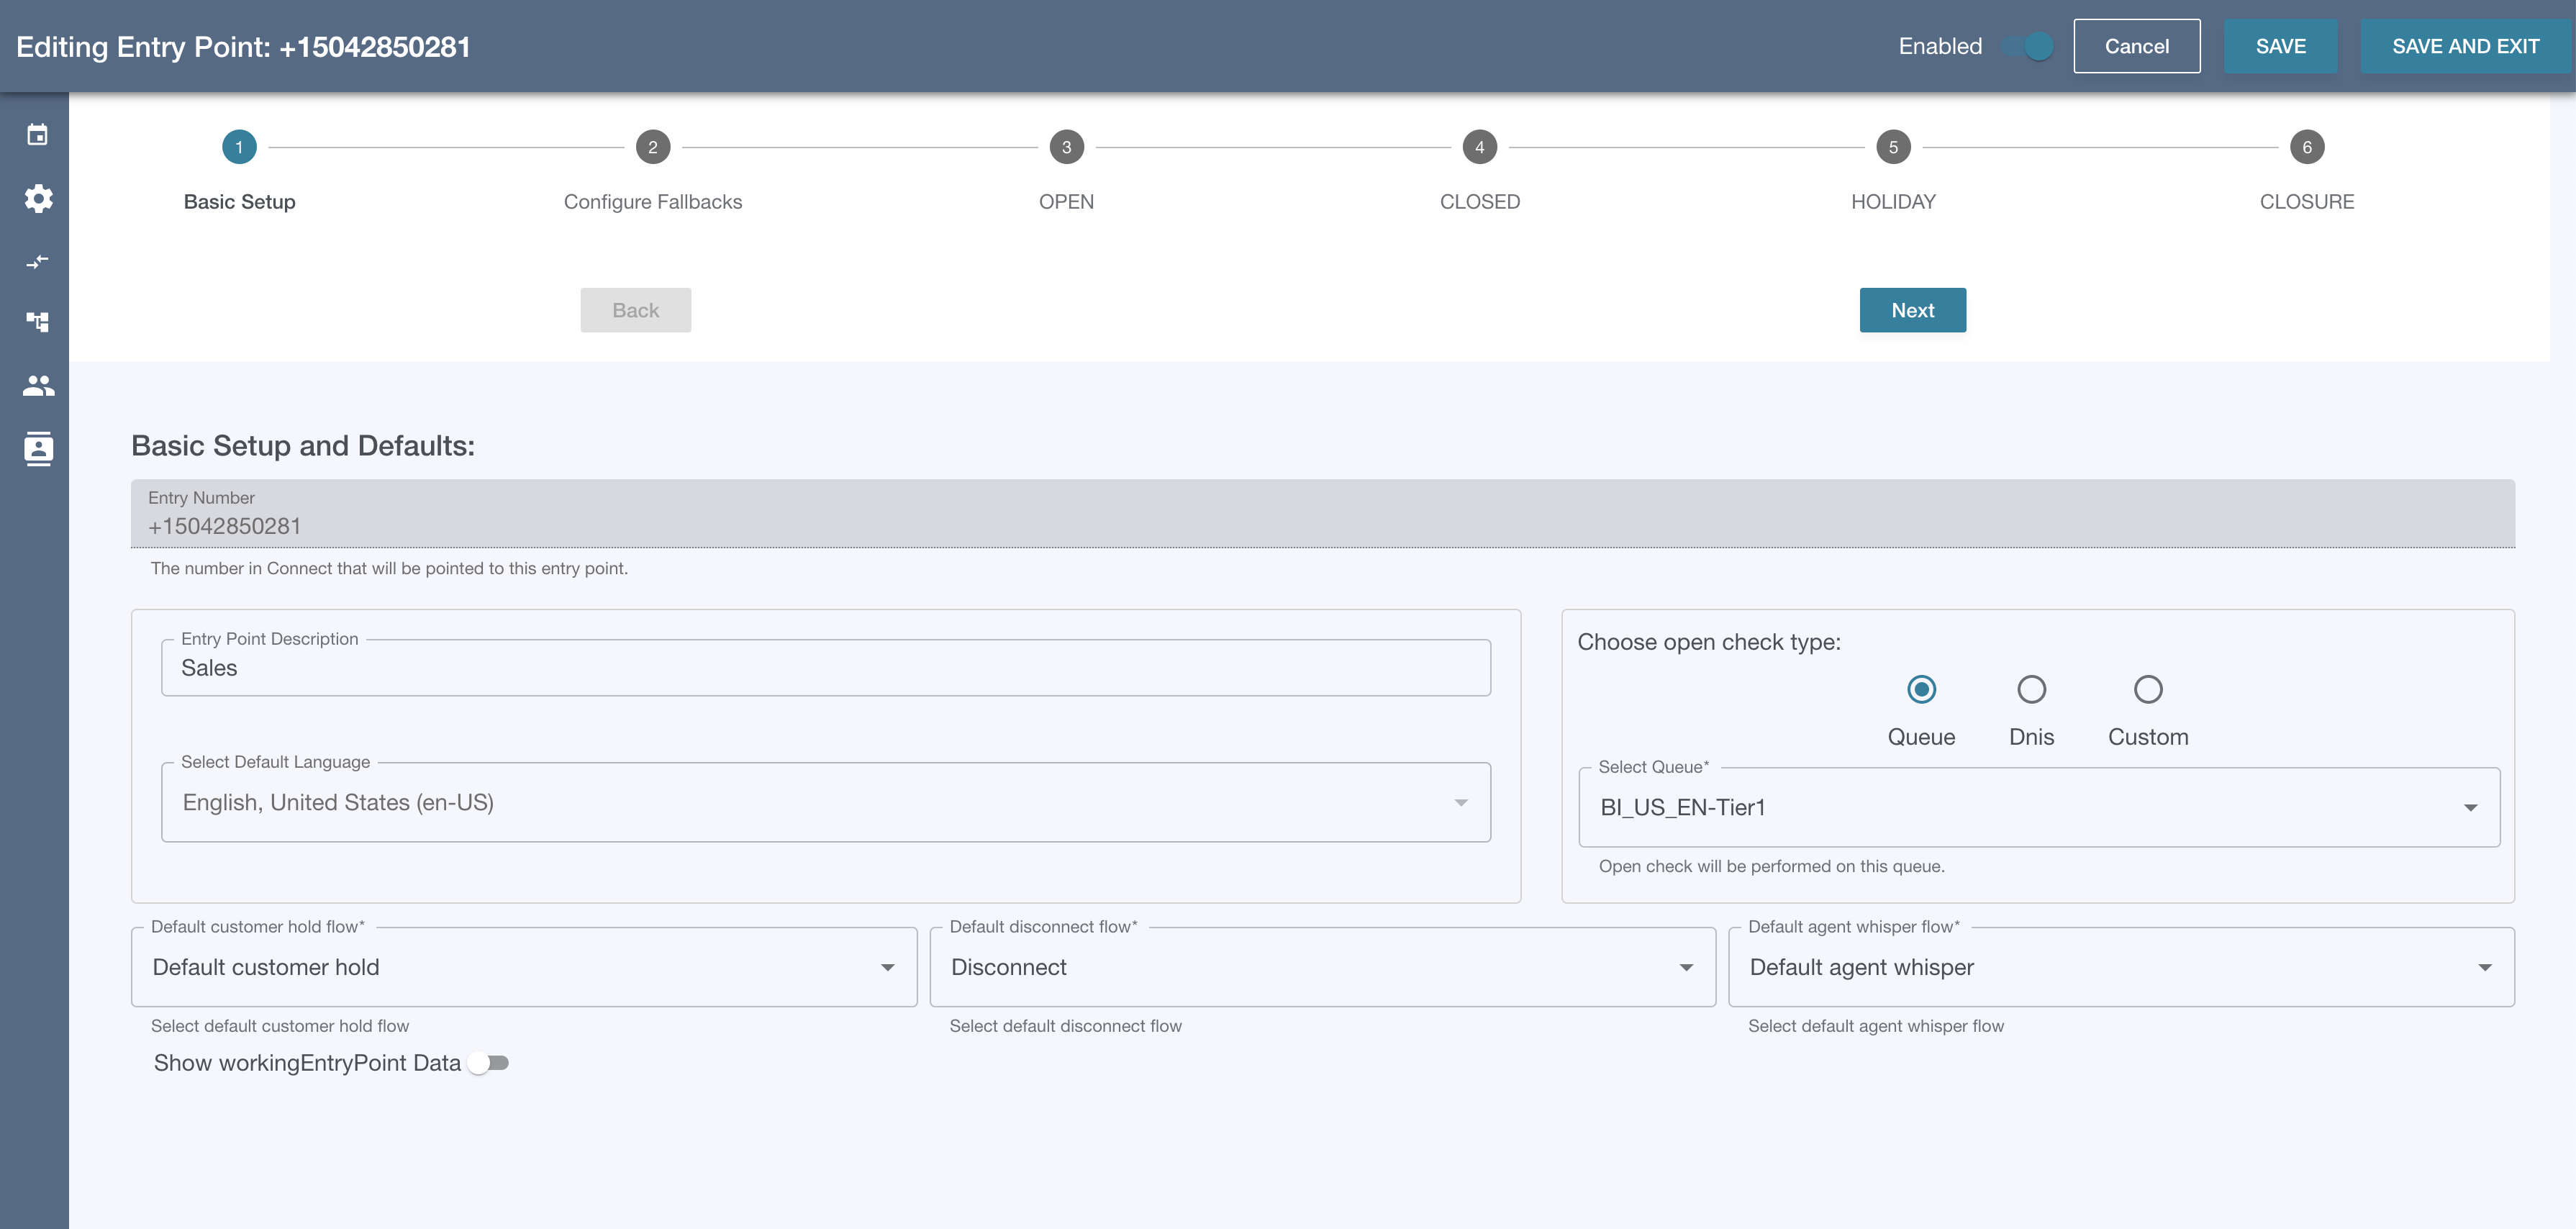
Available phone numbers will be automatically listed in the drop-down.
Select the phone number to configure the Entry Point. Add a description to help identify the function of the call flow, and add an identifier for the Customer Journey which is a logging identifier that will track the path of the call.
Open Check
The next section describes what will be checked to determine if the Contact Center is open, closed or on holiday.
You can define hours checks based on Queue Name, DNIS or a Custom label created when the Holiday / Closure / Open Hours were created.
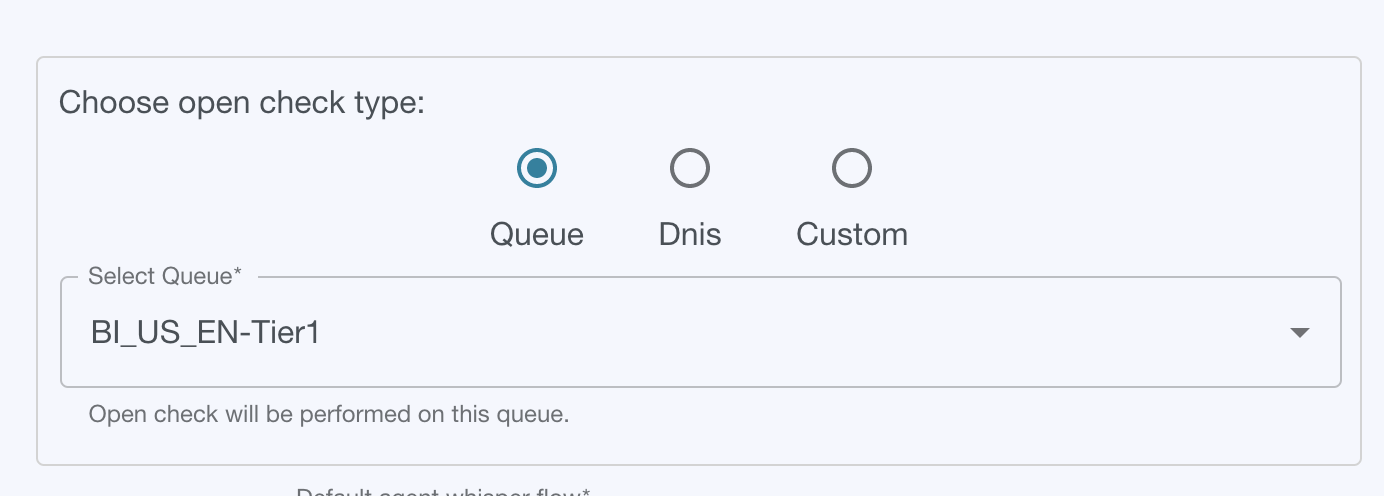
The value selected here should match the associations made when the Holiday / Closure / Open Hours were created.
When using a Custom identifier, the unique label is created when making the Hours associations, as shown in the screenshot below.

All Custom labels created will be available in the drop-down when configuring the Entry Points.
Contact Flow Defaults
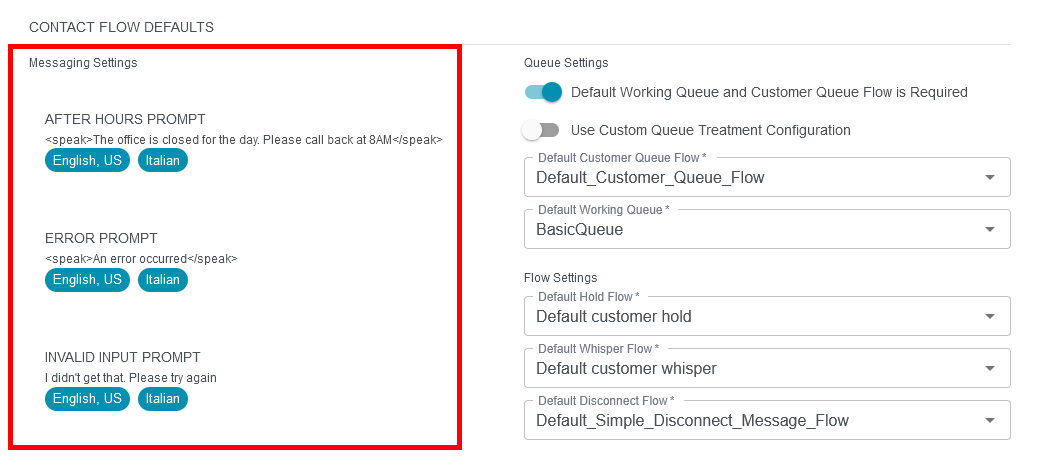
Messaging Settings
The Message Settings section defines the prompts that will be played for the labelled action.
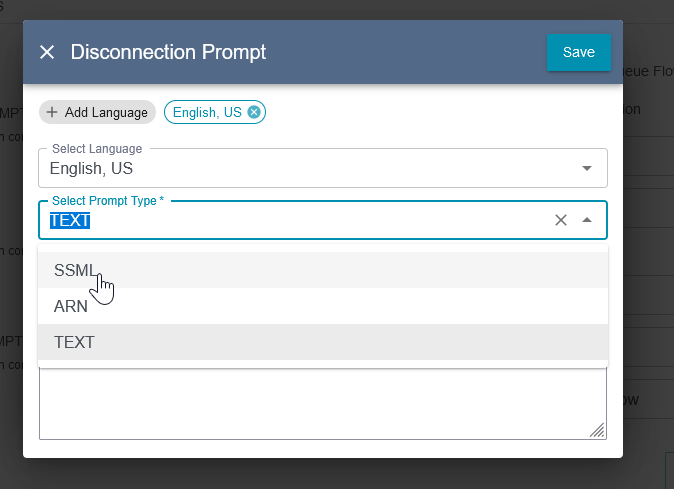
The message can be defined as plain text, SSML or using the ARN for a prompt created in the Connect instance, and multiple languages can be defined for any prompt.
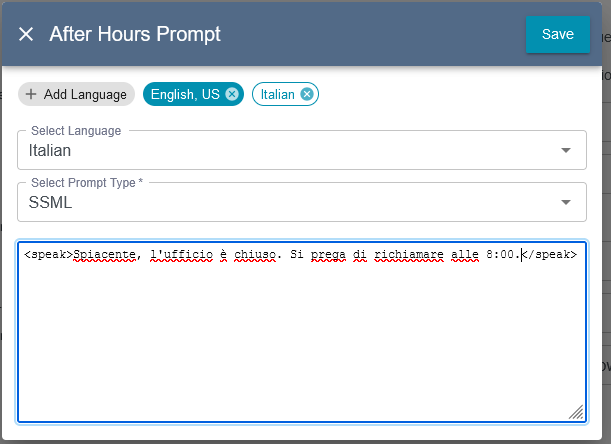
To add new text to a prompt, click the “Add Language” button, which will then require that you select the Language. The next box lets you select from the three types of prompts that can be played.
SSML- will allow you to use markup tags to enhance the automated speech of the prompts being played. SSML text expects the prompt text to be surrounded by <speak> </speak> tags, as shown in the example below. Other values that control the vocal output can be found in the SSML Reference page:https://docs.aws.amazon.com/polly/latest/dg/supportedtags.html
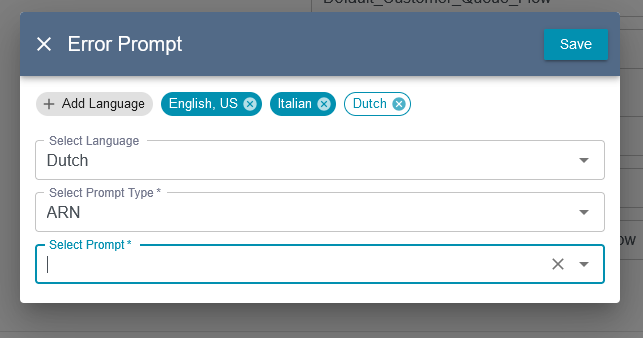
ARN - If ARN is selected, the Prompt dropdown will be populated with available Prompts already defined in Connect.
TEXT - If TEXT is selected, the prompt will be played exactly as it’s defined in the textbox.
Queue Settings
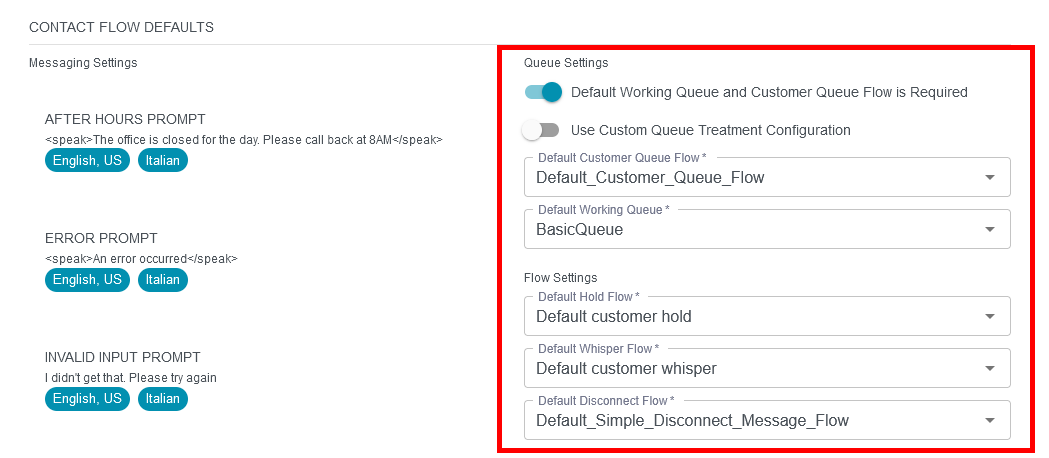
The Queue Settings portion of the Contact Flow Defaults section defines the defaults used in the Contact Flows.
Toggling On the “Default Working Queue and Customer Queue Flow is Required” indicates that the entry flow will use the queue and customer queue flow specified in the defaults.
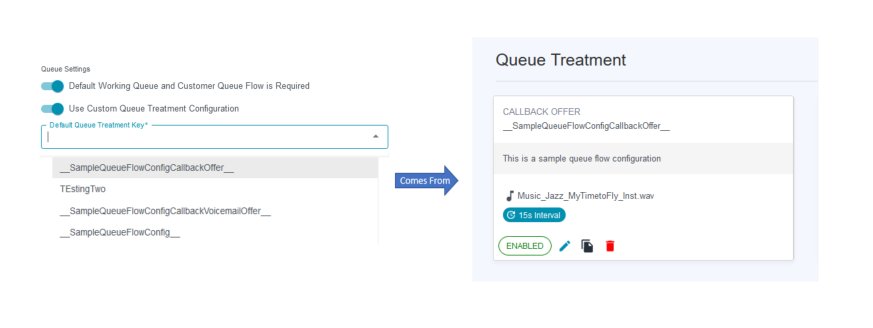
If “Use Custom Queue Treatment Configuration” is toggled on, the Default Customer Queue Flow becomes a Default Queue Treatment Key, which is populated with items created in the Queue Treatment menu option.
The Flow Settings allow defaults to be specified for the Hold, Whisper and Disconnect Flows used in the Entry Flow. The options in the dropdowns will be those already created in the Connect instance.
Entry Point Behavior
This section defines what happens next in the Contact Flow once the Contact Center’s status has been checked.
Each status (Open, Closed, Holiday, and Closure) can be configured separately, or statuses with the same action can be grouped together.

The options for actions to be taken are shown below.
For each option, there is a place to define the Customer Journey, which is a logging point to track the path of the call. The value chosen for the Customer Journey should describe the path taken so that the decisions can be understood from the logs.
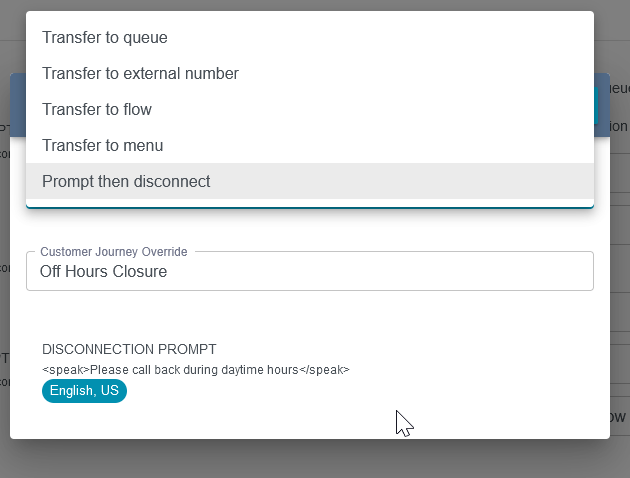
If flows or queues are chosen, there will be a dropdown of existing queues and flows.
If “Prompt then disconnect” is chosen, then the prompt is defined the same as the prompts from the Messaging Settings:
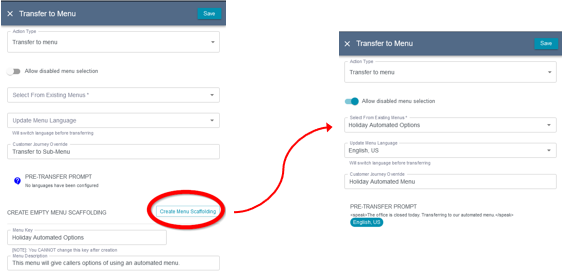
I you select the “Transfer To Menu” option, you will transfer the call to a pre-configured menu. The options listed in Select From Existing Menus are ones that have already been created through the Menu Management page.
If the menu you need hasn’t been created yet, you can create a skeleton menu that can be filled in later. Add the name and description and click the Create Menu Scaffolding button to create the Menu and have it appear in the Select list.
