Salesforce Console
Signing in and out
Sign in
Go to the URL of your company Salesforce account. To obtain the URL please ask your administrator.
Sign in to Salesforce.

Once you have signed into Salesforce, a new tab will load on your browser asking to sign in to your Single Sign-On (SSO) provider. After you sign in, the tab will close automatically and another tab will momentarily open and sign you in to Amazon Connect.
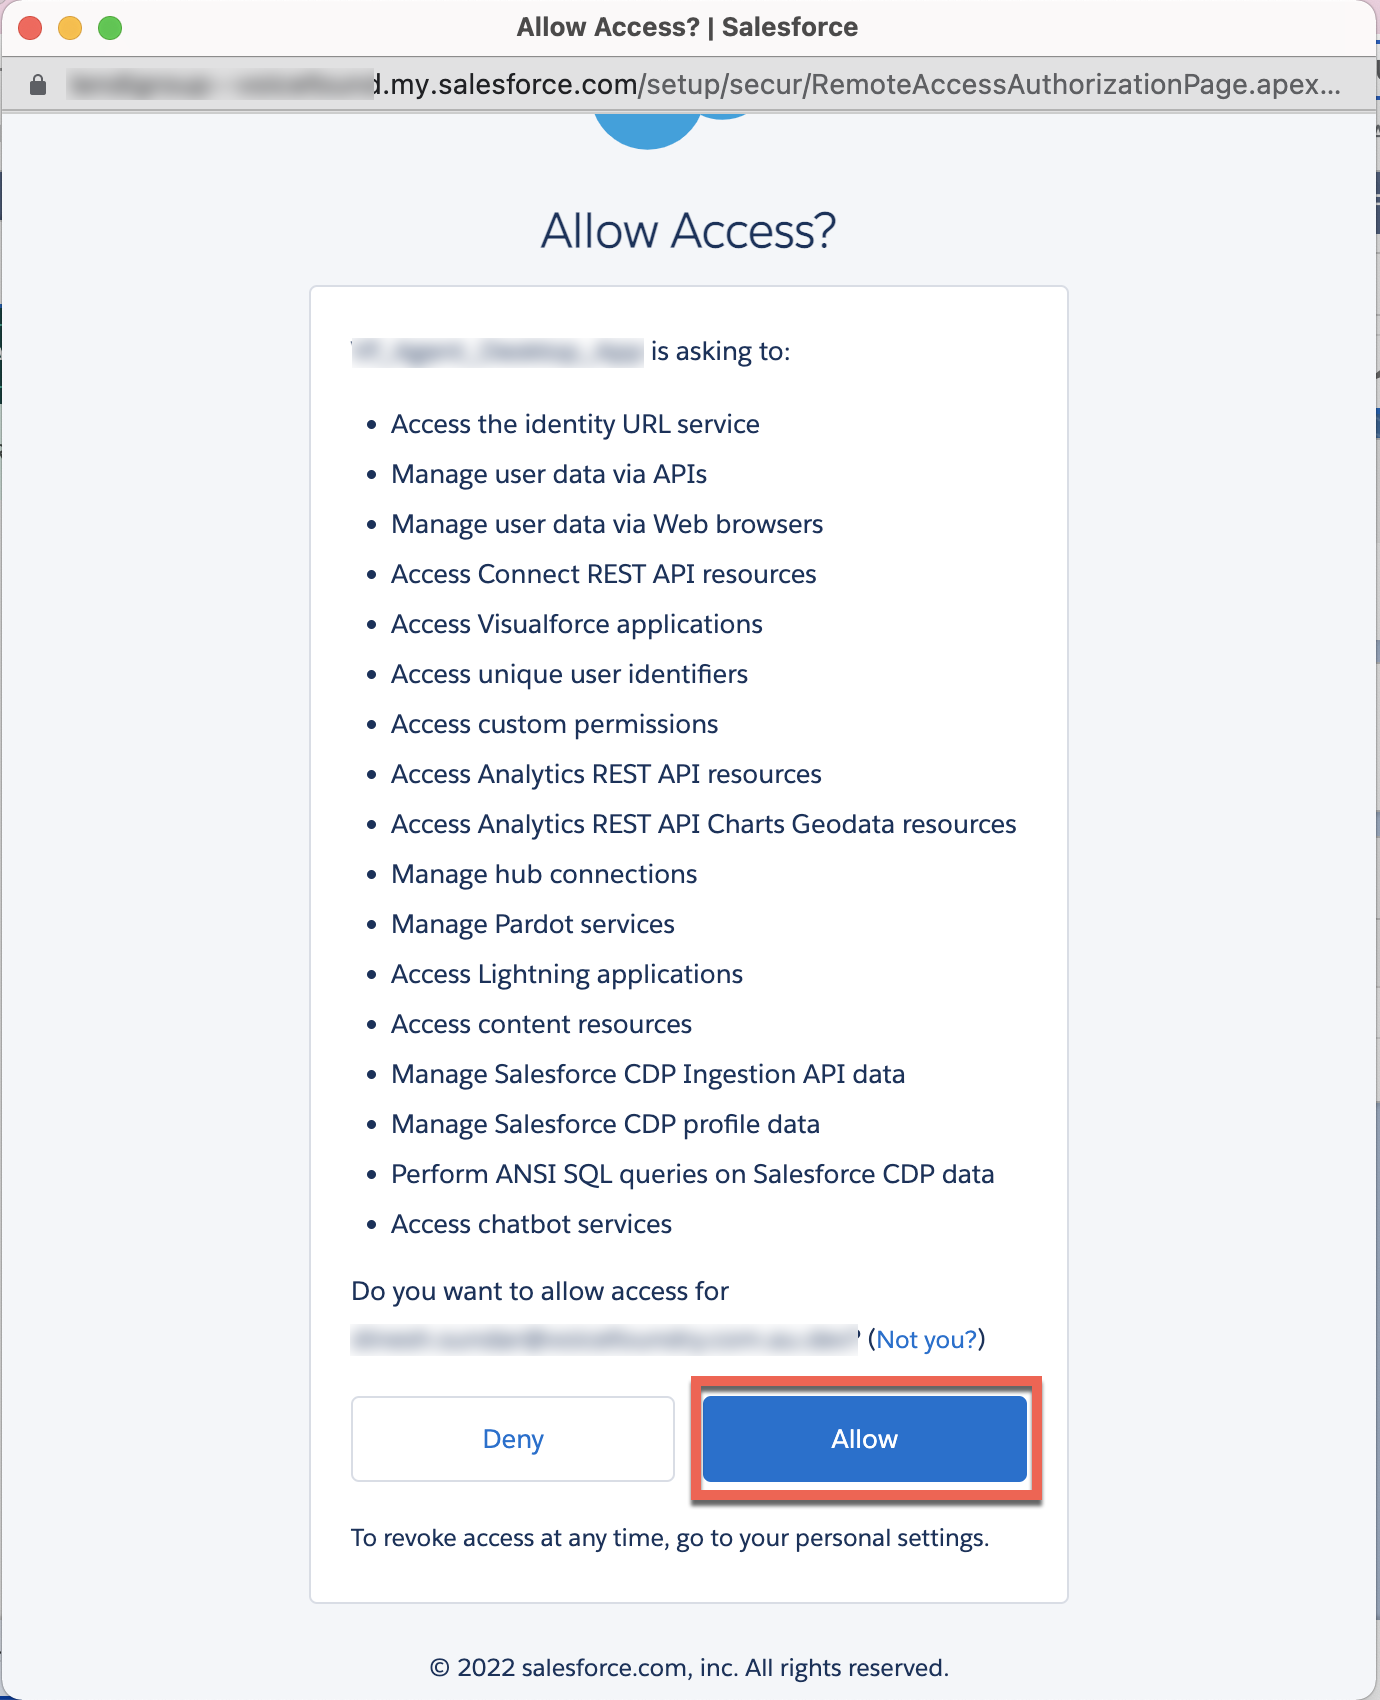
You will also be required to allow access to the Salesforce Console application. Scroll down and click on Allow.
Allow pop-ups and use of microphone
When you sign into the Salesforce Console for the first time, make sure you allow pop-ups and enable the use of your microphone on your browser, otherwise the Salesforce Console will not function correctly.
Allow pop-ups
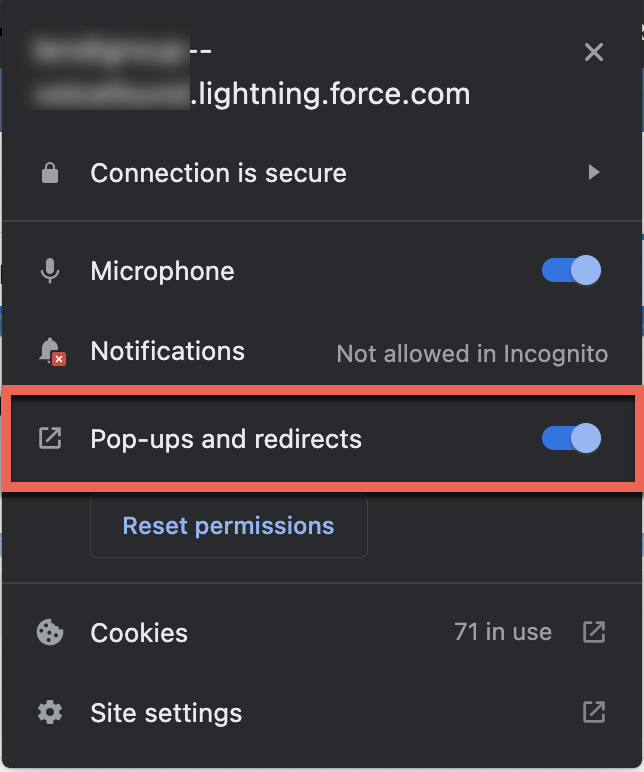
If not already set, allow for pop-ups and redirects on your browser.
Allow use of your microphone
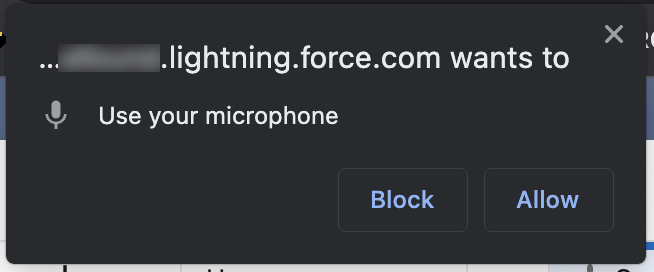
Click on Allow within the popup on the left hand side of the address bar.
Opening the Salesforce Console
To open the Salesforce Console, click on the application within the bottom bar of the Salesforce screen.
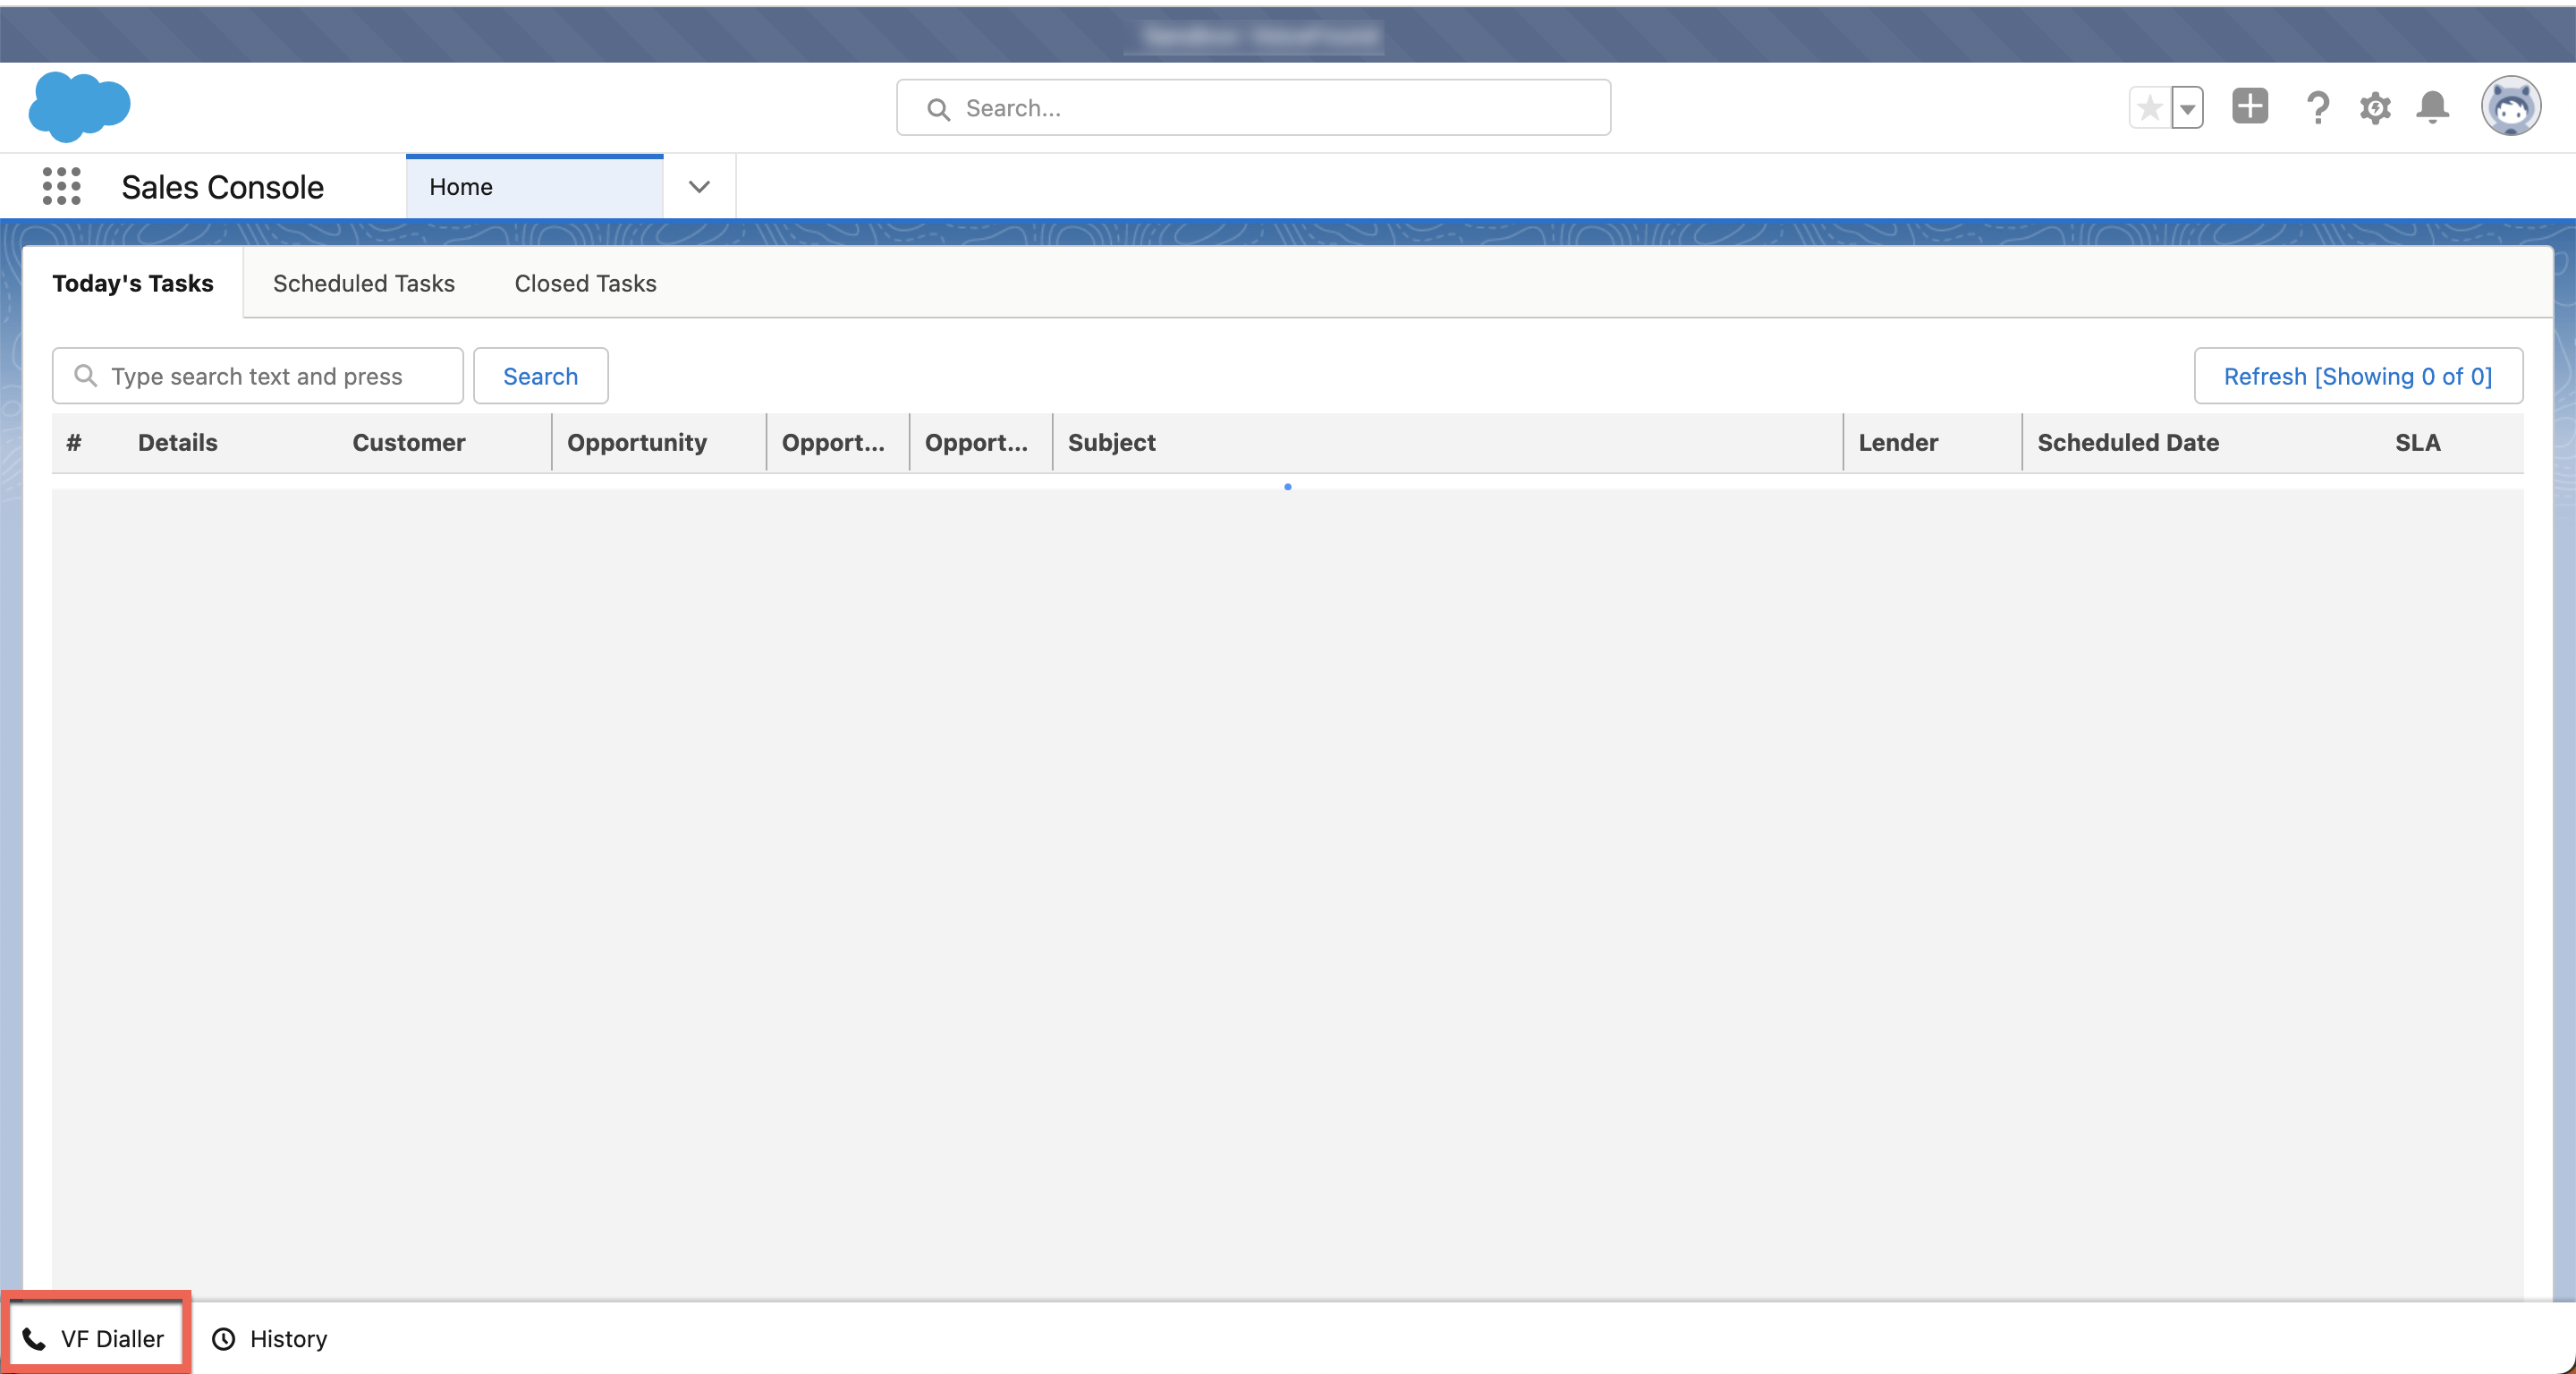
Note: They name of the application VF Dialler may be different in your environment. To check, speak to your administrator.
Sign out
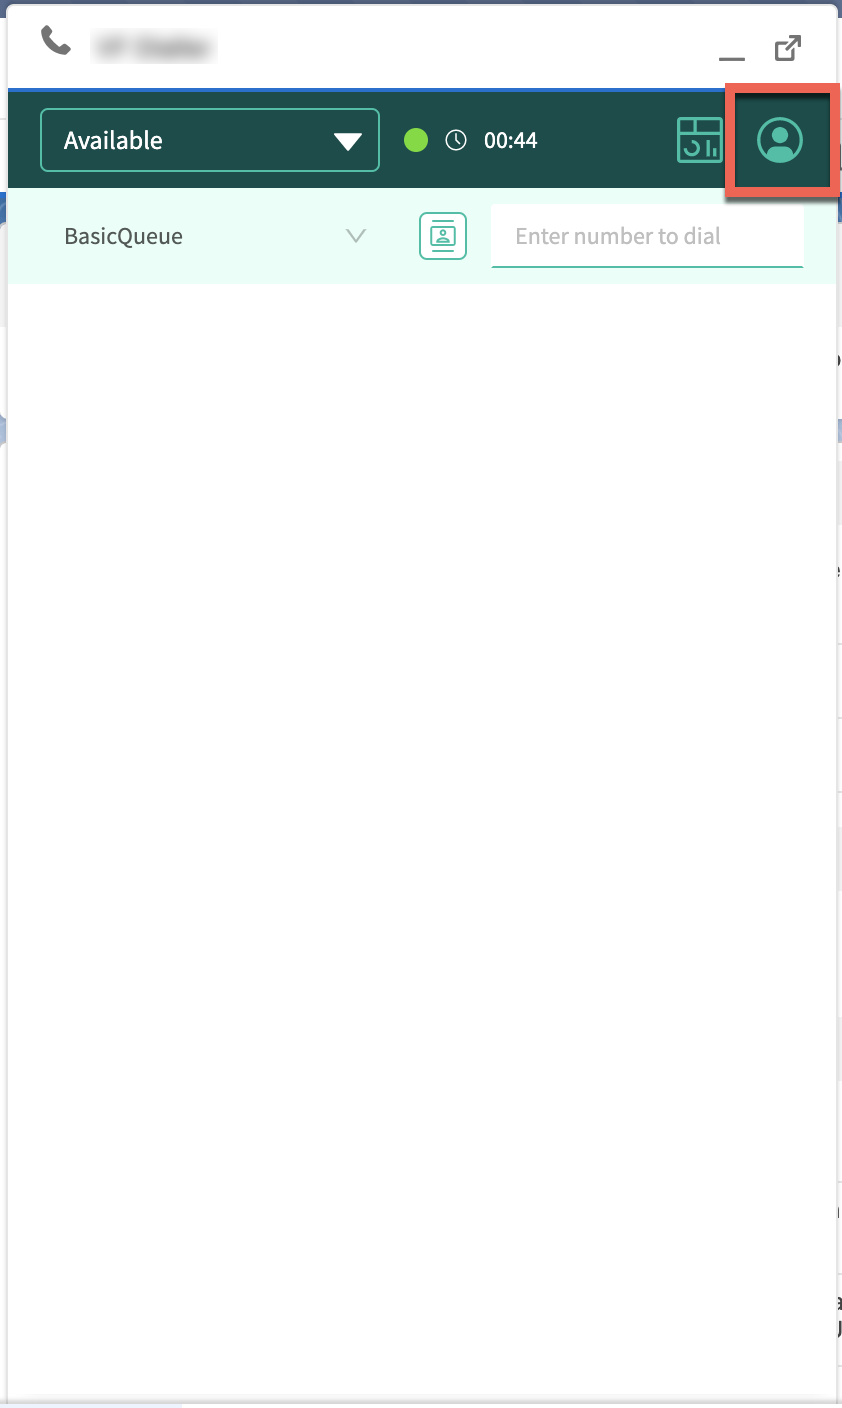
Click on the account icon.
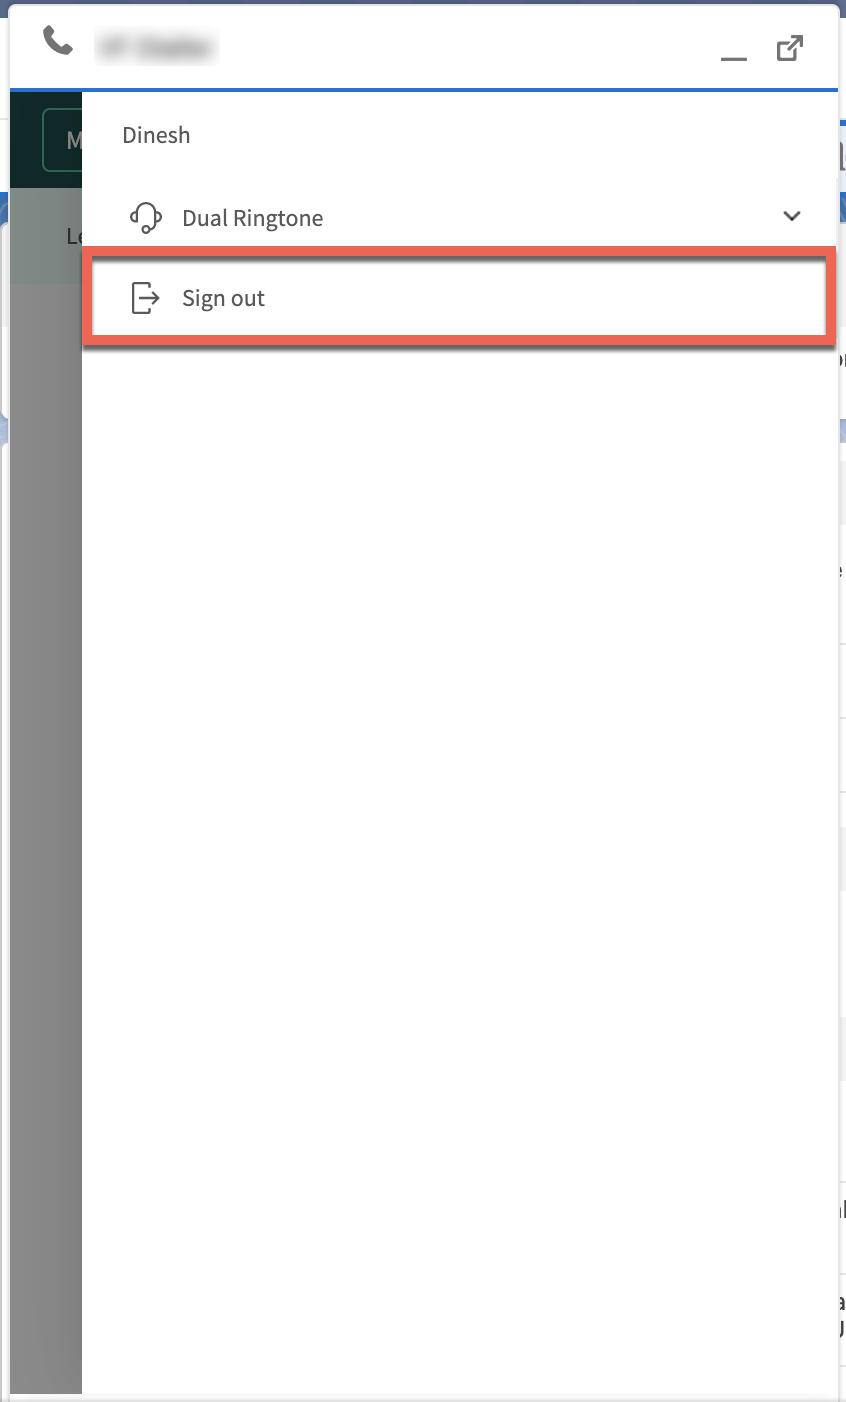
Click on sign out.
Change your status
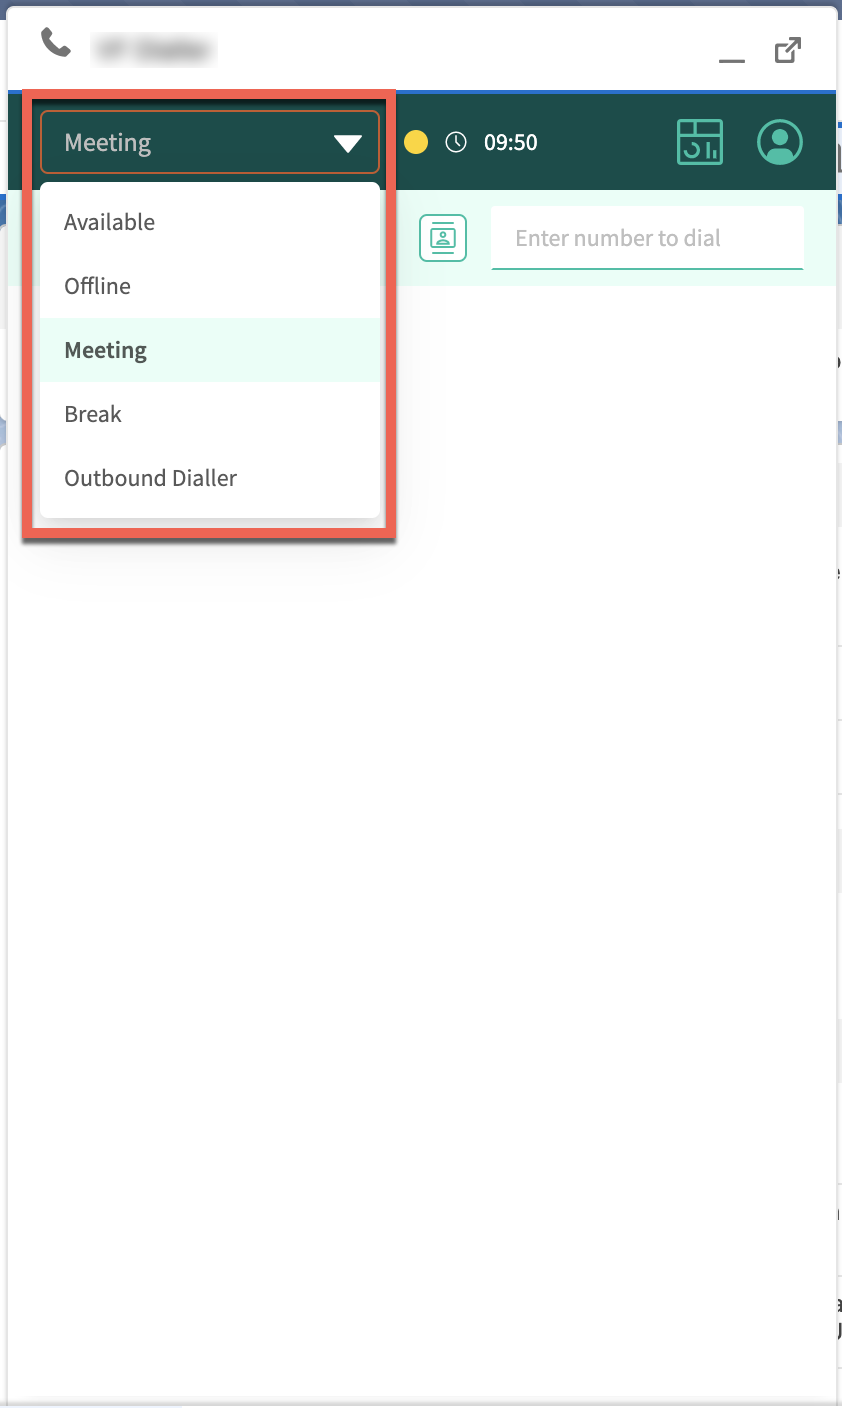
To change your status, click on the status dropdown, and select your desired status.
Agent statuses
To following types of statuses can be selected.
Available | Agent is ready to start receiving interactions. |
Break status | Agent will not receive any interactions during this time. Agent can only set themselves to a break status when they are not on a live voice interaction. |
Offline | Agent will not receive any interactions during this time. Agent can only set themselves to the offline status when they are not on a live voice interaction. |
Accepting an incoming interaction
An agent can accept an incoming interaction by clicking on the check icon within the notification. If you reject the incoming interaction, it will be routed to the next available agent.
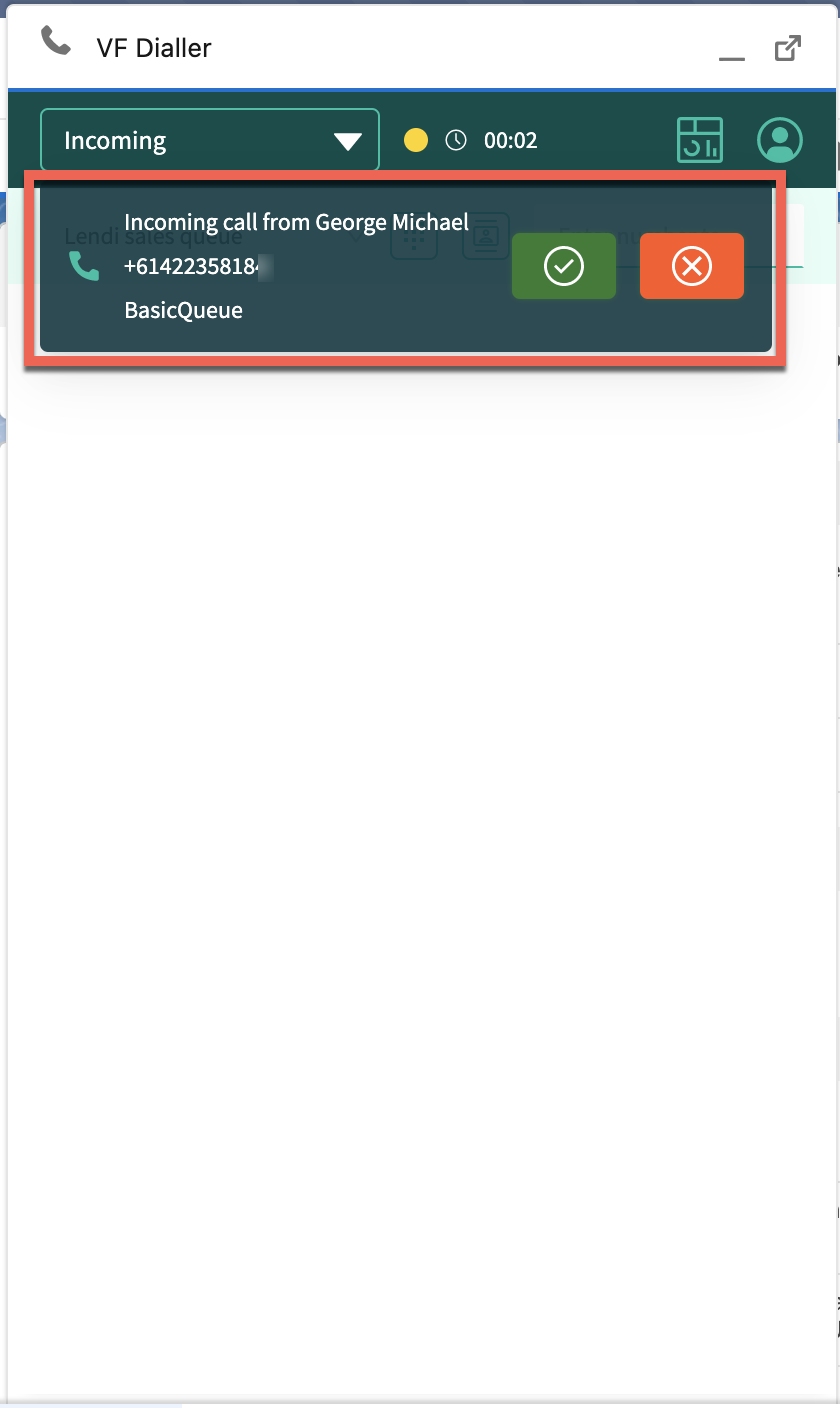
Auto accept
If your routing profile has been set to auto-accept, interactions will be automatically routed to you without needing to accept them.
Voice interactions (inbound/manual outbound)
A voice interaction will display the following:
Contact's phone number.
Contact’s name (if available).
Brand (if available).
Type of call (inbound / manual outbound / outbound dialler).
Queue name.
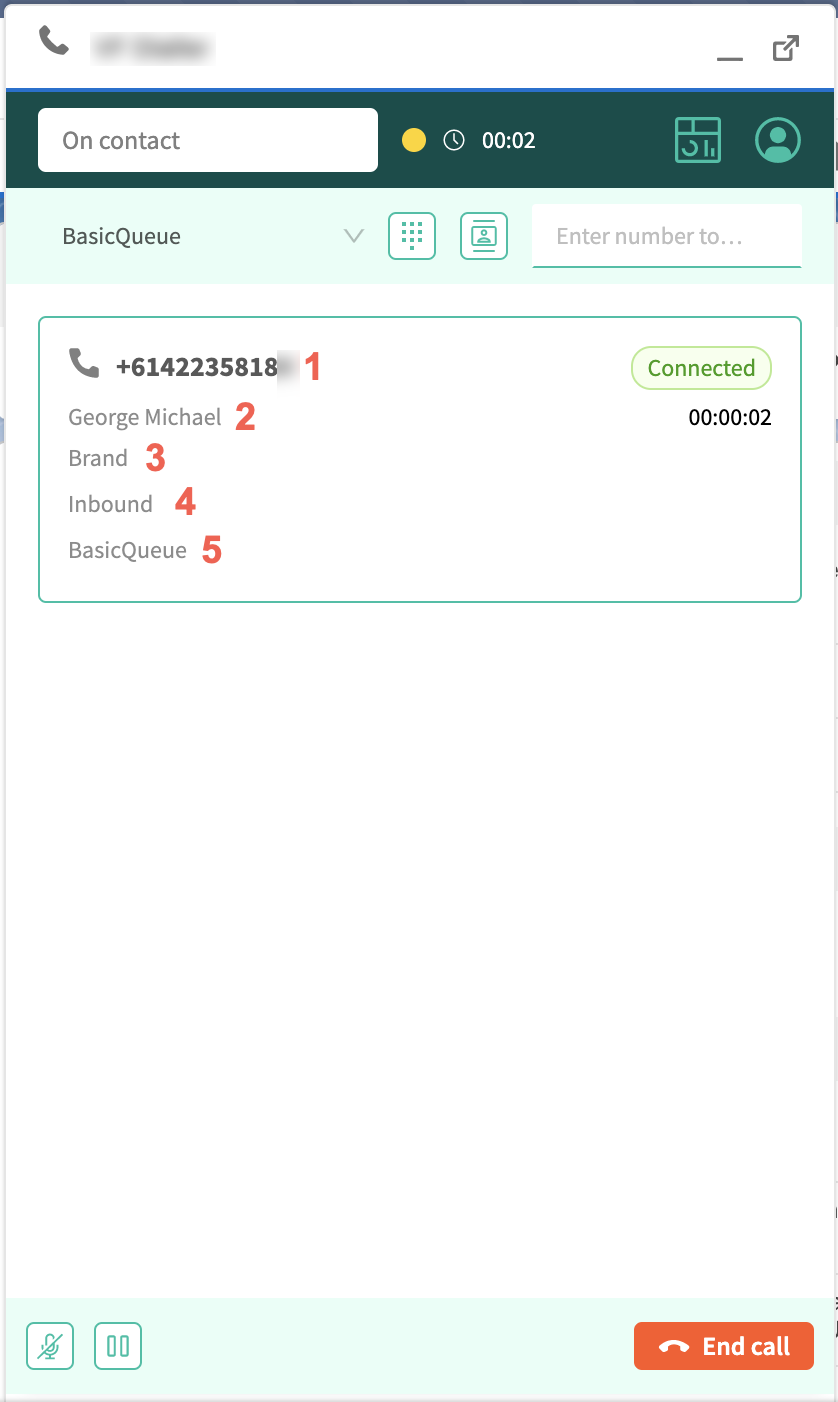
You can perform the following actions during a voice interaction:
Mute the call.
Pause the call.
End the call.
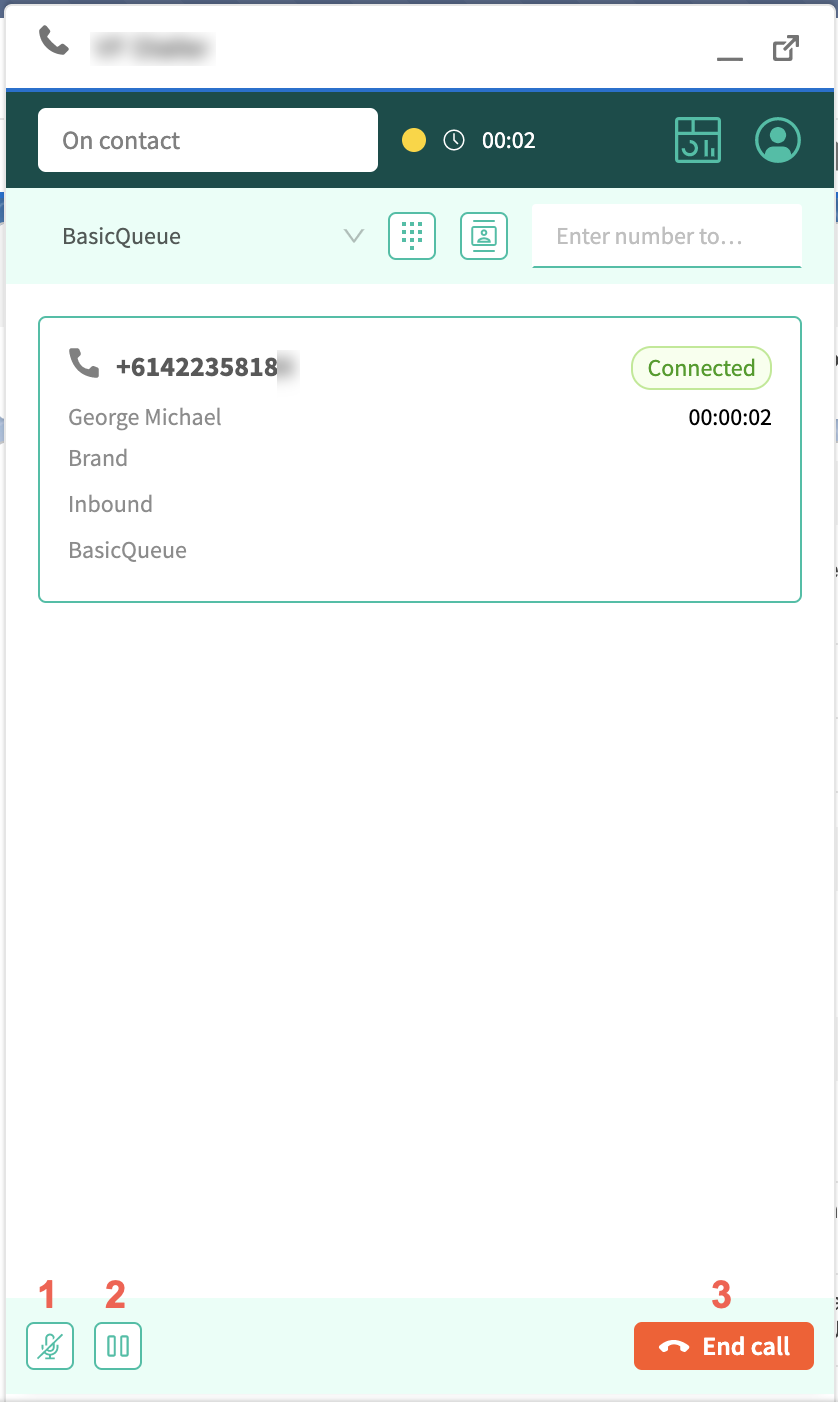
Transfer a call
Transfer a call through the number input field
Enter the phone number in the number input field and press enter on your keyboard.
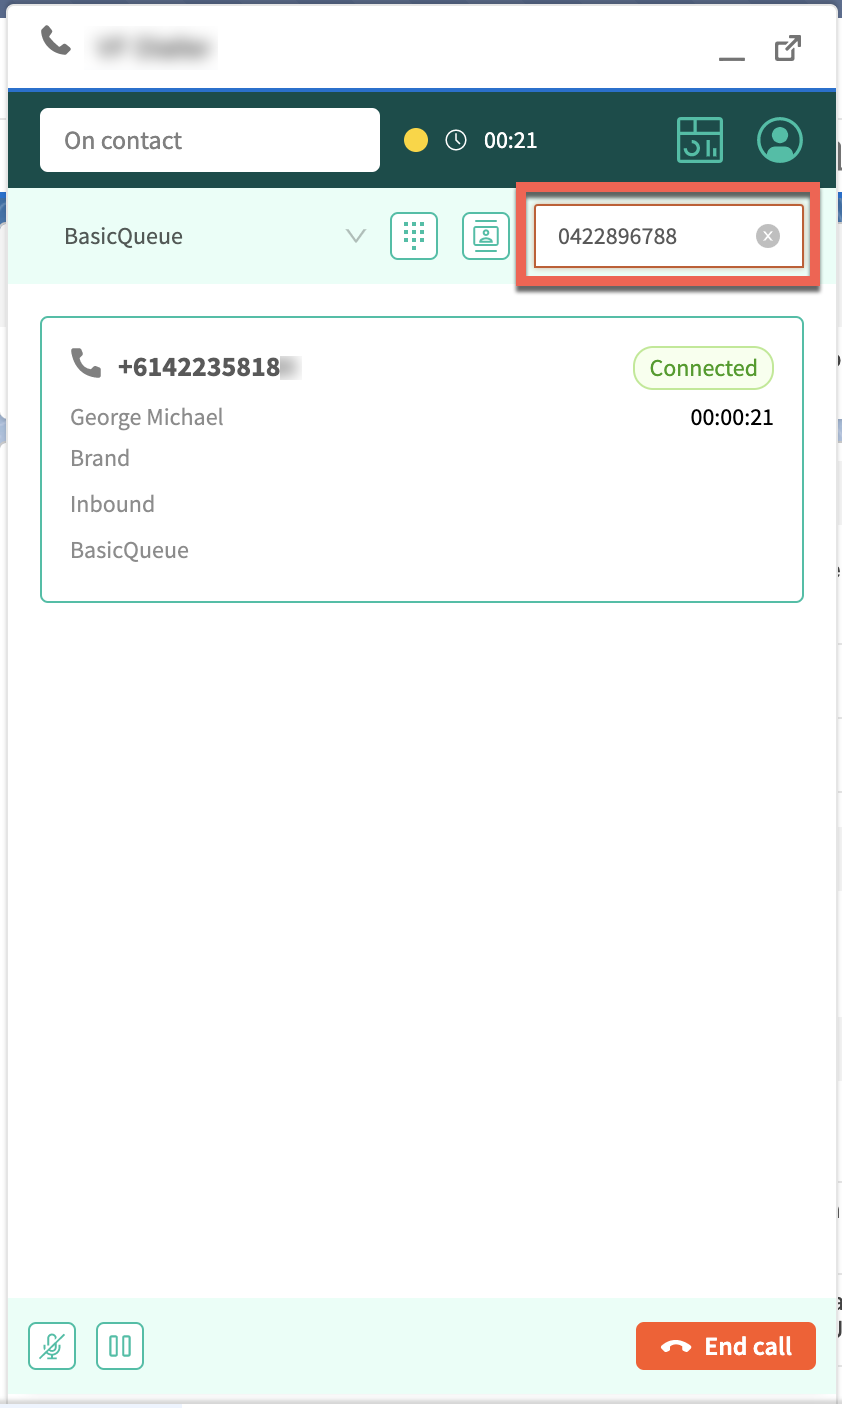
You can omit the country code for local calls.
Transfer a call through the phone directory
Click on the directory icon.
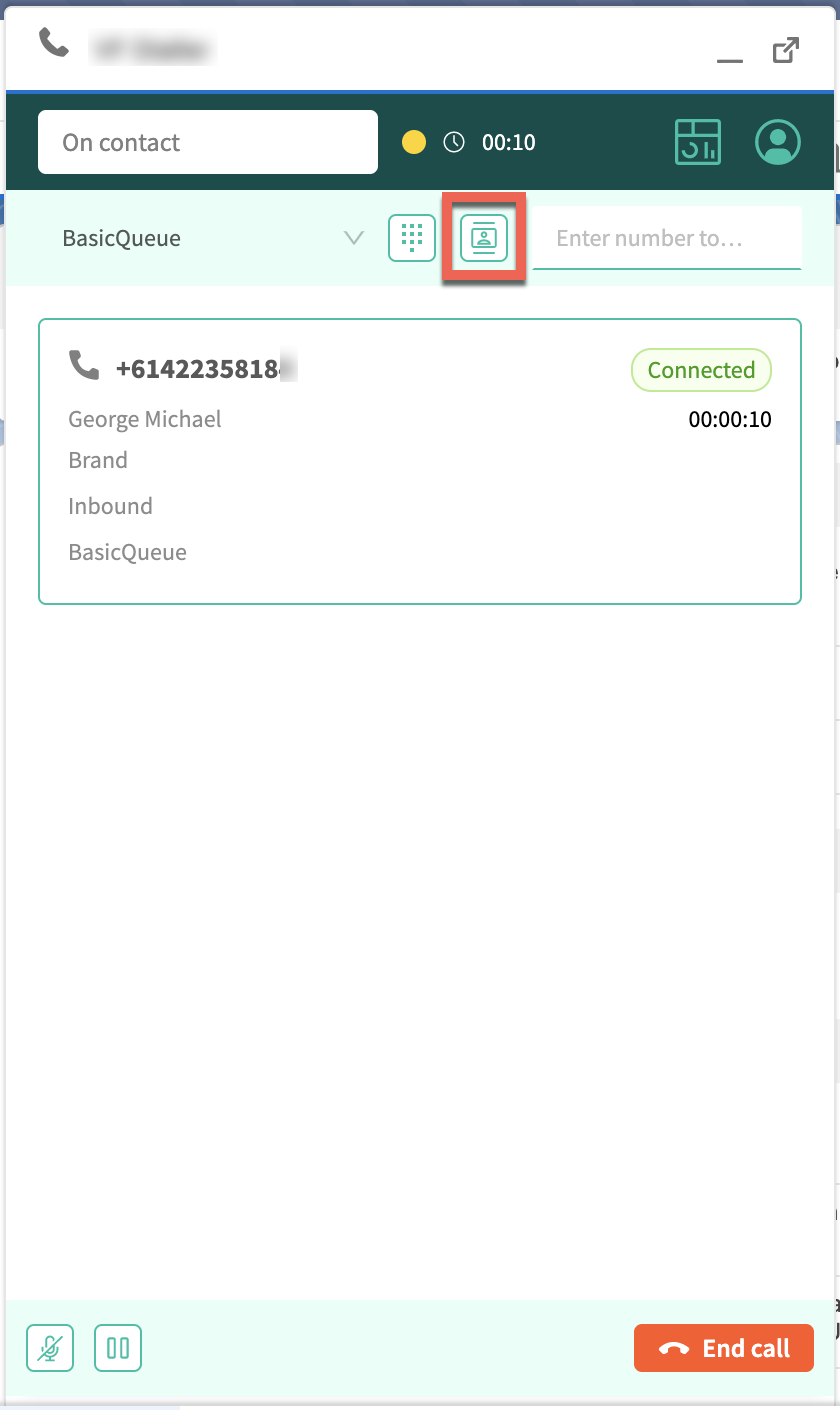
Search for and select a contact, agent, queue or contact flow.
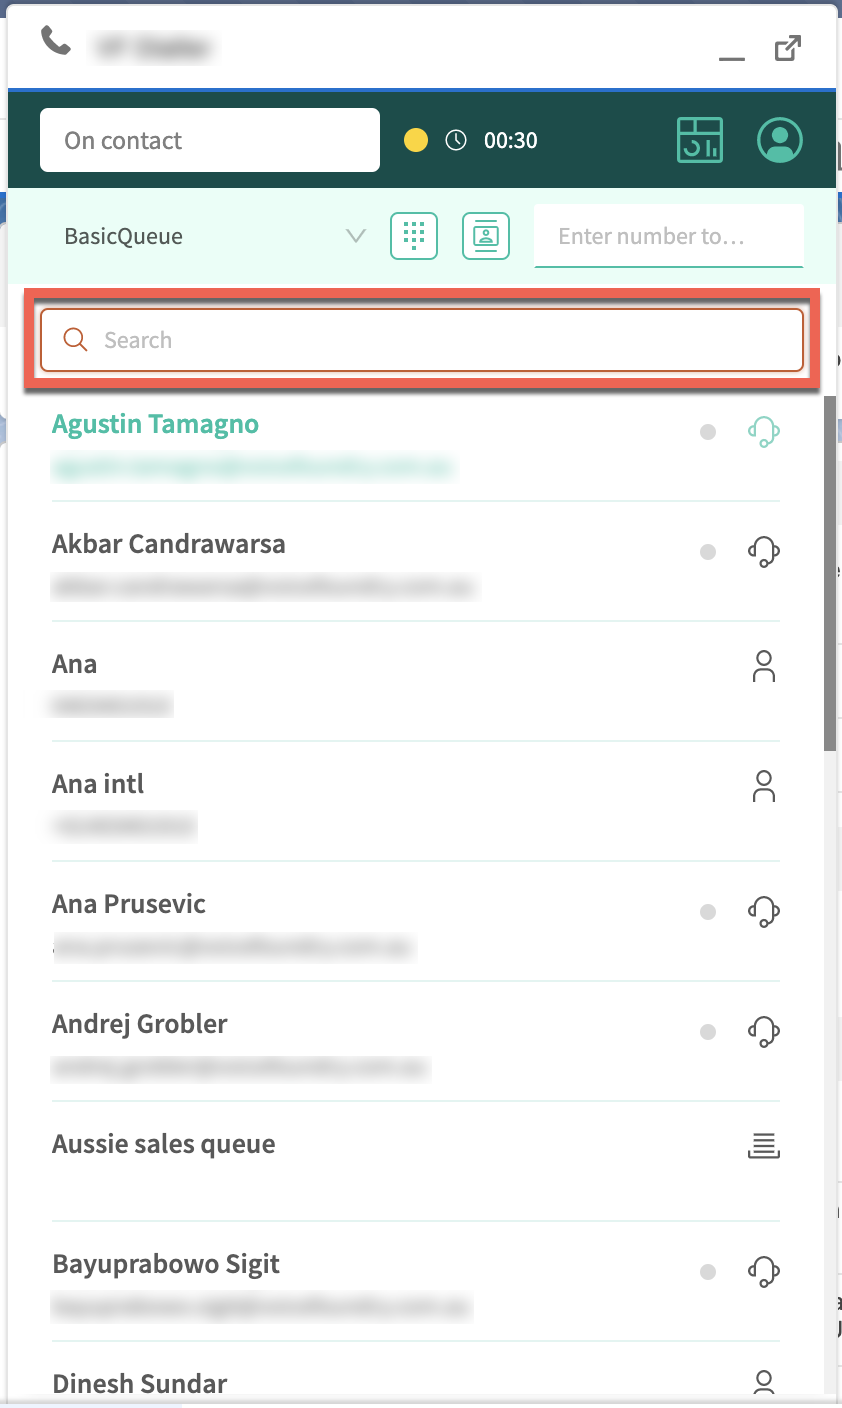
Tip: To filter to specific contact types within the directory, use the following shortcuts.
Type d: to display directory contacts only
Type a: to display agent contacts only
Type q: to display queue contacts only
Type f: to display contact flow contacts only
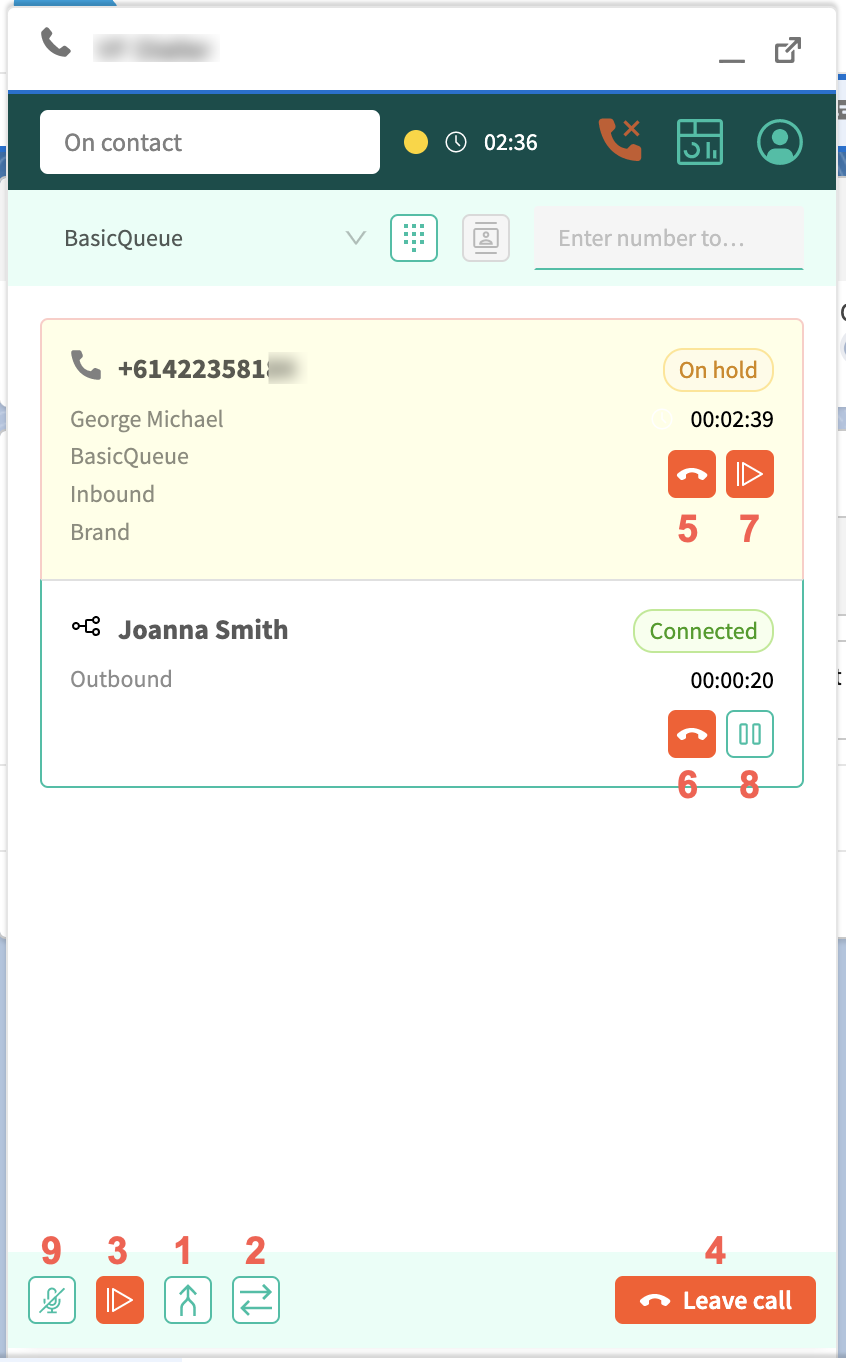
Once you are connected to the second contact you can perform the following actions:
Join the calls.
Swap the calls.
Hold all calls.
Leave call.
Disconnect the caller leg.
Disconnect the transfer leg.
Resume the caller leg.
Pause the transfer leg.
Mute the call.
Making an outbound call
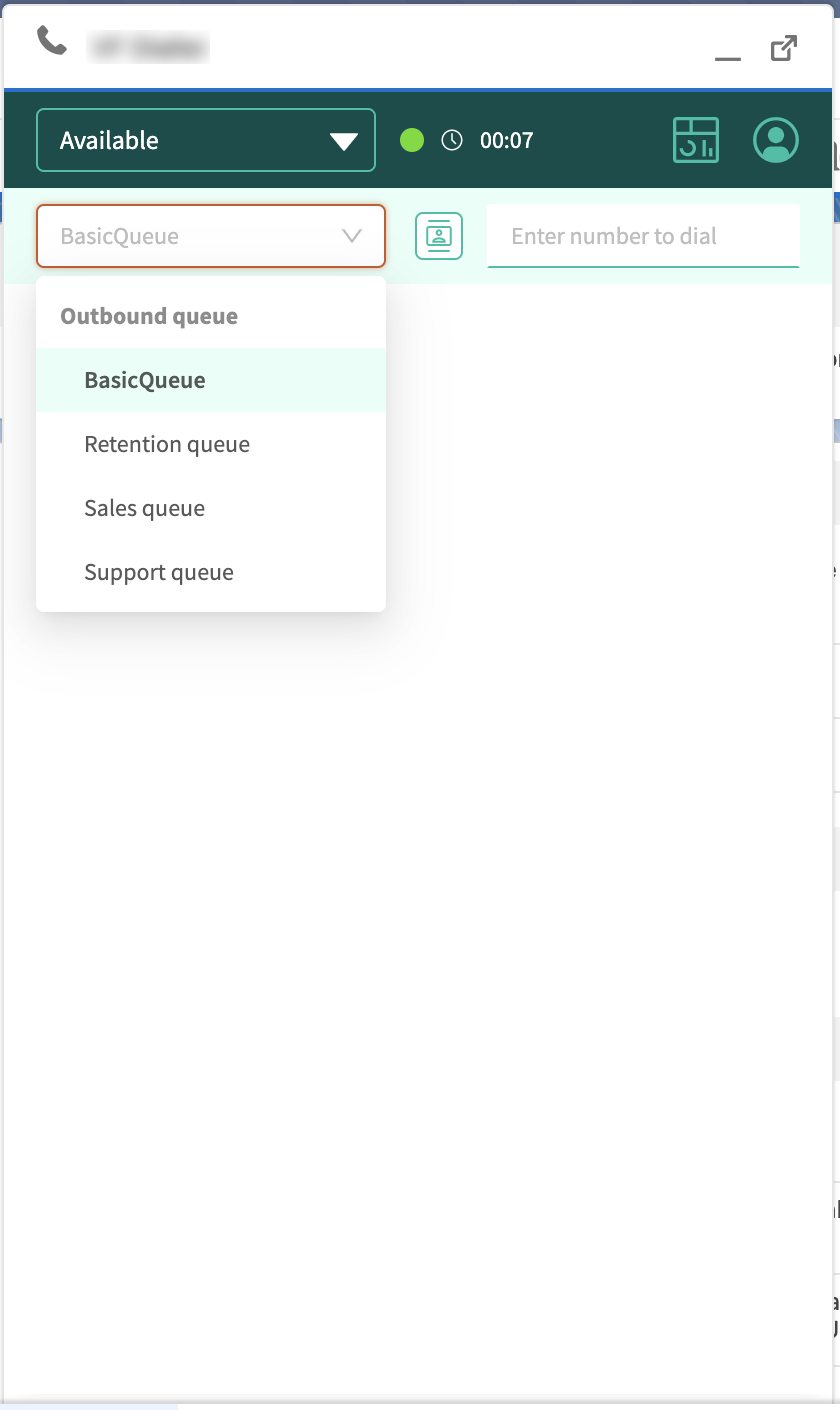
Selecting an outbound queue
To select an outbound queue before making a call, click on the outbound queue select field and choose a queue.
Manually entering a phone number
Enter the phone number in the number input field and press enter on your keyboard.
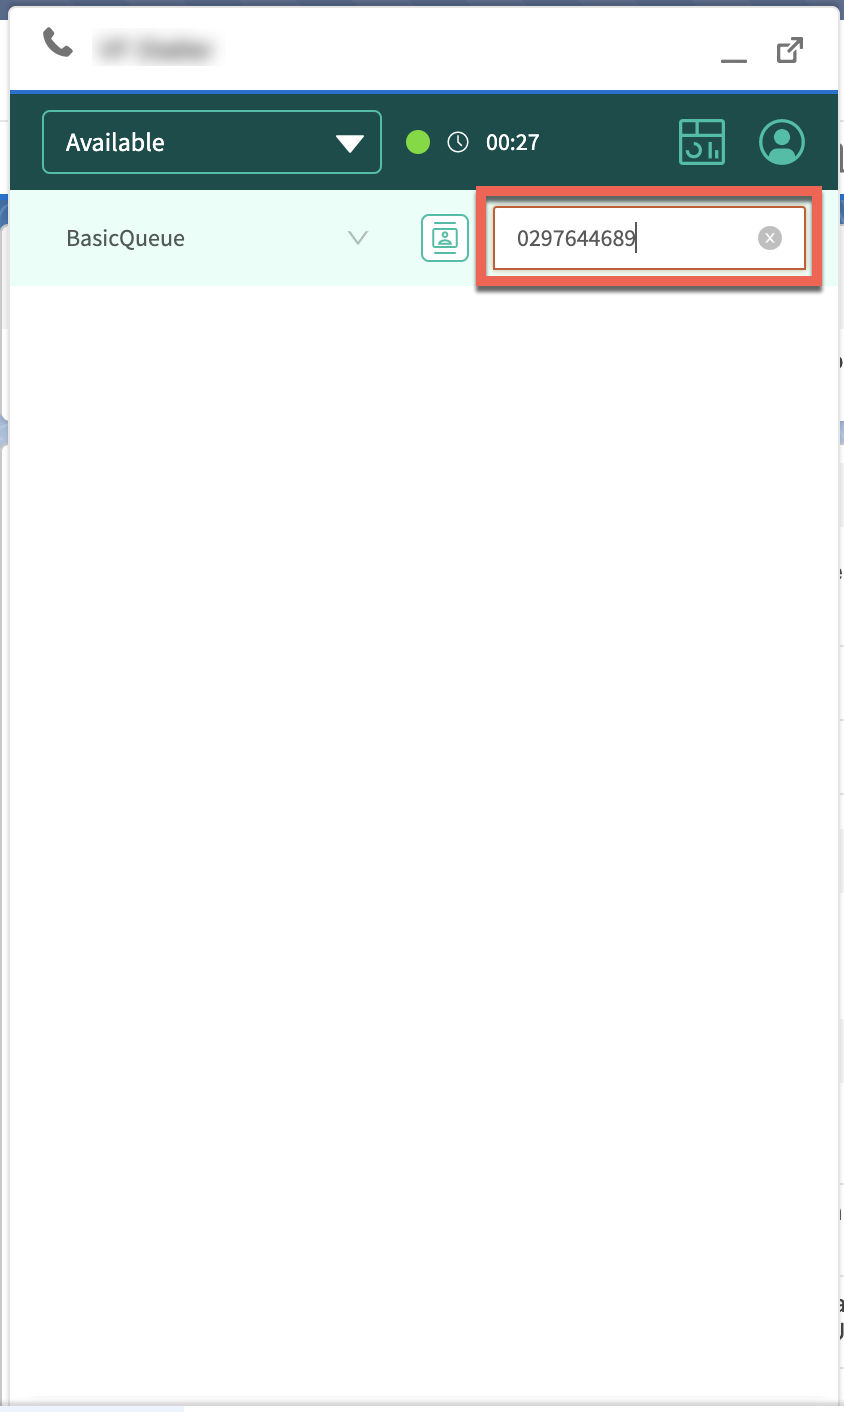
You can omit the country code for local calls.
Making an outbound call through the directory
Click on the directory icon.
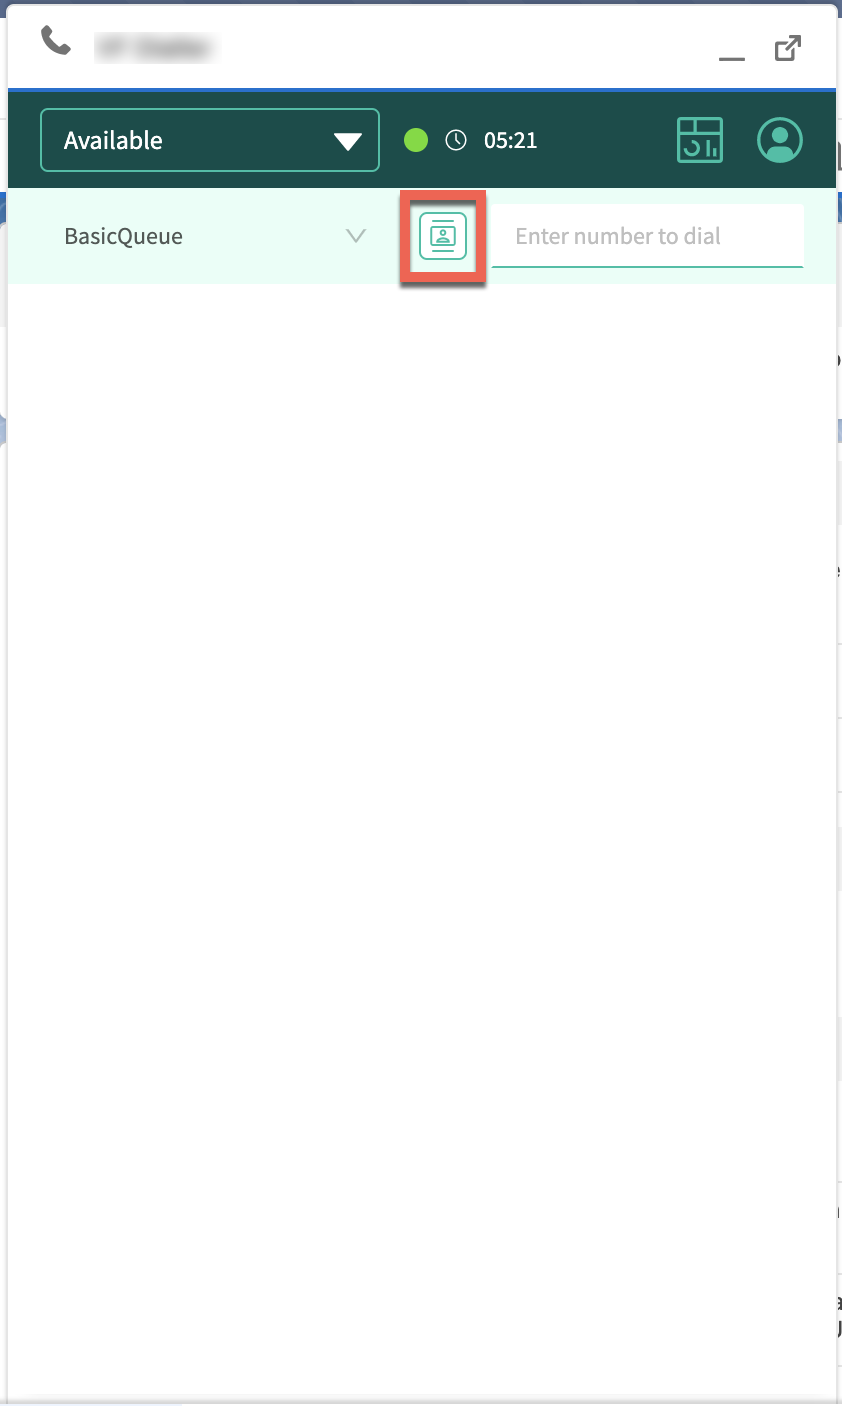
Search for and select a contact, agent, queue or contact flow.
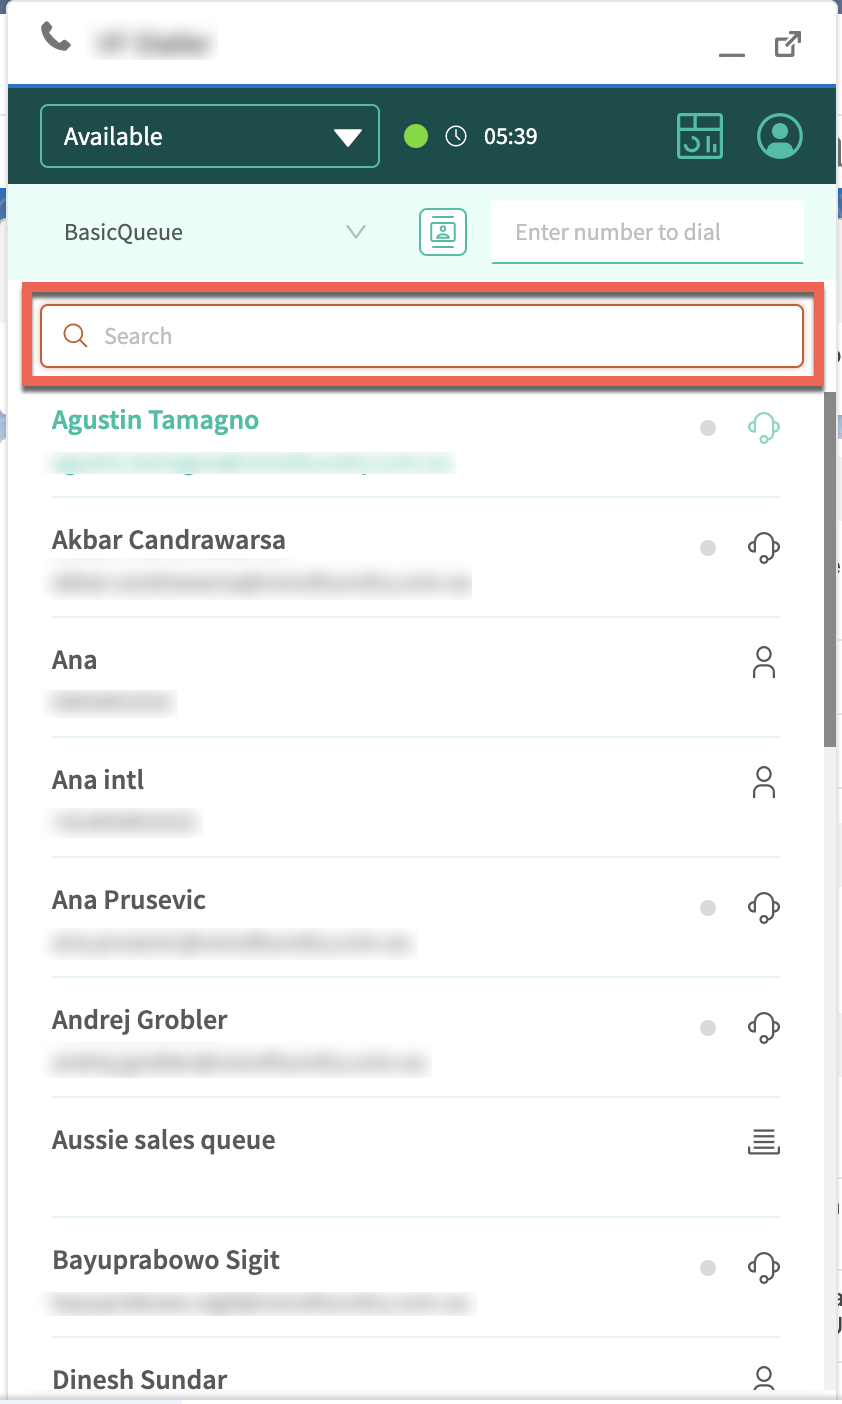
Tip: To filter to specific contact types within the directory, use the following shortcuts.
Type d: to display directory contacts only
Type a: to display agent contacts only
Type q: to display queue contacts only
Type f: to display contact flow contacts only
Using the dialpad
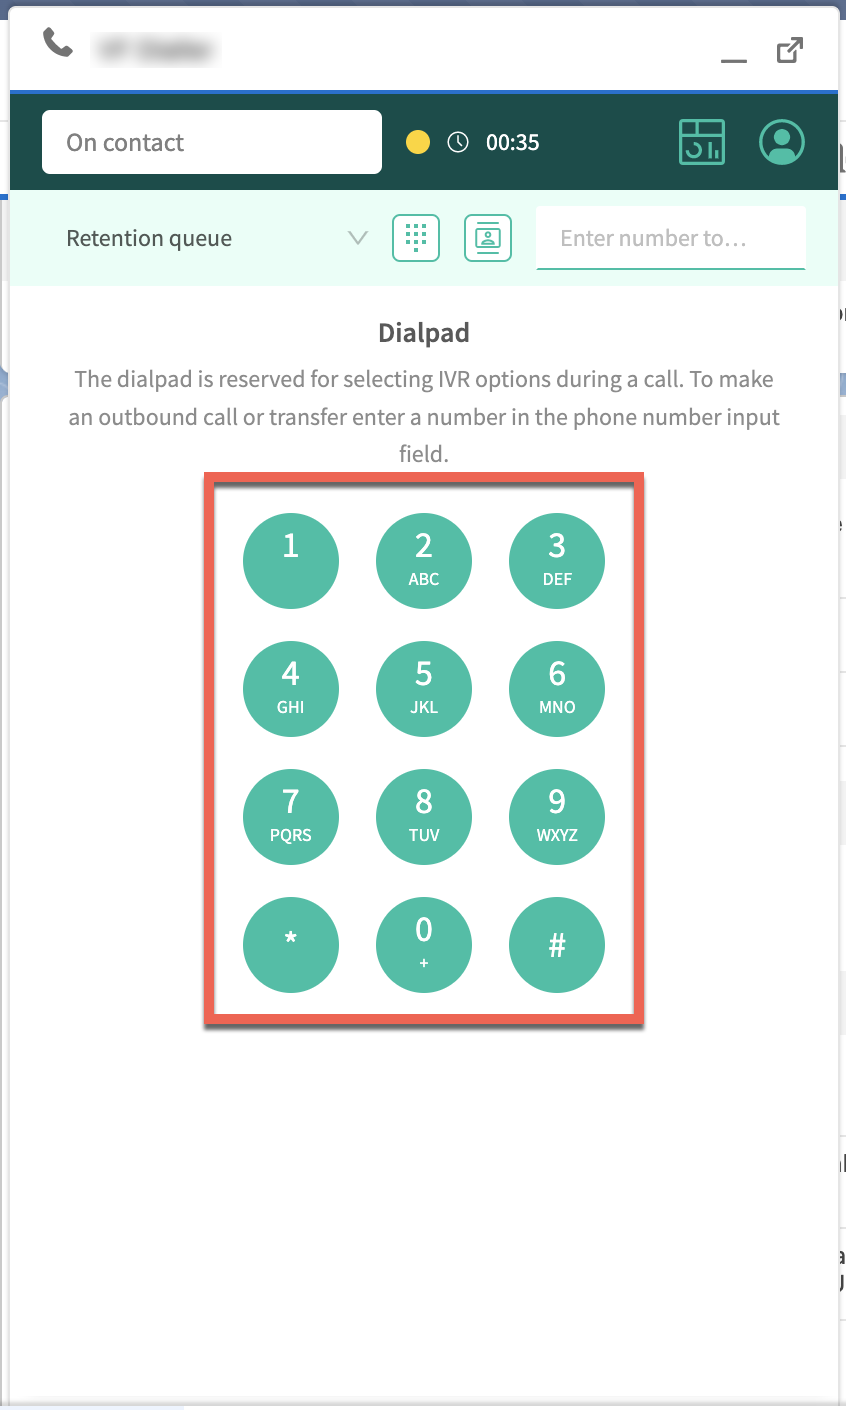
The dialpad is reserved for selecting IVR options during a call only. You cannot make an outbound call through the dialpad. To make an outbound call, enter a number in the phone number input field.
The dialpad will only appear when you are on a connected call.
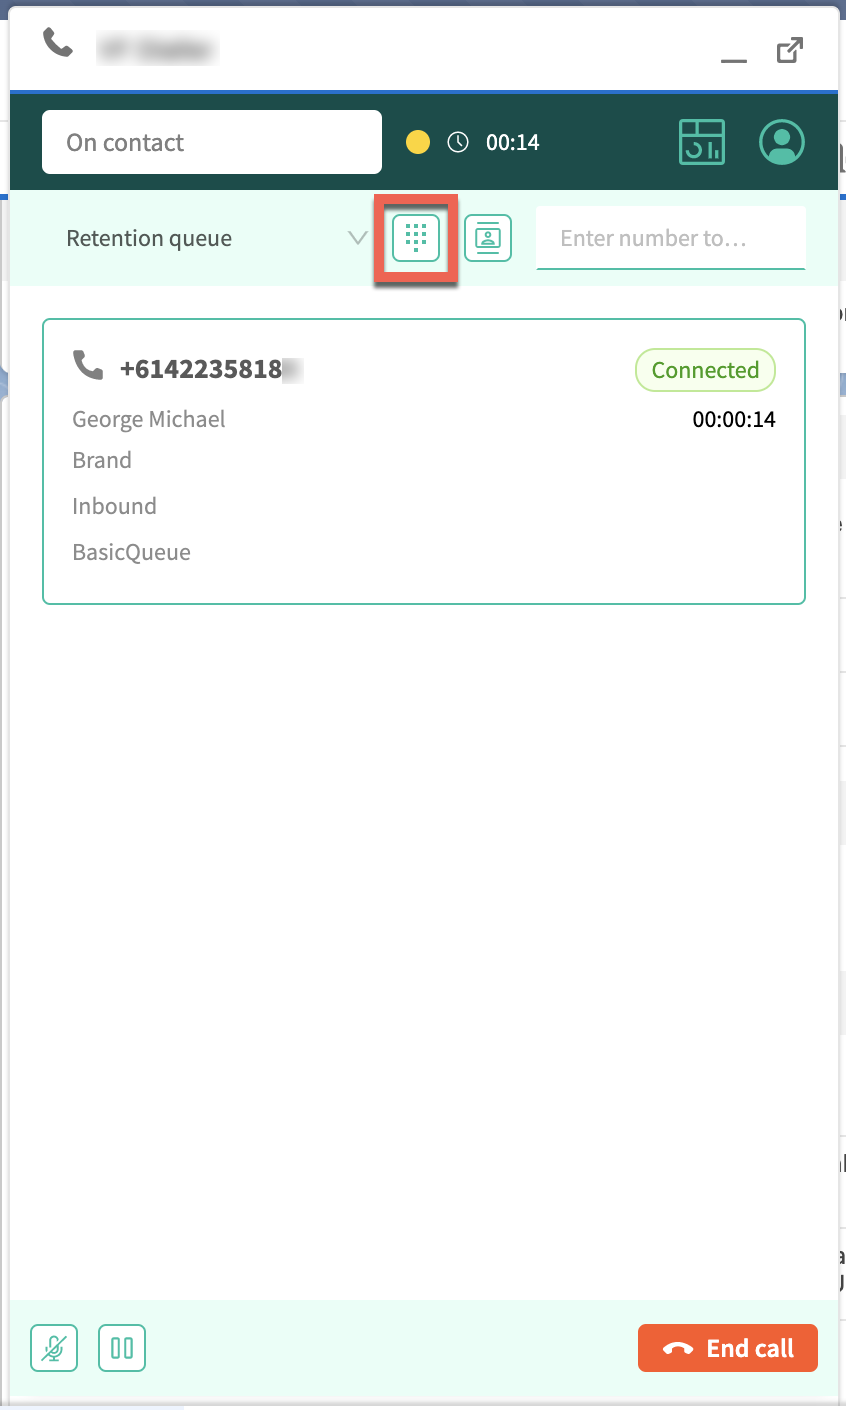
If you are in an IVR and are required to enter a DTMF tone, you can do so by clicking on the number buttons.
Click-2-Call
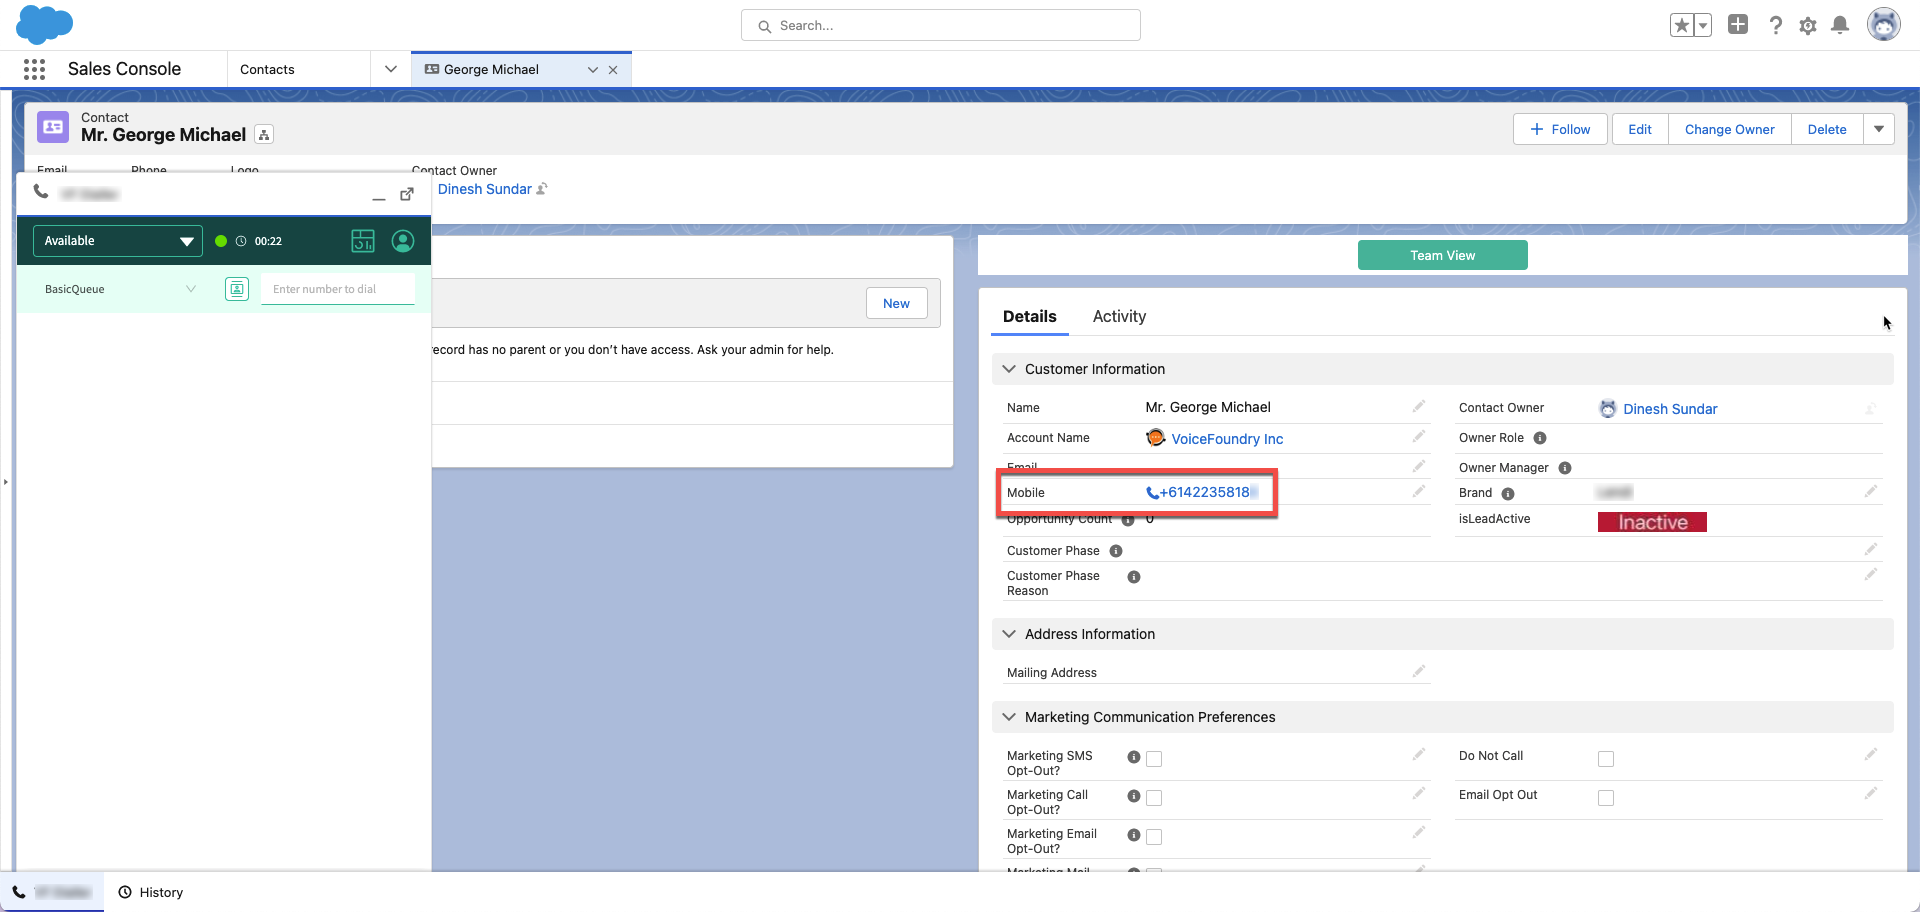
You can initiate an outbound call by clicking on a contact’s phone number within a contact’s record in Salesforce.
Search for a contact in Salesforce
Open the contact’s record
Select the outbound queue from within the Salesforce Console that you want the call to be made from.
Click on the contact’s phone number
Outbound dialler
Enabling / disabling outbound dialler
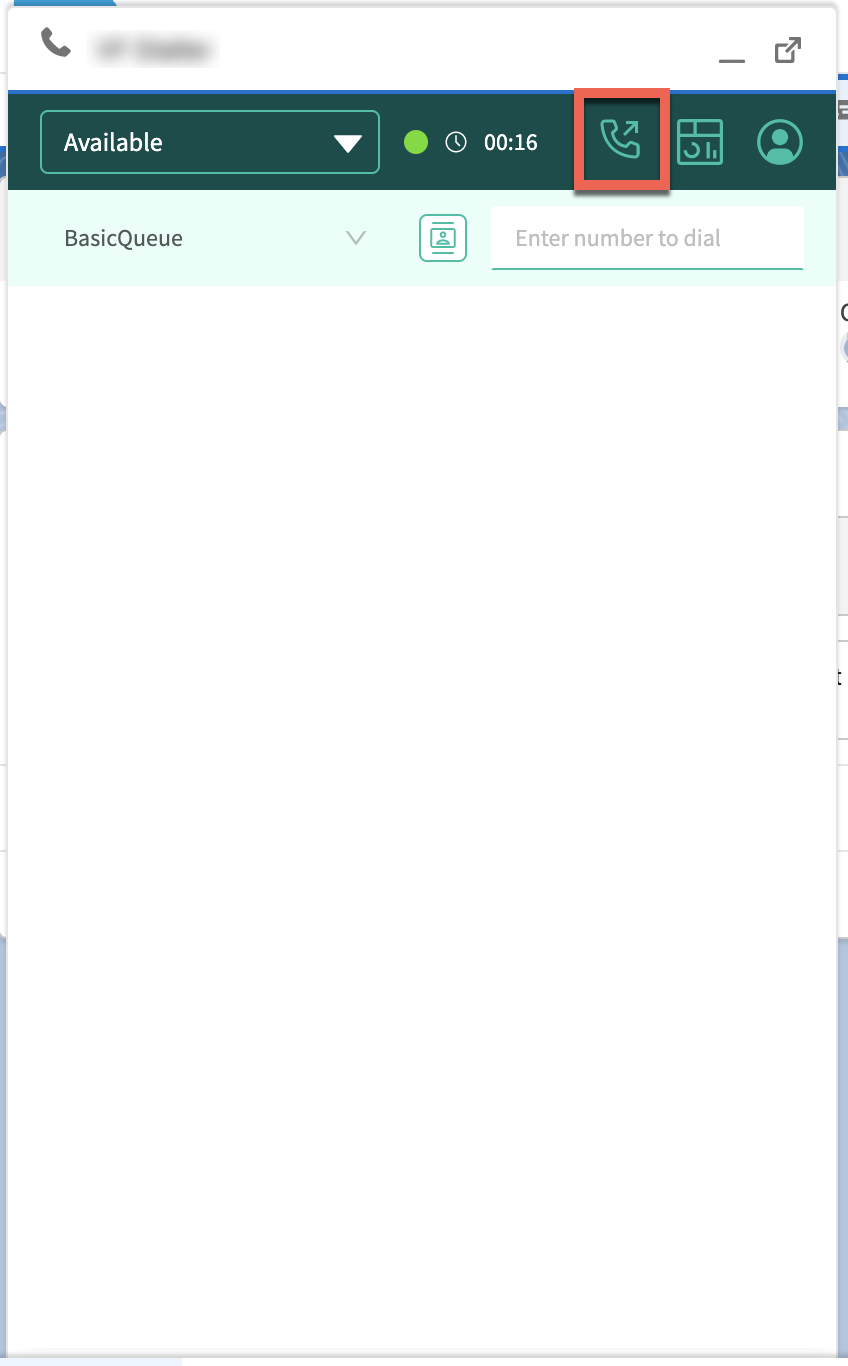
In order for you to start receiving outbound dialler calls, you will first need to enable outbound dialler within the Salesforce Console by clicking on the outbound dialler button. Your agent status will also need to be set to Available.
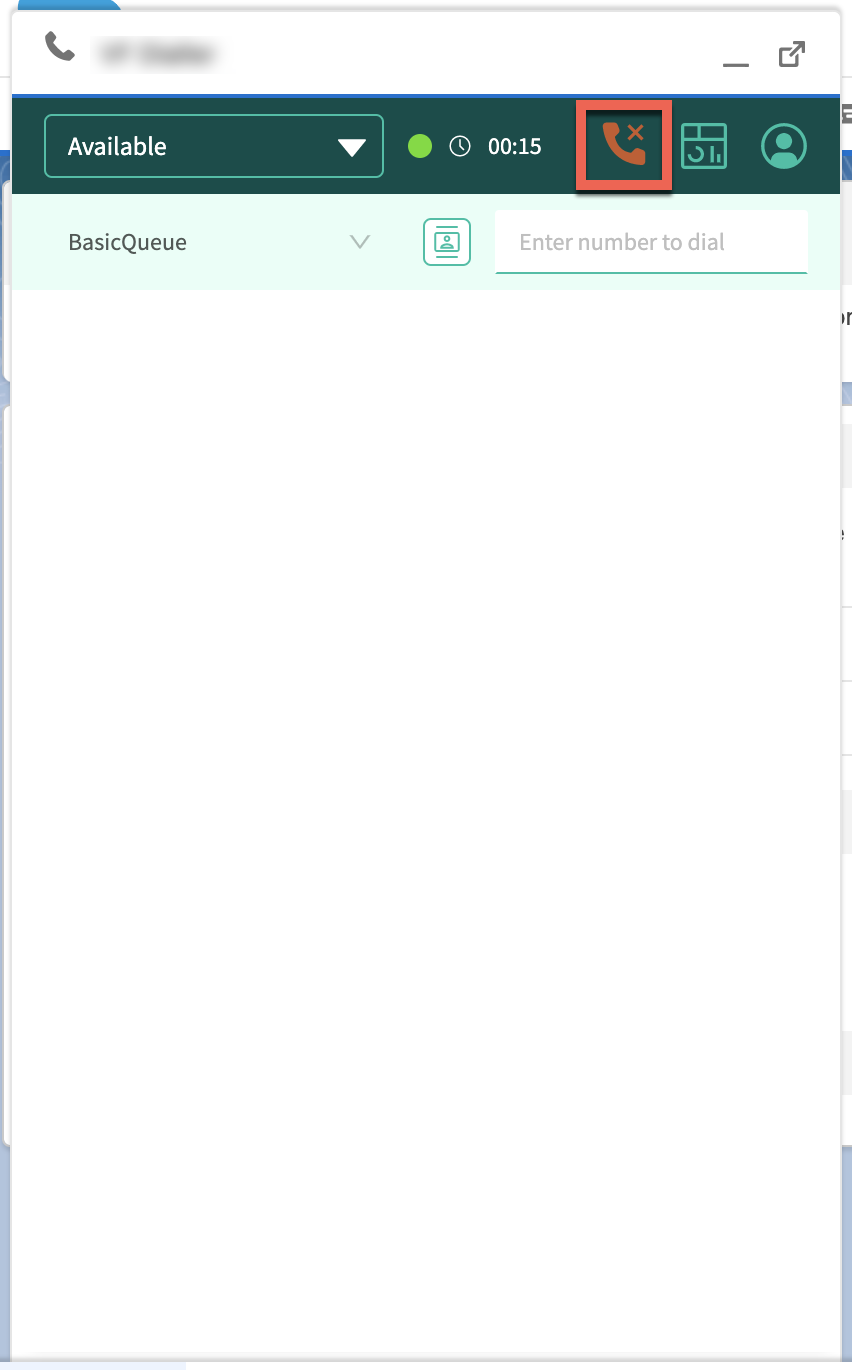
To stop receiving outbound dialler calls, you can disable outbound dialler within the Salesforce Console by again clicking on the outbound dialler button.
Outbound dialler interactions
An outbound dialler interaction will display the following:
Contact’s phone number.
Type of call (inbound / manual outbound / outbound dialler).
Any contact attributes from the outbound dialler record.

Progressive mode
If the dial mode for a campaign has been set to Progressive, customers will be automatically dialled at a 1-1 ratio, and delivers answered calls to agents upon connection. Answering Machine detection is turned off in this mode.

Preview mode
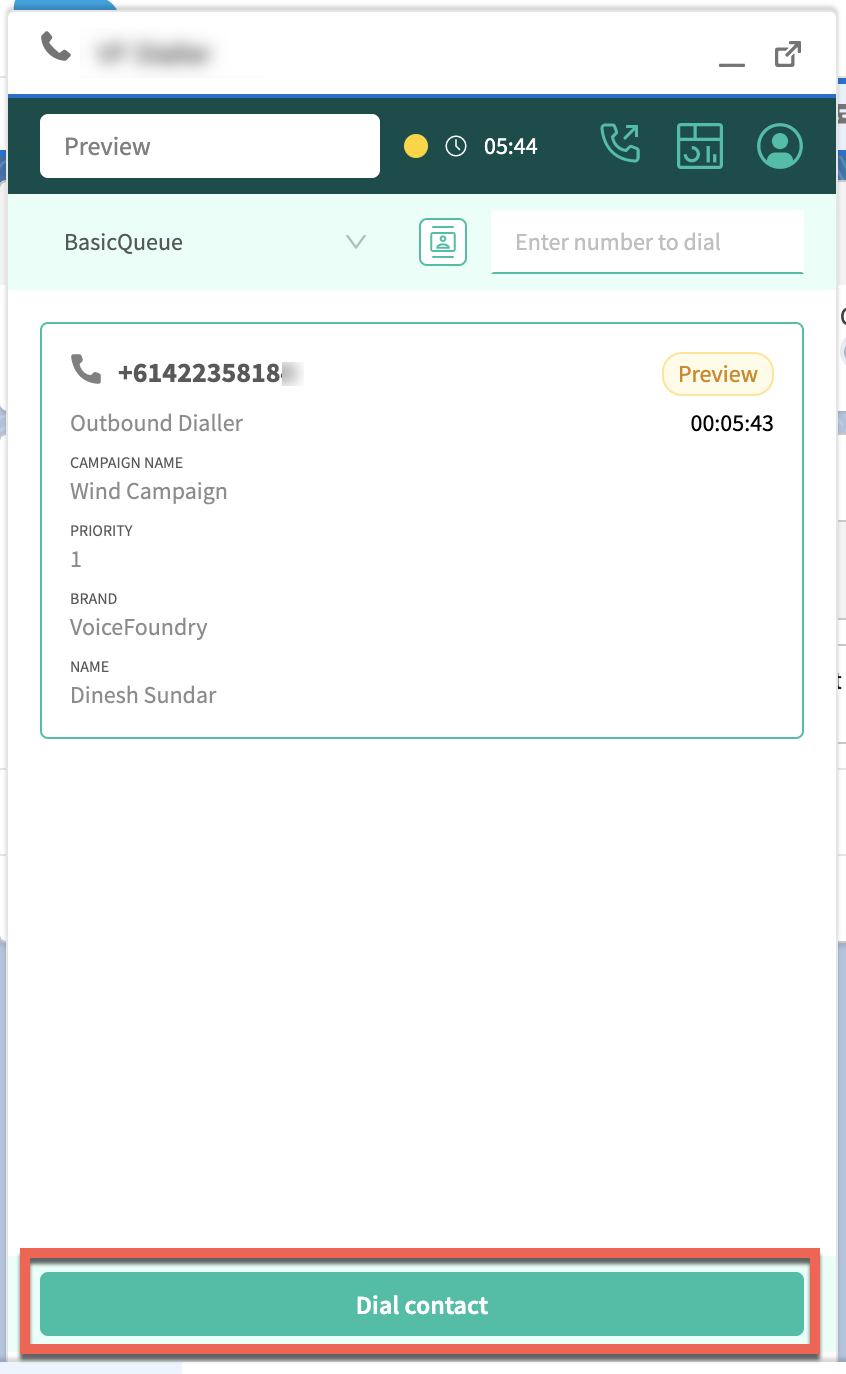
If the dial mode for a campaign has been set to Preview, records are first displayed to agents before the record is dialled. Agents can then manually dial the record by clicking on the Dial contact button. Answering Machine detection is turned off in this mode.
Ending an interaction
Ending a call
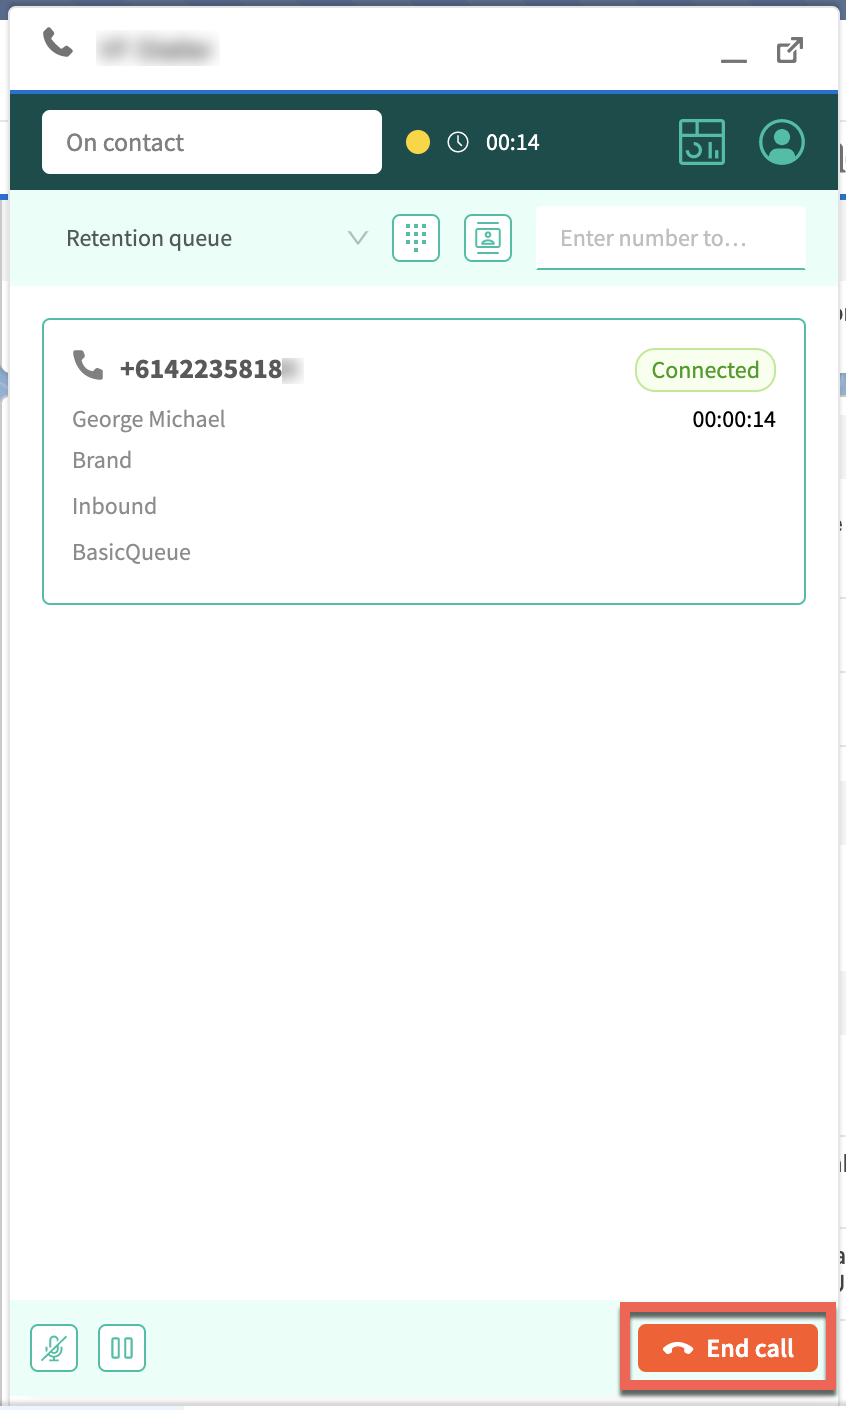
To end a call, click on the End call button at the bottom of the Salesforce Console.
After contact work
Voice
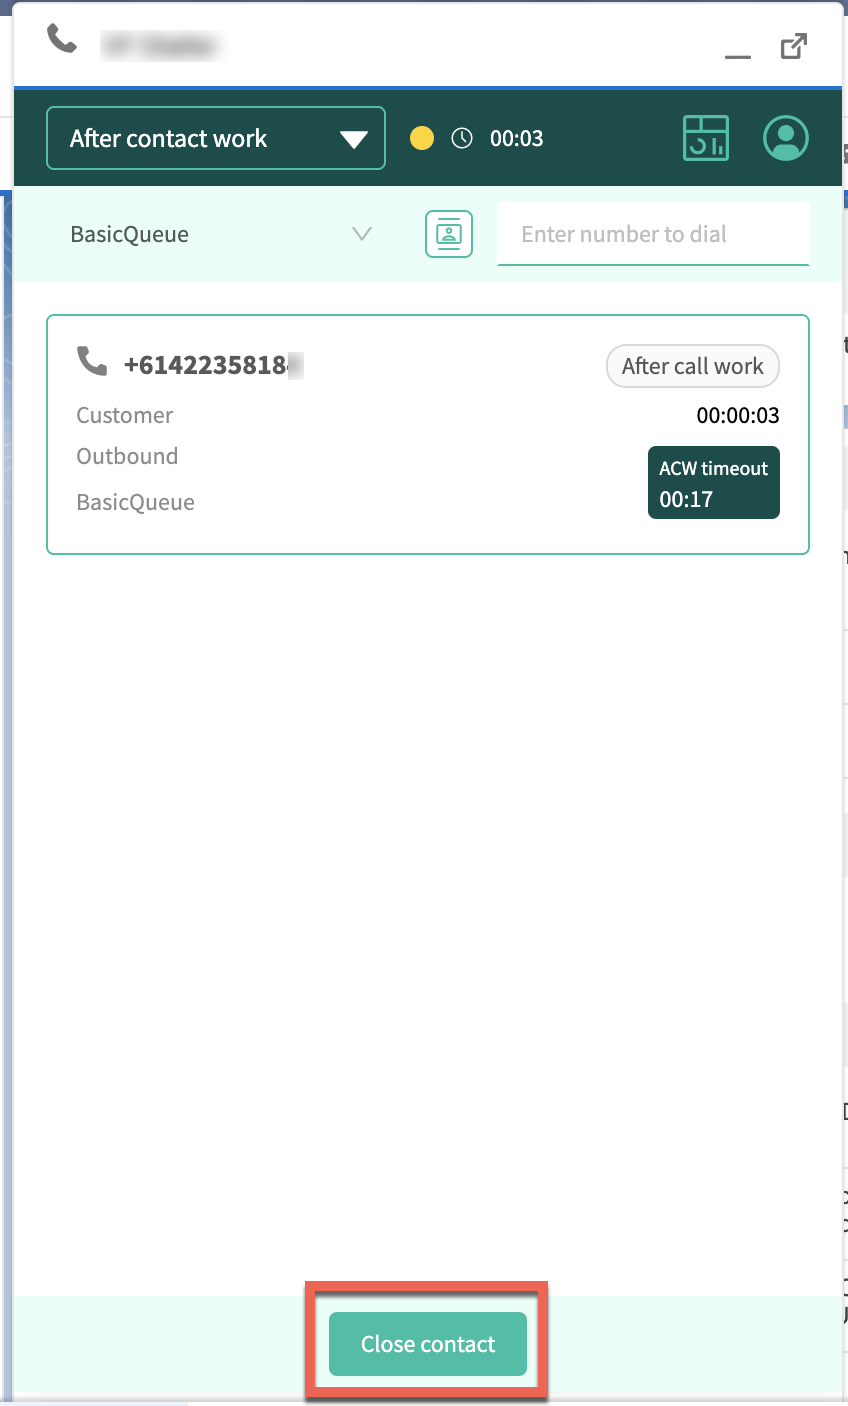
Once you have finished a call, you can perform any necessary after contact processing tasks and then click close contact. You will then be ready to receive another voice interaction.
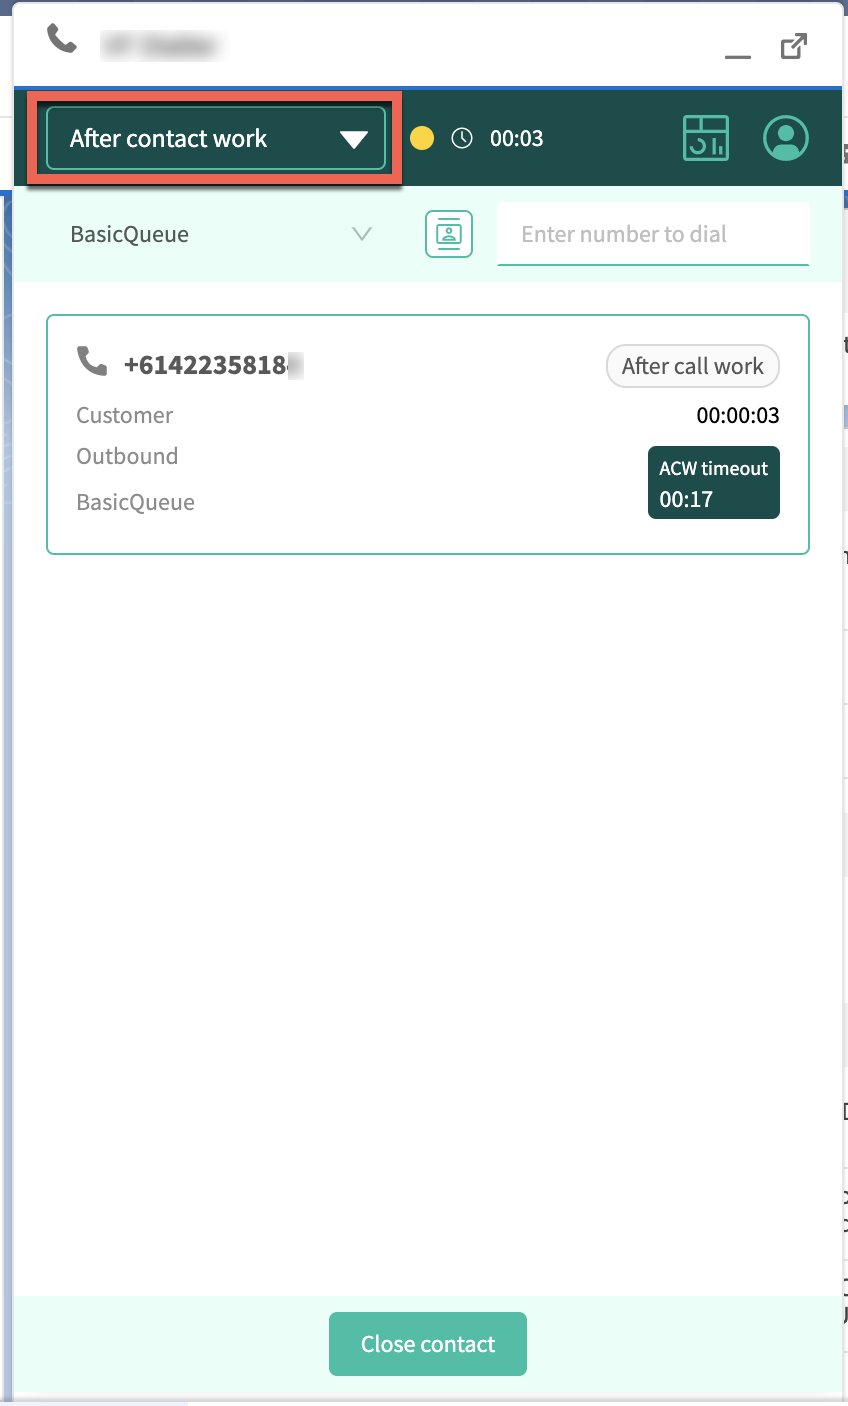
Alternatively, if you don’t want to receive another voice interaction, you can change your status to a break status.
After contact work timeout
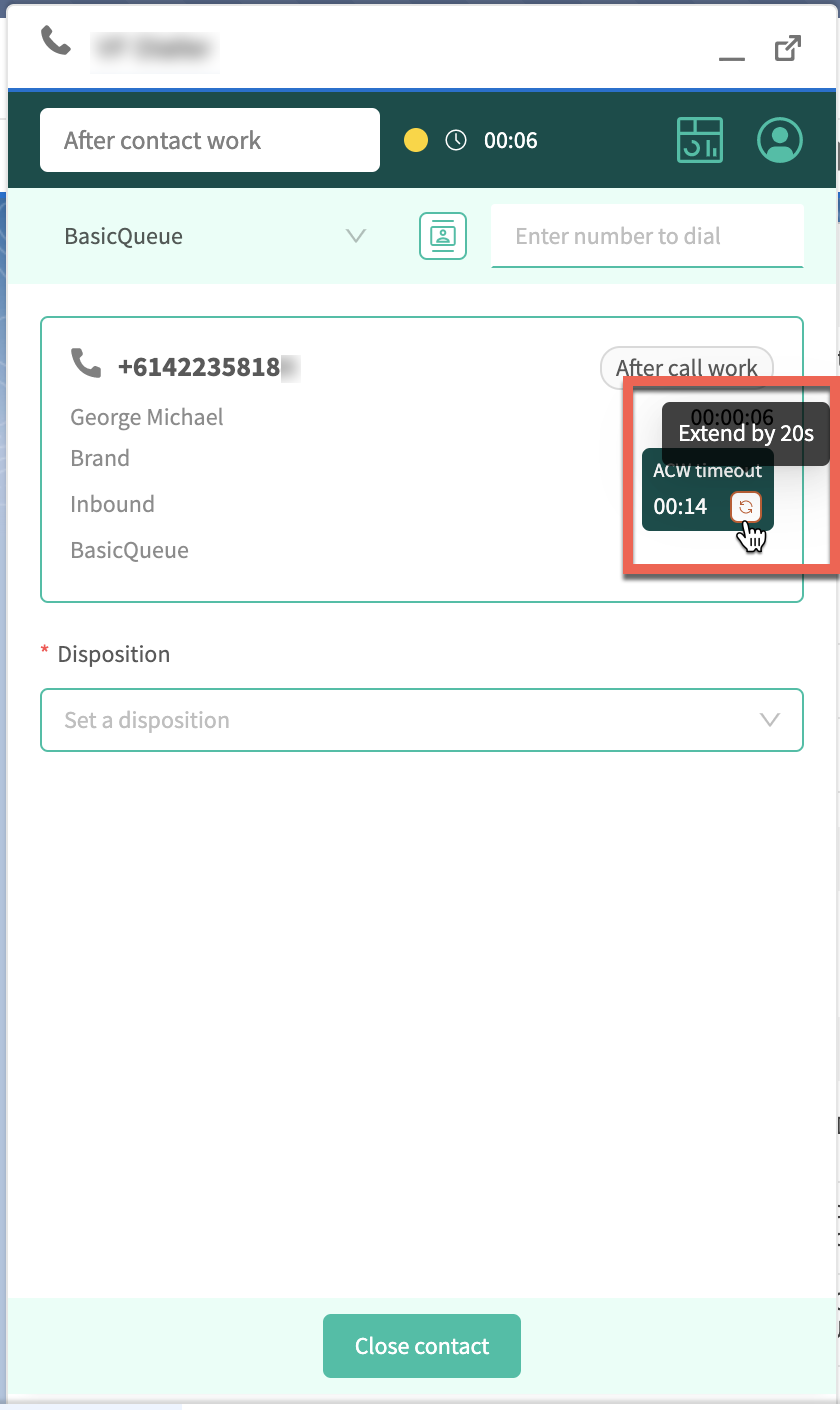
If an after contact work (ACW) timeout has been set, you will see a countdown appear within the Salesforce Console. If you don’t close the contact or change your status before the timeout reaches 0, your status will automatically change to Available.
.png?inst-v=ff267536-0793-47b5-be49-0a77e65ce182)
After contact work timeout (Outbound dialler)
If an after contact work (ACW) timeout has been set for outbound dialler, the timeout will only begin after you have submitted your disposition for that contact.
Extended after contact work timeout
If an extended after contact work (ACW) timeout has been set, you will see a button next to the countdown timer that when clicked will increase your timeout by the specified amount.
Dispositions
Dispositions (Inbound / manual outbound)
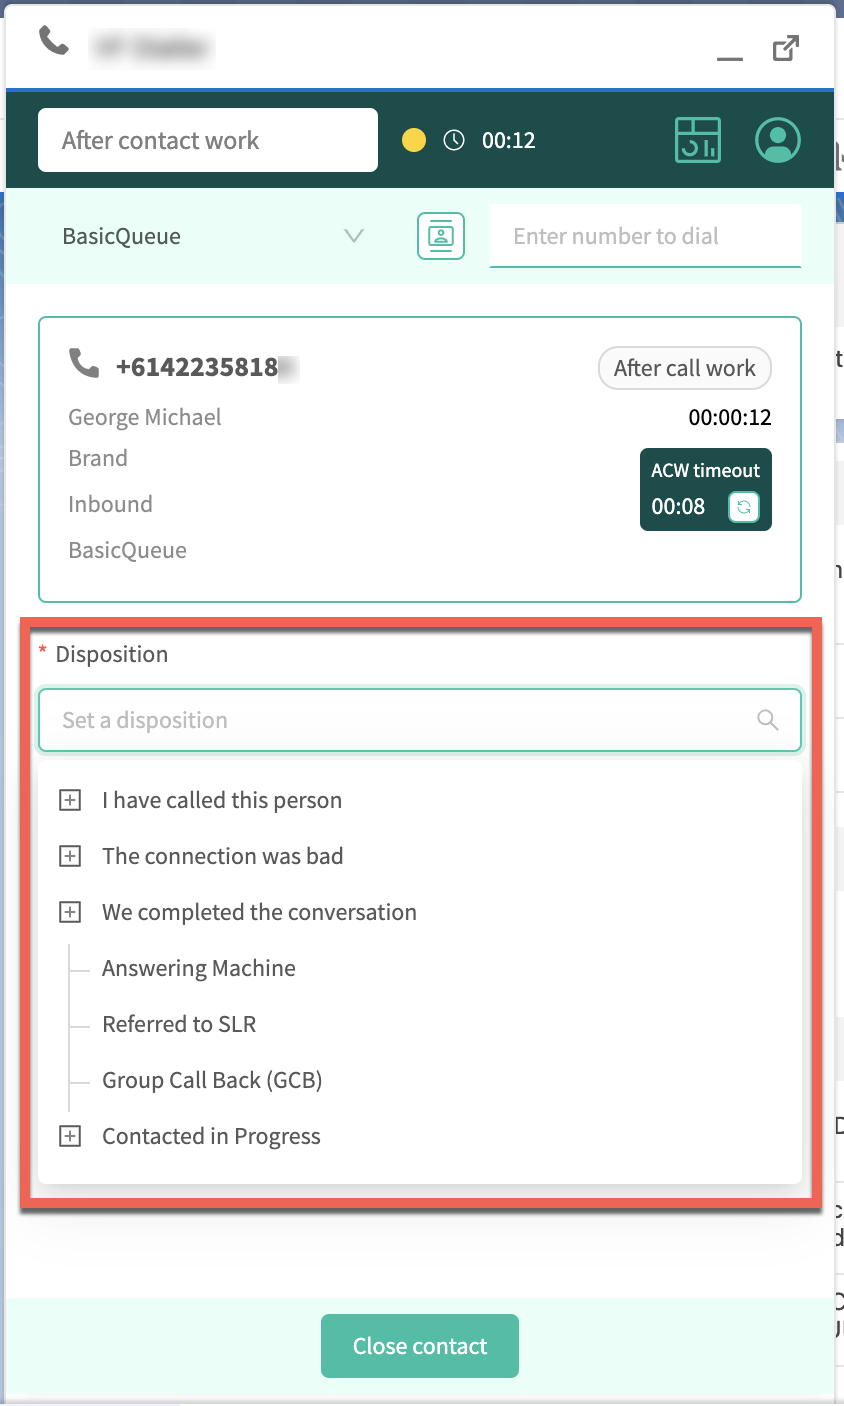
If a disposition group has been assigned to a queue, you will be presented with a disposition select field at the end of an interaction. You will need to select a disposition before closing the contact or changing your status.
Dispositions (Outbound dialler)
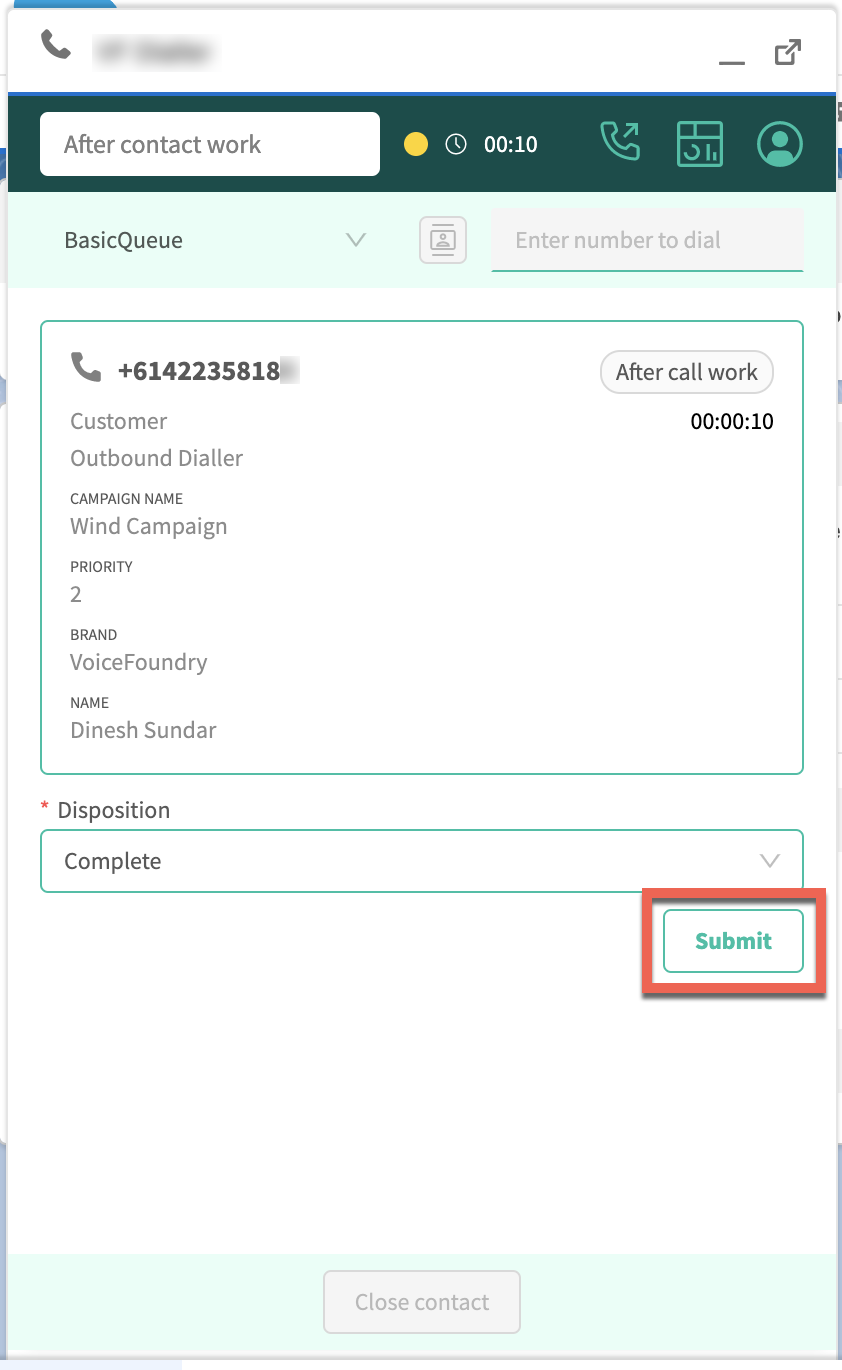
At the end of an outbound dialler call, you will be presented with a disposition select field. You will need to select a disposition and click on the submit button before closing the contact or changing your status.
Scheduled callbacks (Outbound dialler)
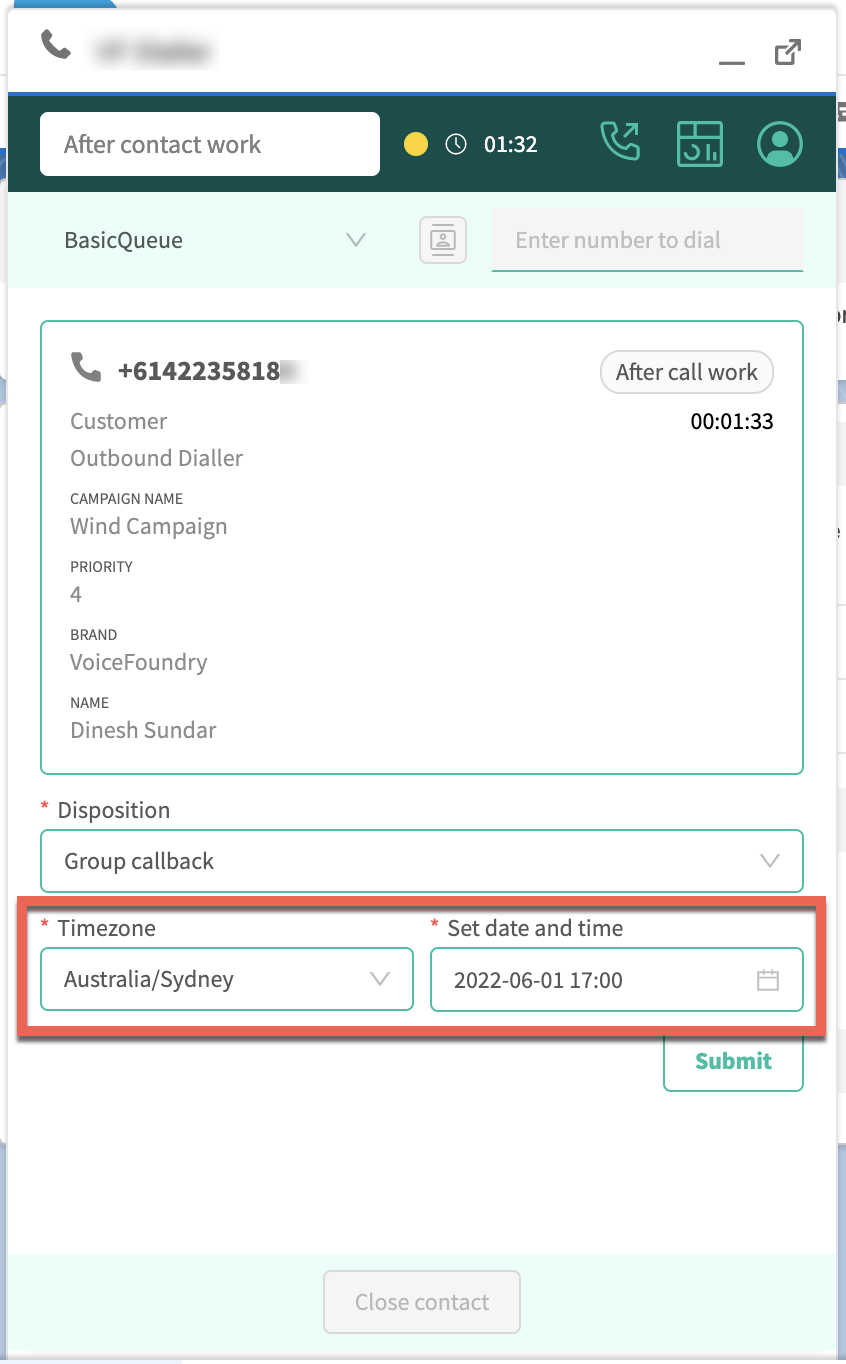
Scheduled callbacks can be set for outbound dialler contacts only. To set a scheduled callback, select the appropriate disposition type, then set the timezone and date/time for the callback before clicking on the submit button.
Screen pop
Contact record
At the beginning of every call, if an existing Salesforce contact record exists for that caller, that contact record will pop for the agent.
Call record
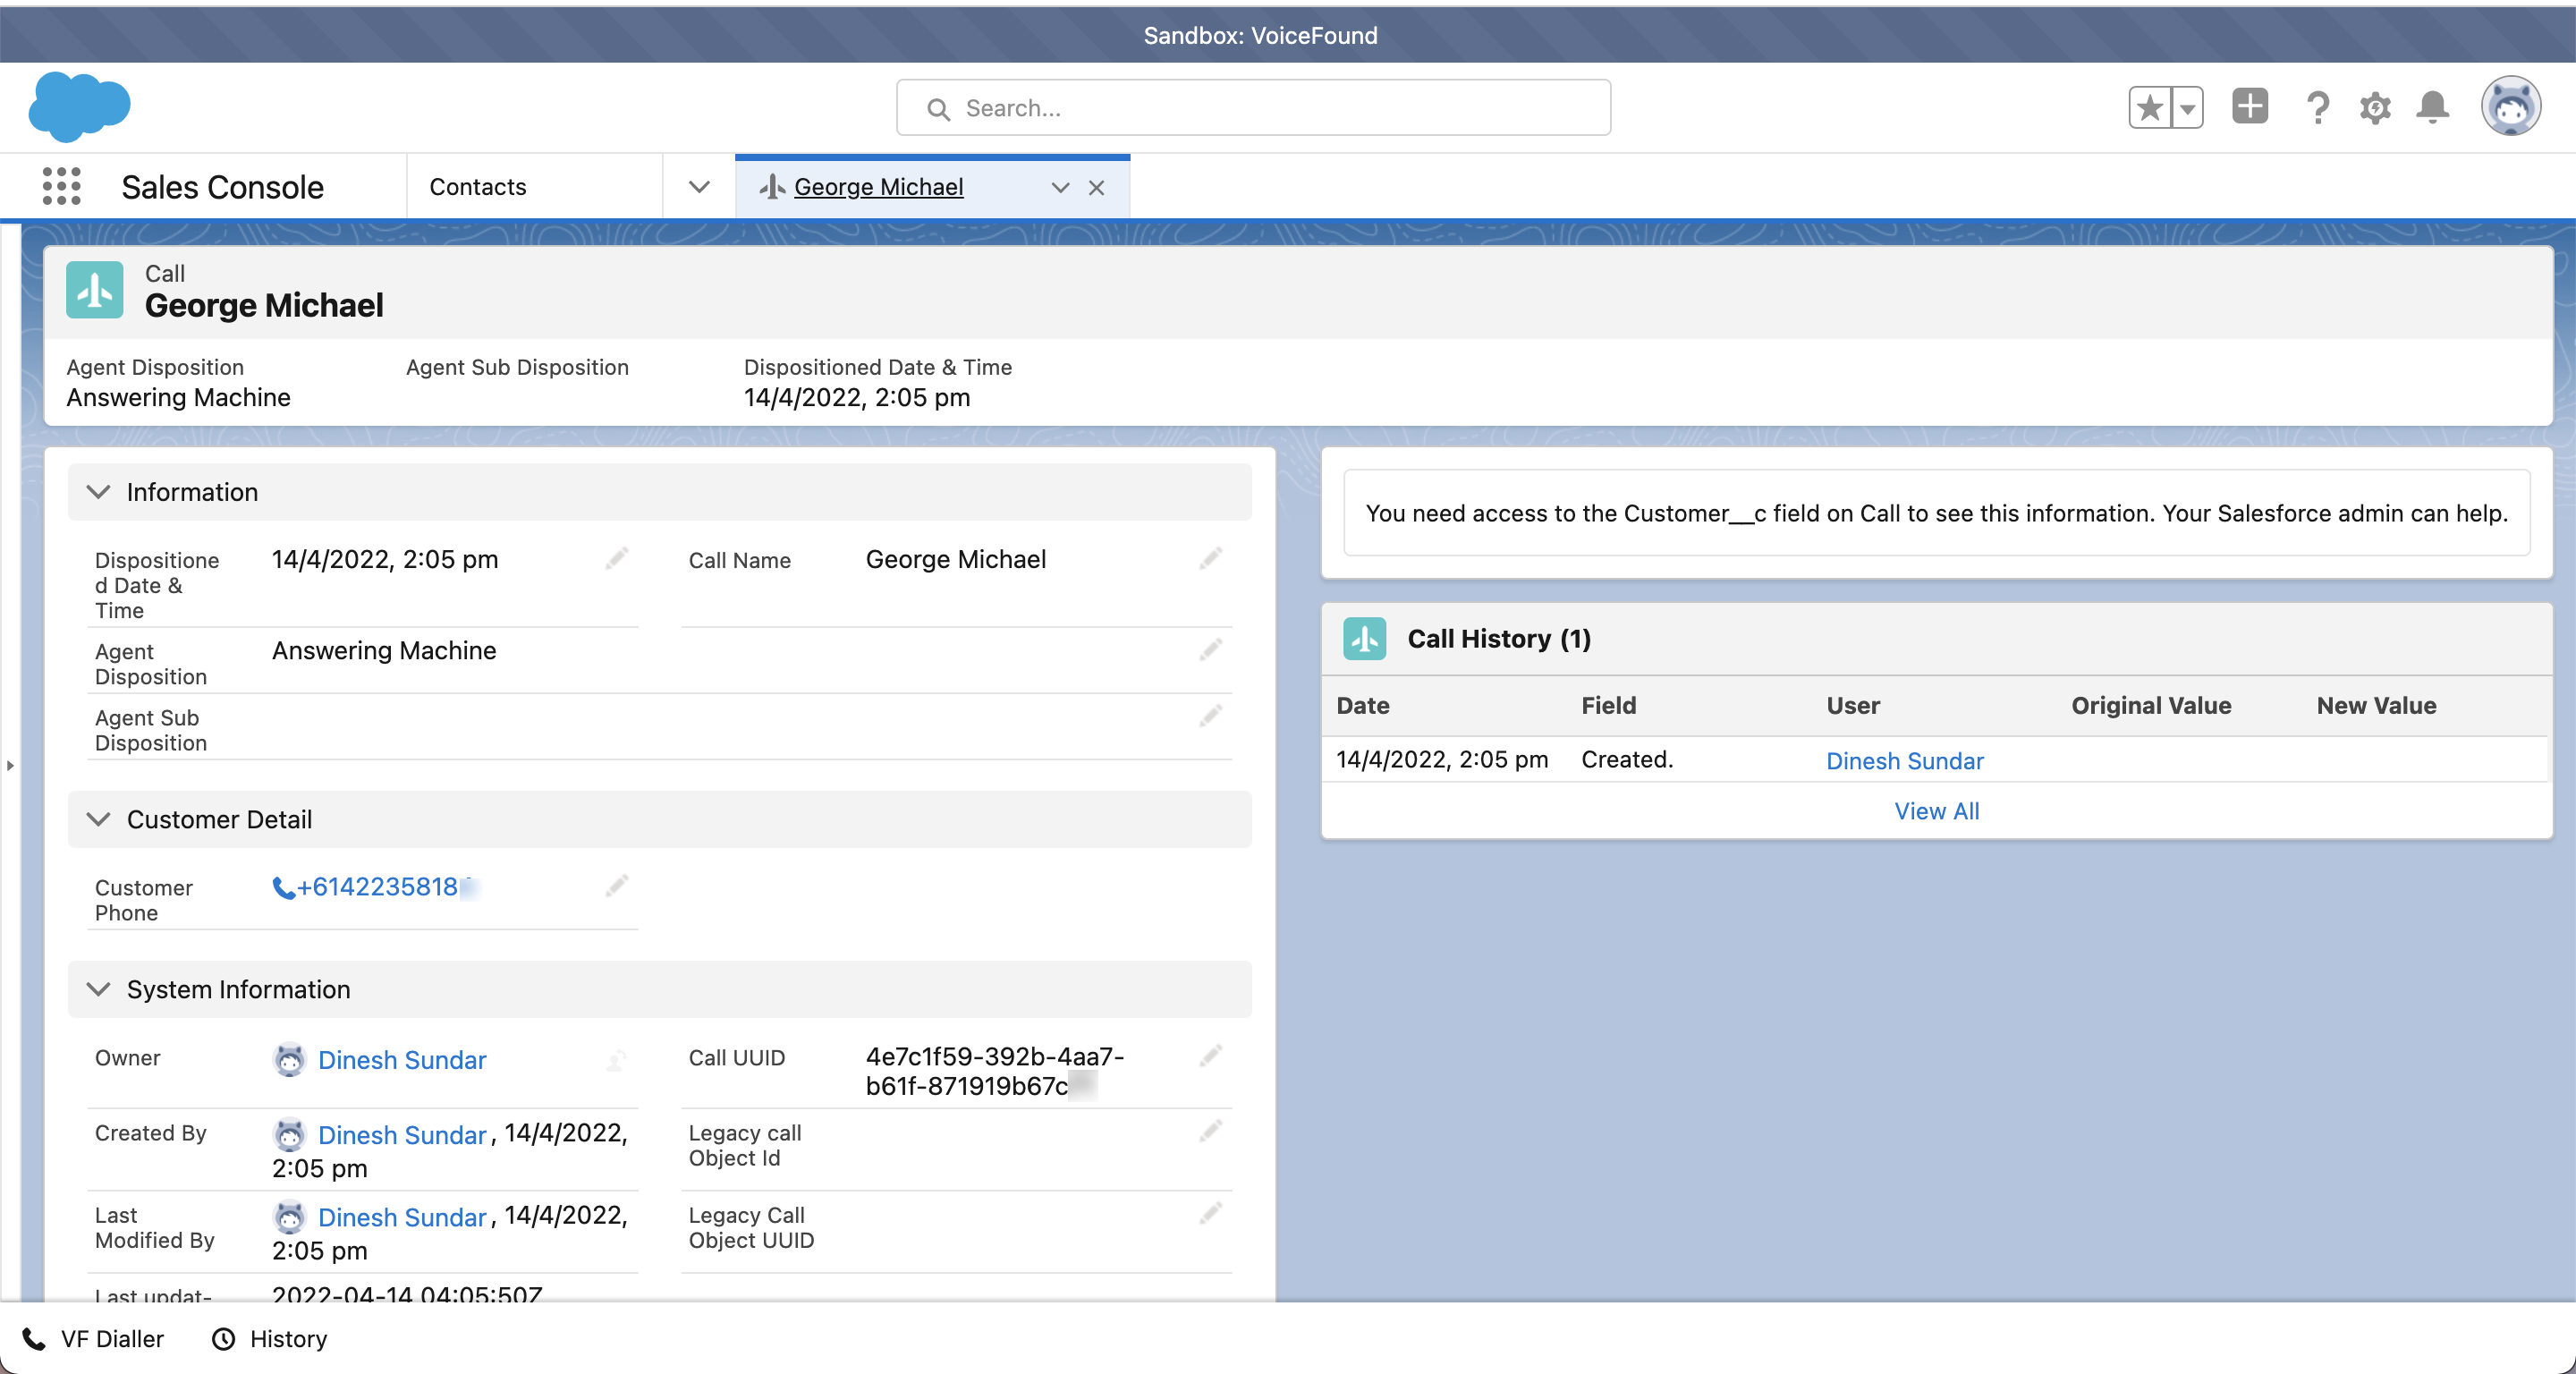
All calls will automatically create a call record in Salesforce at the end of the call after you have submitted a disposition from within the Salesforce Console.
Real time metrics
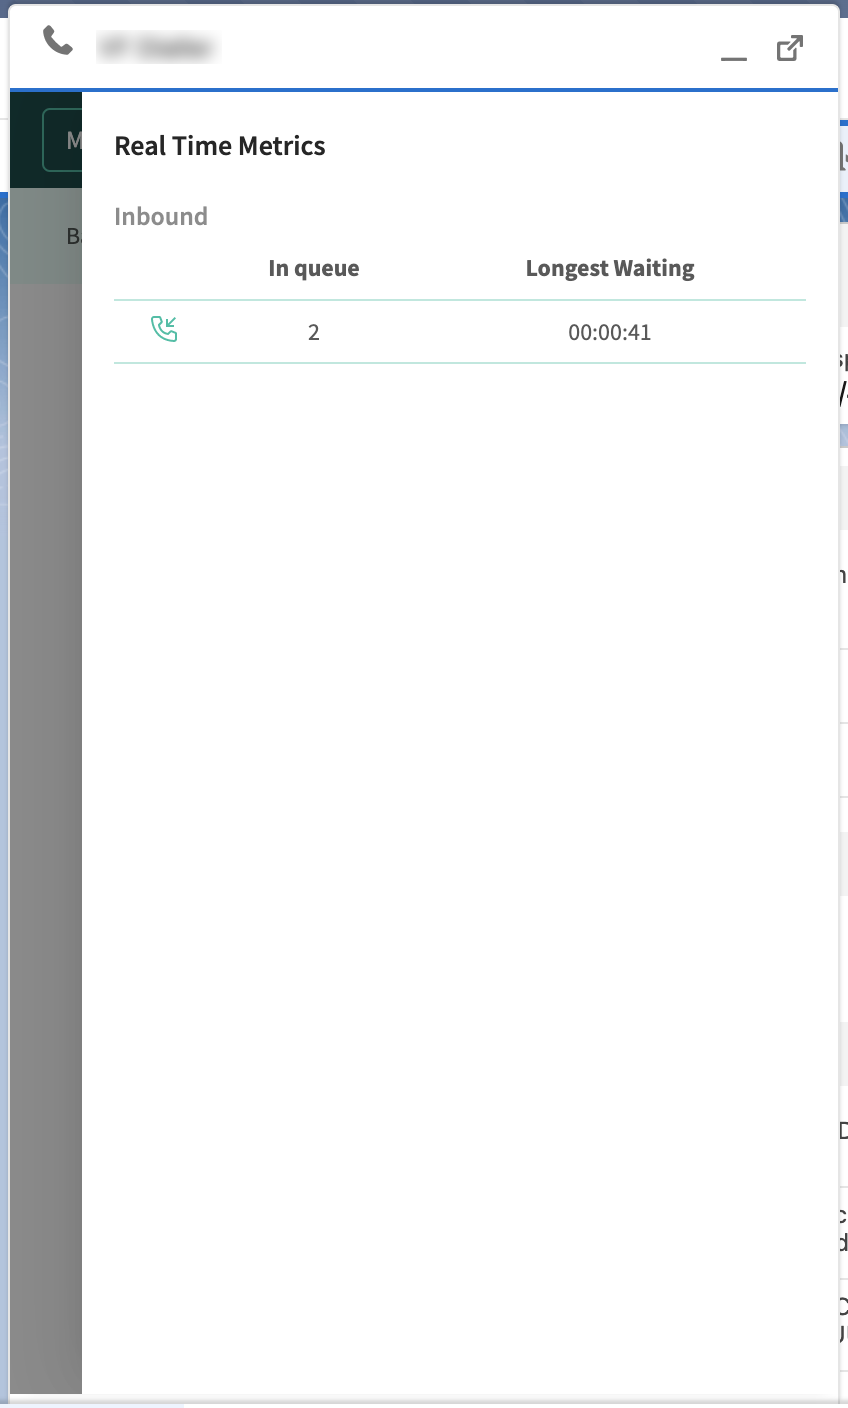
You can view the following real time metrics:
Number of contacts in queue
Longest wait time
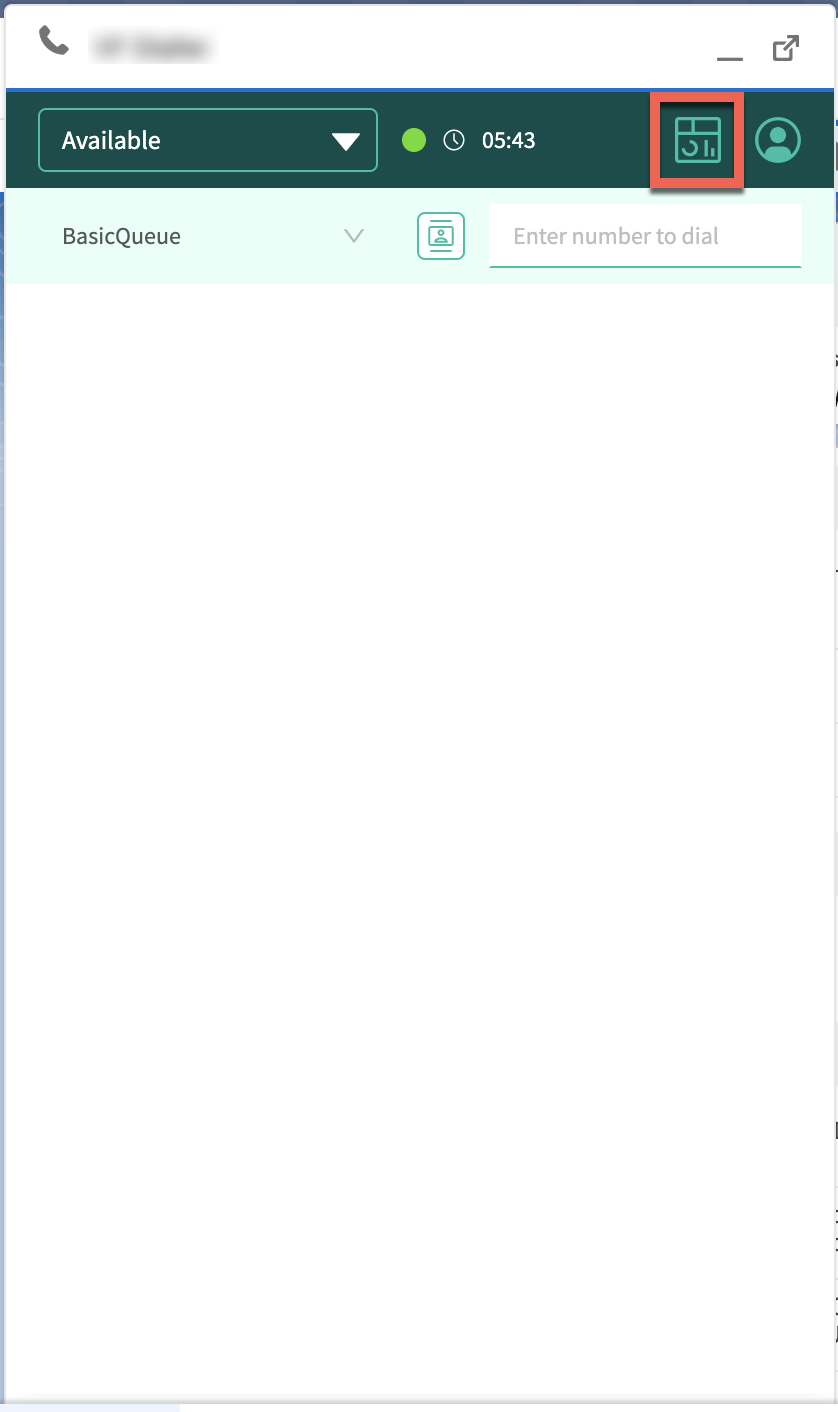
To view real time metrics, click on the Dashboard icon in to the top bar of the Salesforce Console.
Real time metrics will open within a drawer.
Dual ringtone
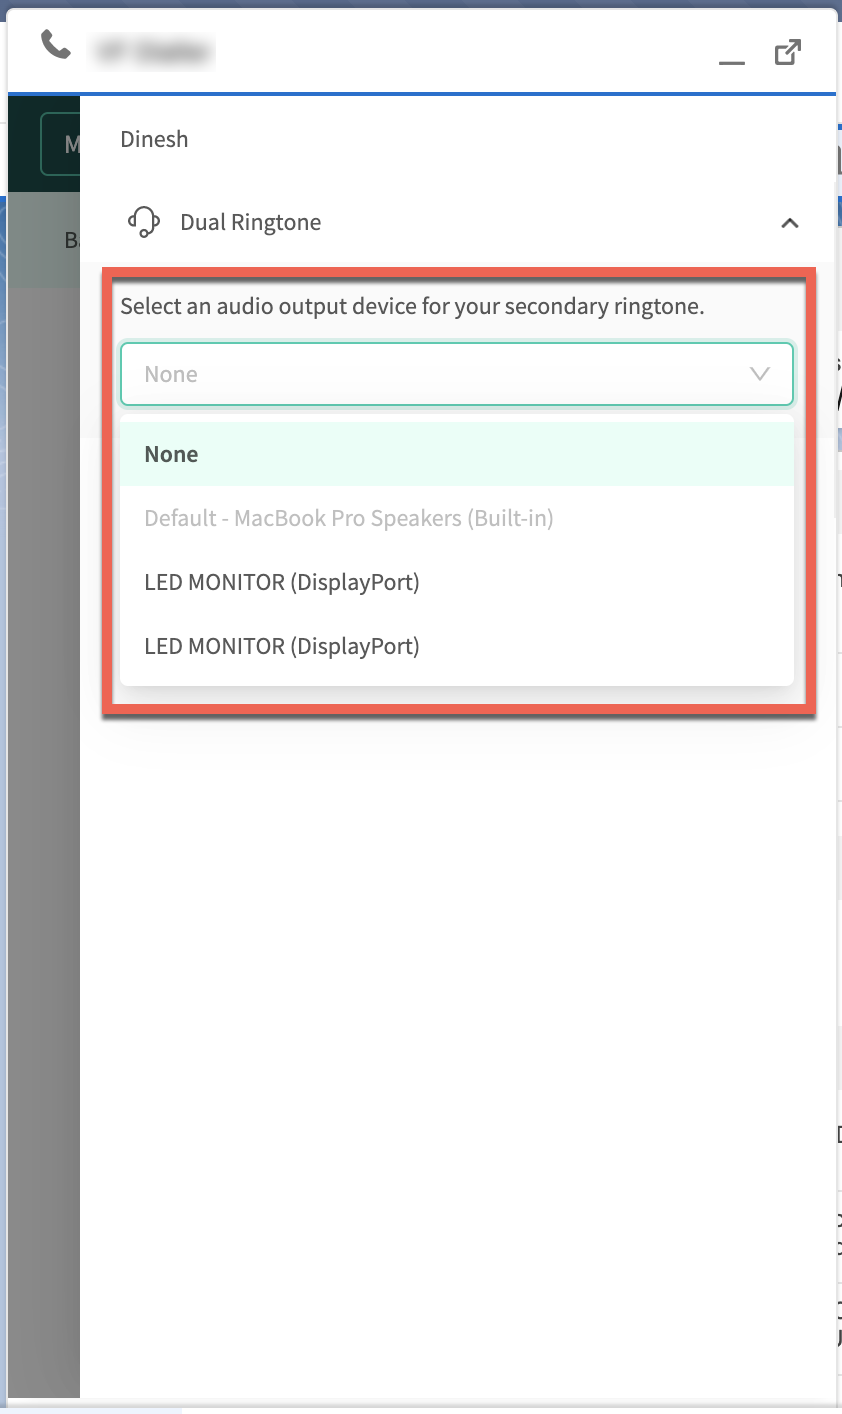
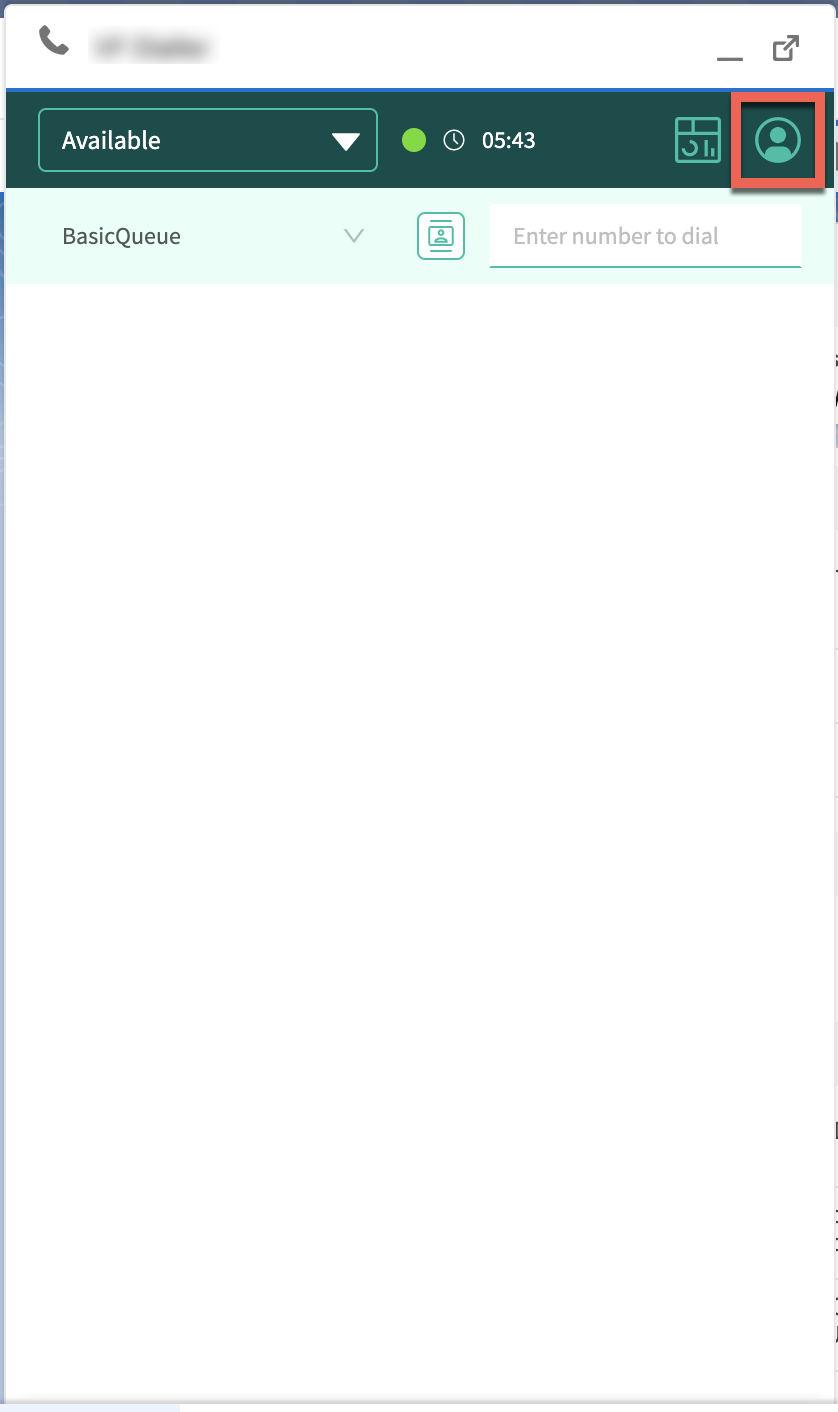
To add an audio device to ask as a secondary ringtone, go to the Account icon in the top bar, and under Dual ringtone select an audio output device.
Select an audio output device.
