v1.0 - Event Closures
Event Closures Introduction
Event closures are date/time specific blackout periods, flexible enough to be applied to multiple campaigns at once, with the added benefit of individual application to Zones within selected campaigns. Event Closures are designed to cater for situations such as:
A national public holiday
A state based public holiday
Emergency zone dialling blackouts (ie, a flood or fire event)
Event closures are the first “Gate” which needs to be opened before dialling can occur for a campaign - this means that, if an Event Closure is active against a campaign, records will not check Operation Hours, Zonesets, Filters or campaign Active status. Records will be blocked before checking any of these subsequent gates.
Note: For more information on dialling gates, please review the “Running your Campaigns” section of the Campaigns section in this guide
How do they work?
Event closures are created at the instance level. A simple configuration process will take you through the configuration of the following items:
An event closure name and description
A date/time schedule configuration
Configuration of applicable campaigns
Configuration of applicable zones
As mentioned above, Event Closures can be applied to specific Zones which you have configured in your instance. You can therefore use Event Closures to close a specific state or zone, for any or all campaigns. To achieve this, Event Closures do not validate against the zone values applied to your records in your campaigns. This is an important point - this method allows you to set zone closures in campaigns for records which may not contain that zone. If the zone the closure is applied to is contained in any record in the applied campaigns, the record will be subject to the Event Closure.
Once an Event Closure has been configured, you can then turn the event on or off quickly, with a slide radio button. This will allow you to start an event closure, and turn it off mid flight in circumstances which require it (for example, an emergency flood event in a particular zone can be set for an entire day, and can easily be turned off with the switch, without the need to edit the event closure’s stop time).
Understanding the gates
It is important to understand how operating hours fit into the multi-gate assessment process, and how they affect your campaign dialling times. Event Closures work in conjunction with the other gates in your system. These gates, in order of execution, are as follows:
Gate 1 - Event Closures
Gate 2 - Operating Hours
Gate 3 - Zone Group Hours
Gate 4 - Filter Conditions
In other words, records will not dial in a campaign if there are active event closures. If no active event closures exist, and the campaign is within operating hours, and the record is within zone group’s hours, and the record passes filter conditions, records will dial. These separate gates are described elsewhere in this training guide, however it is important to understand that Event Closures (Gate 1) is the first gate to pass before any dialling can occur.
Configuration
Configuring a new Event Closure is a matter of following the below simple steps:
Step 1 - Navigate to the Event Closures screen
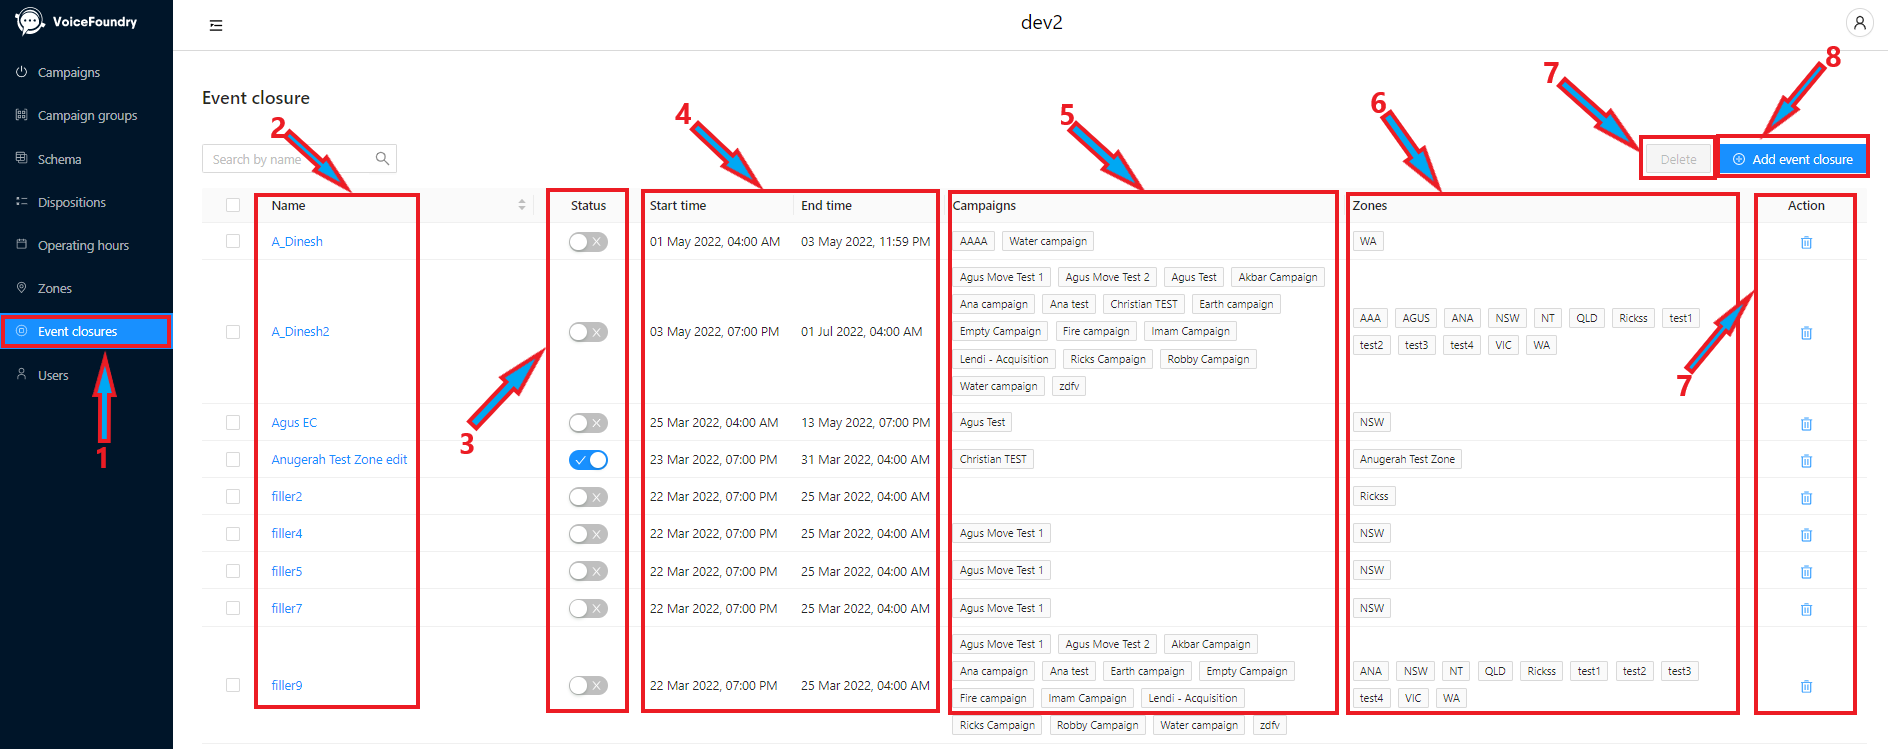
Click the “Event Closures” button in the navigation ribbon (1). You will be taken to the Event Closures screen, which will display all of your event closures in a list. This screen will display
Your event closure name (2)
Status (3)
Start and End Date/Time (4)
Applied Campaigns (5)
Applied Zones (6)
Delete options (7).
You will also be able to create a new event closure (8).
Step 2 - Add New Event Closure
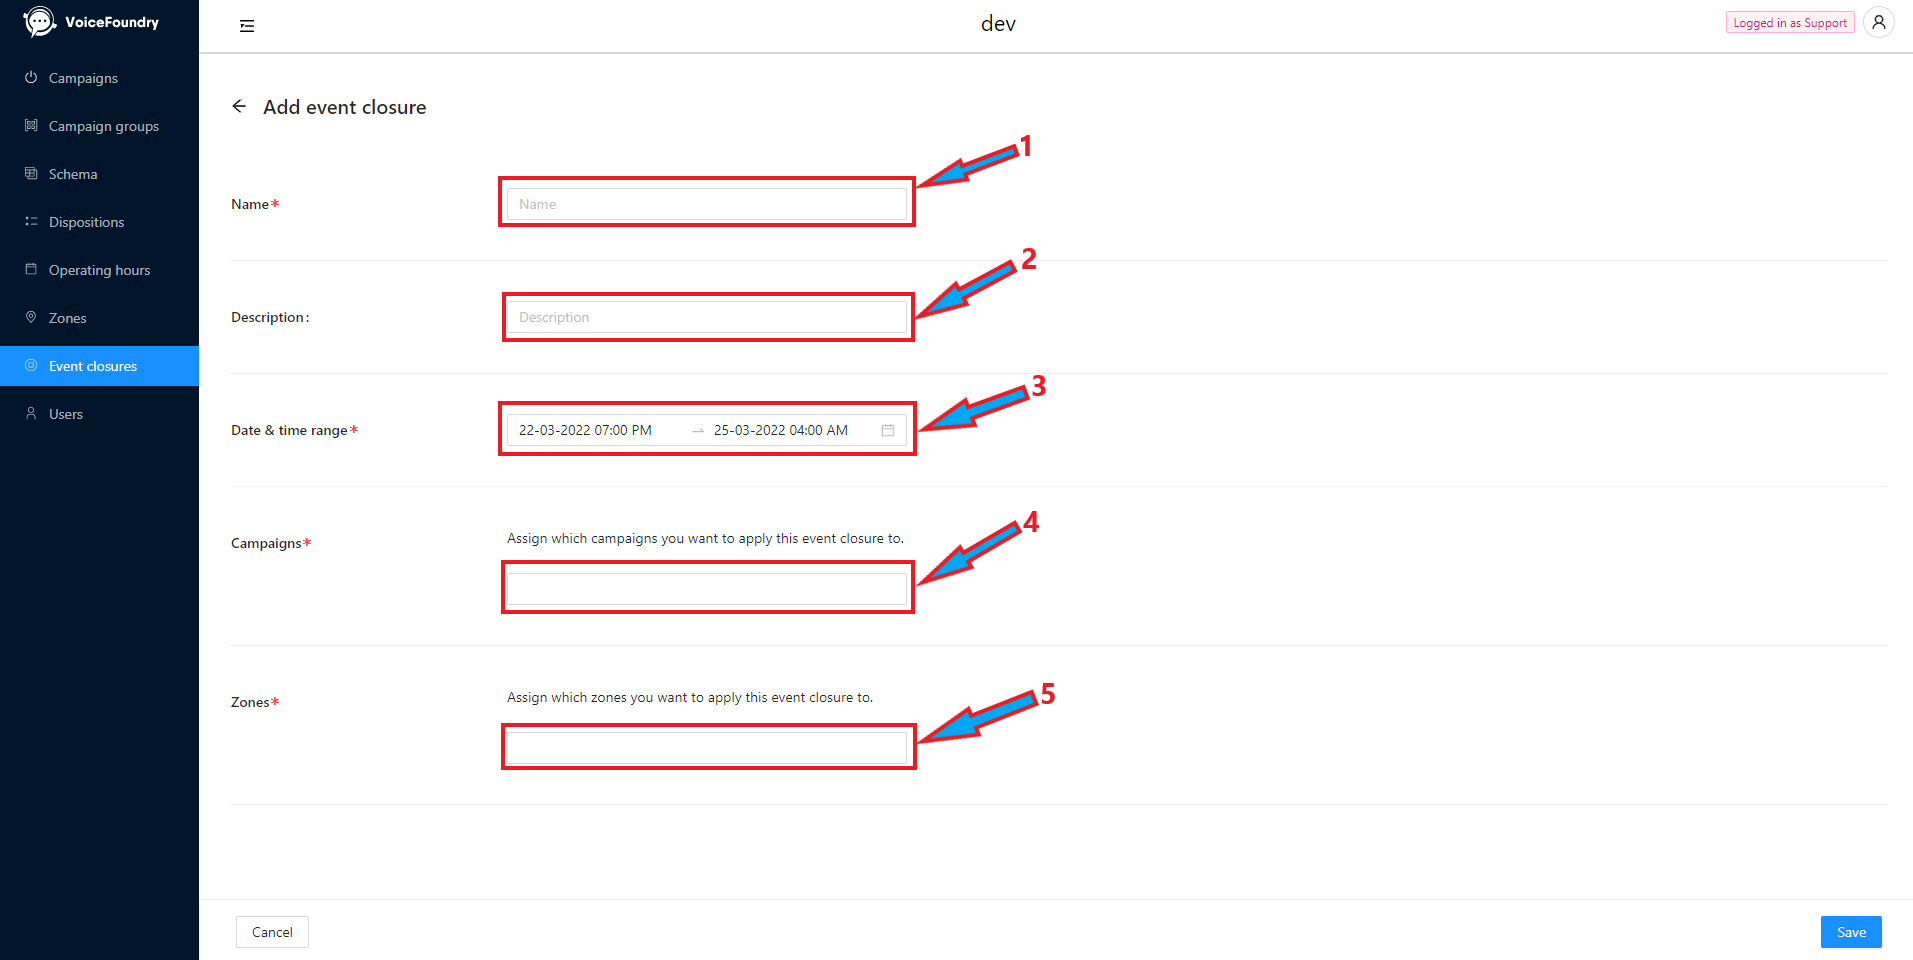
Click on the “Add Event Closure” button. The following screen will appear, with the following sections:
Event Closure Name
Description
Date and Time Range
Campaigns
Zones
Step 3 - Assign a name and description
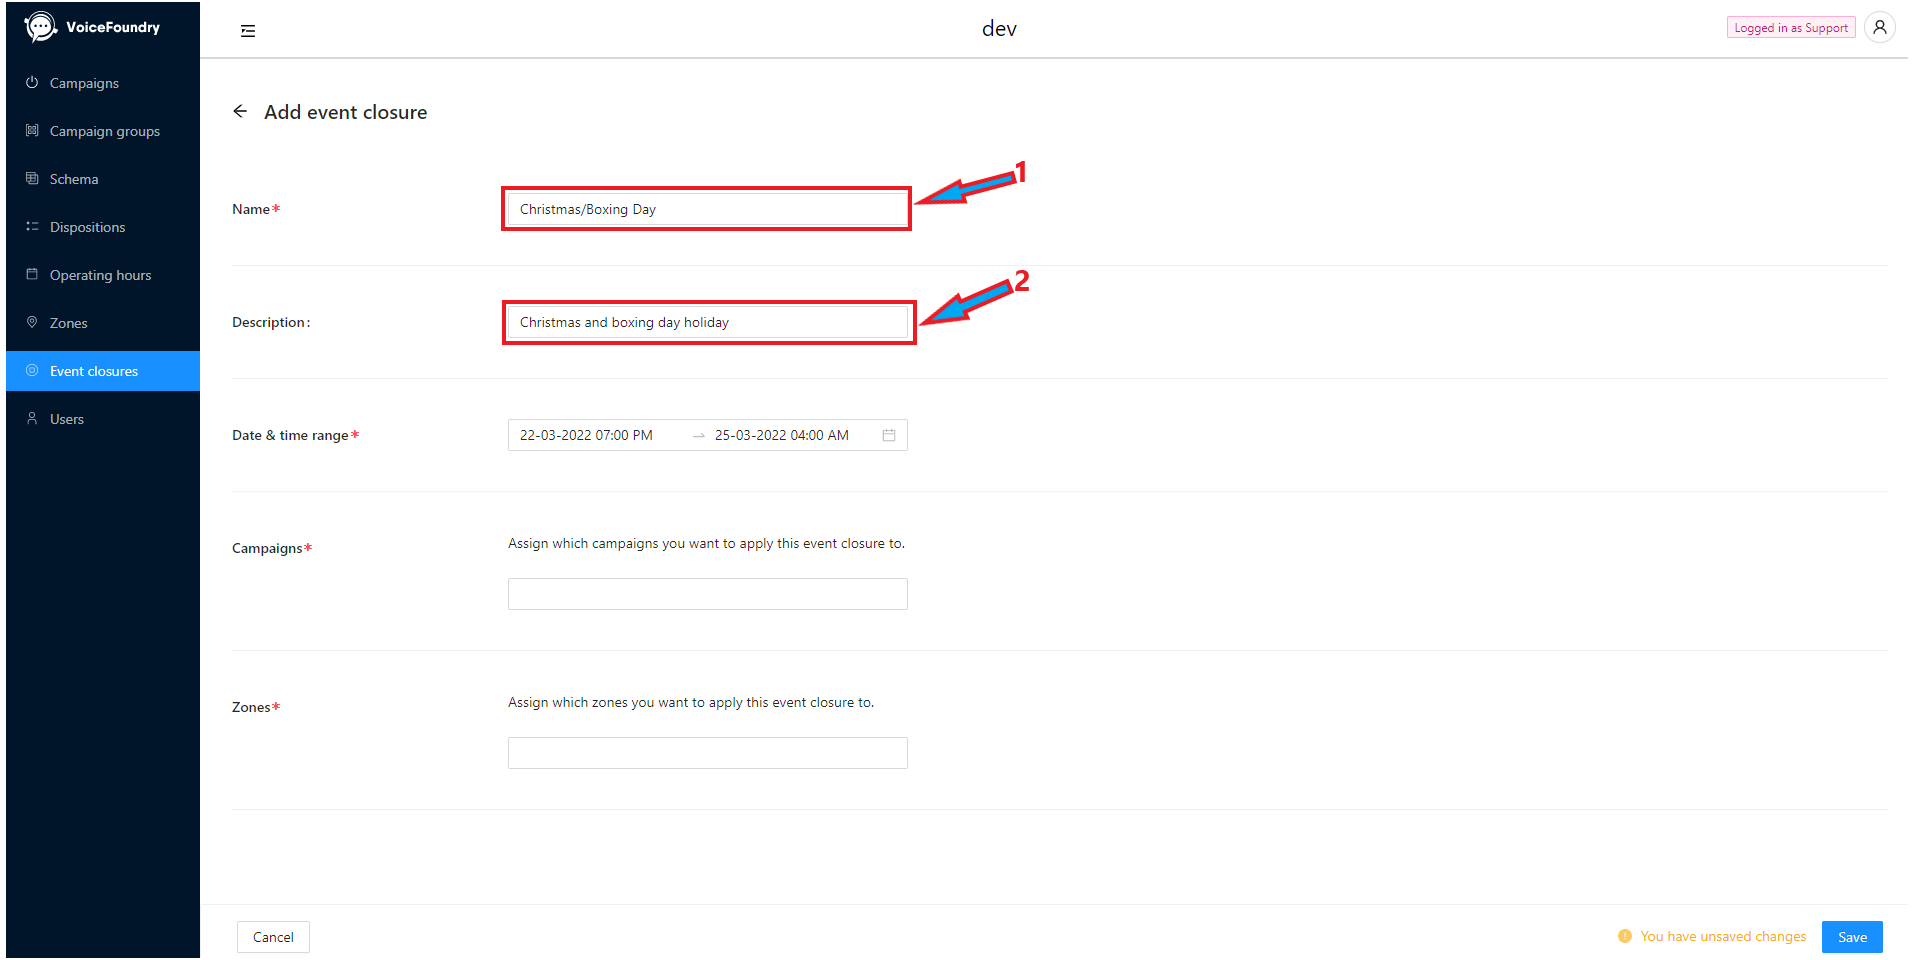
Assign a name (1) and description (2) that will help you to identify this event closure in a list
Step 4 - Set your date and time range
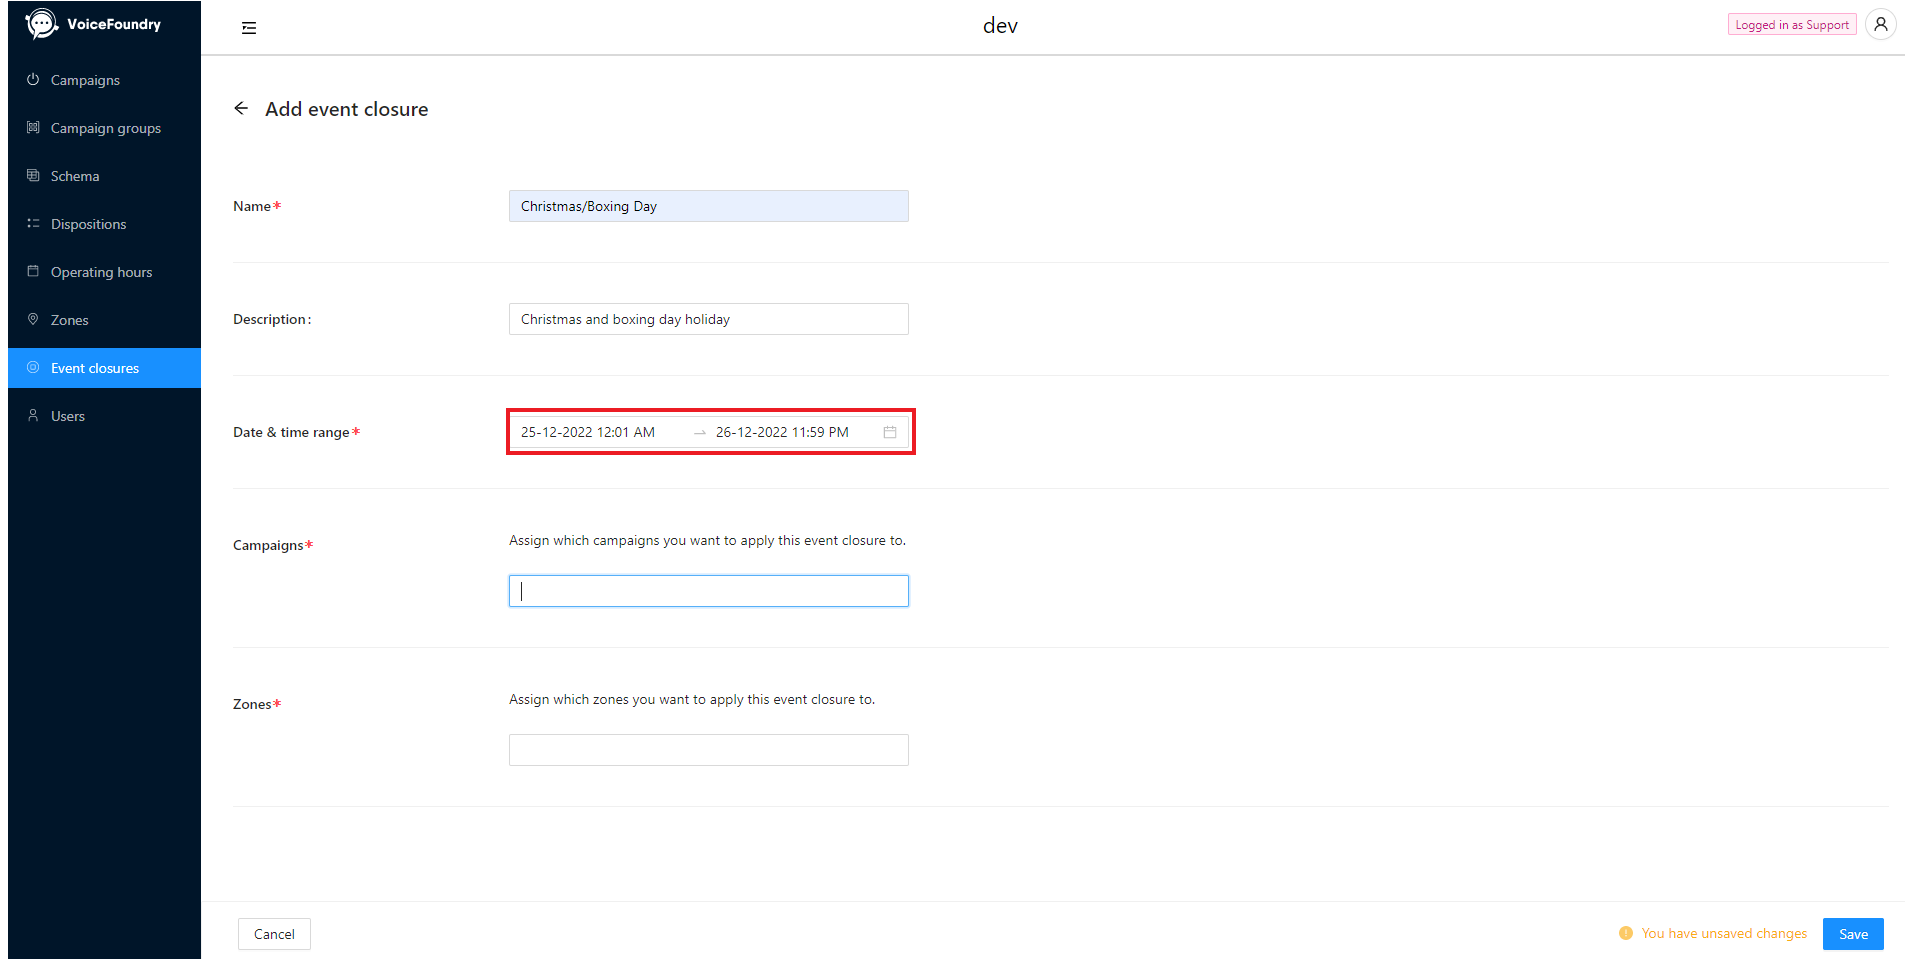
Click on the Date & time range field, and set the start and end date/times for the event
Step 5 - Set your assigned campaigns
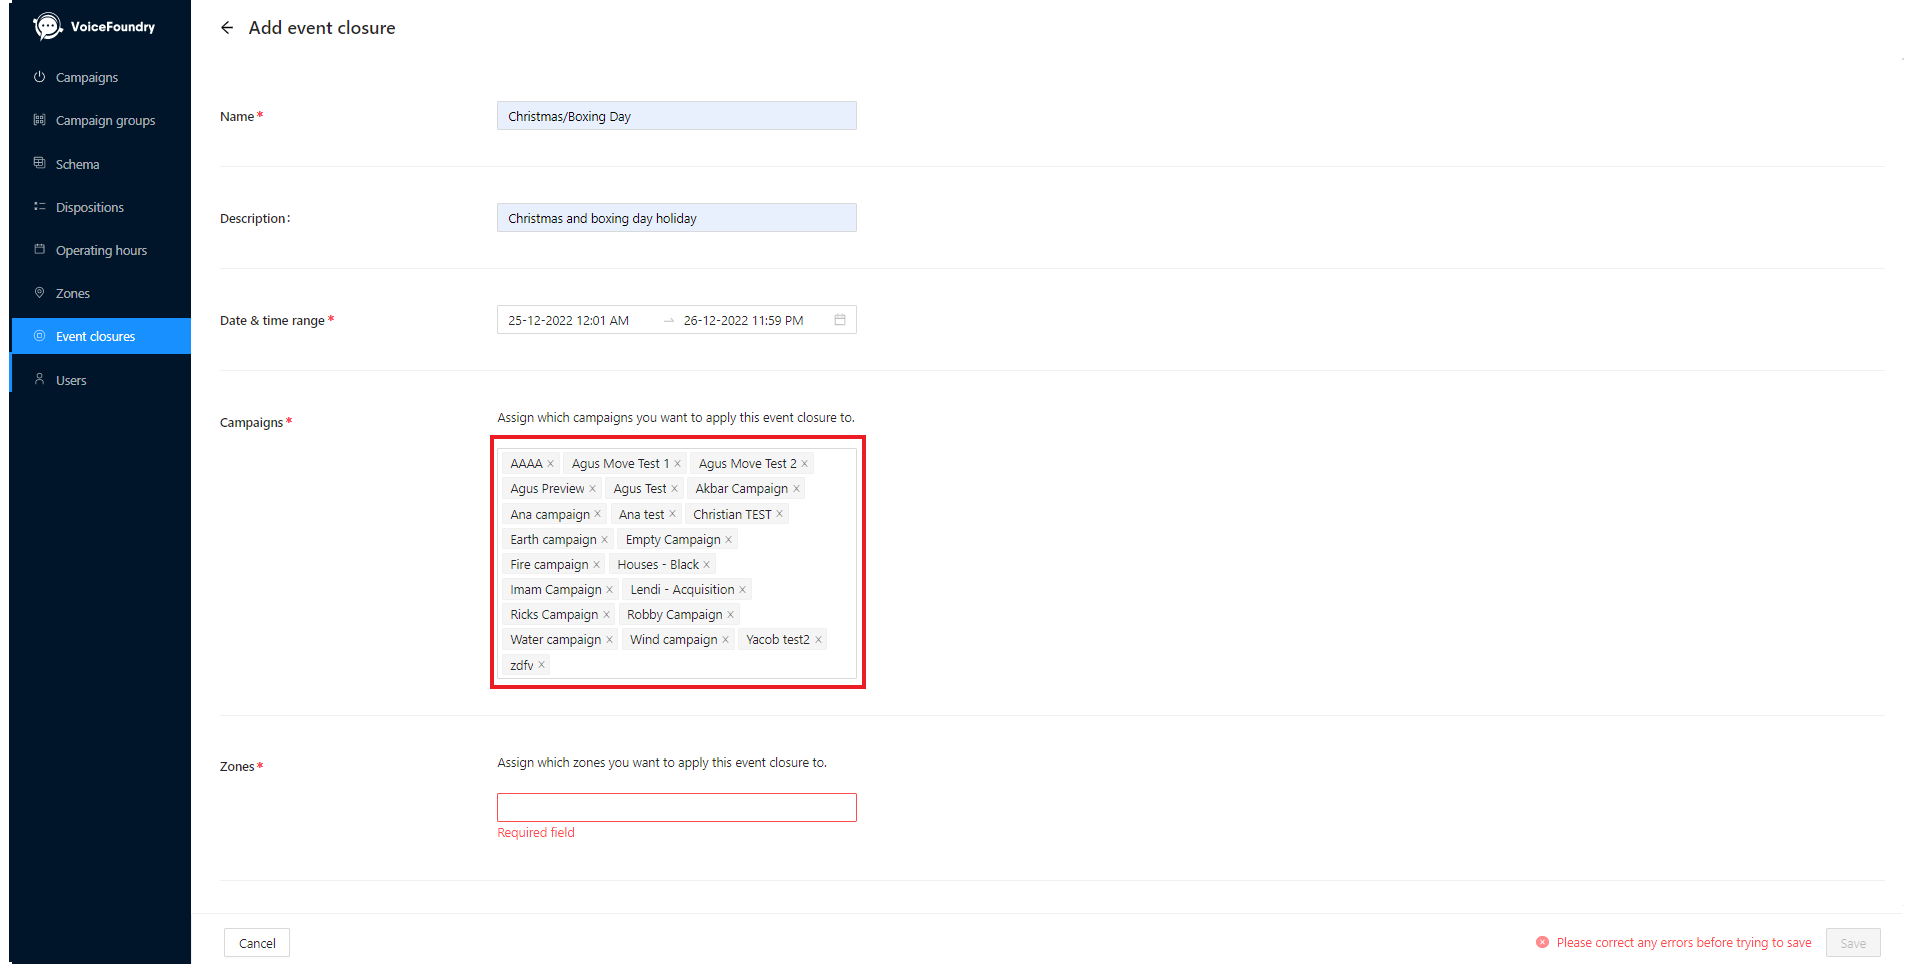
Click on the “Campaigns” section. You will be presented with a campaign picker field, which allows you to select a single, multiple, or all campaigns easily. In the below example, I have chosen all campaigns:
Step 6 - Assign your zones
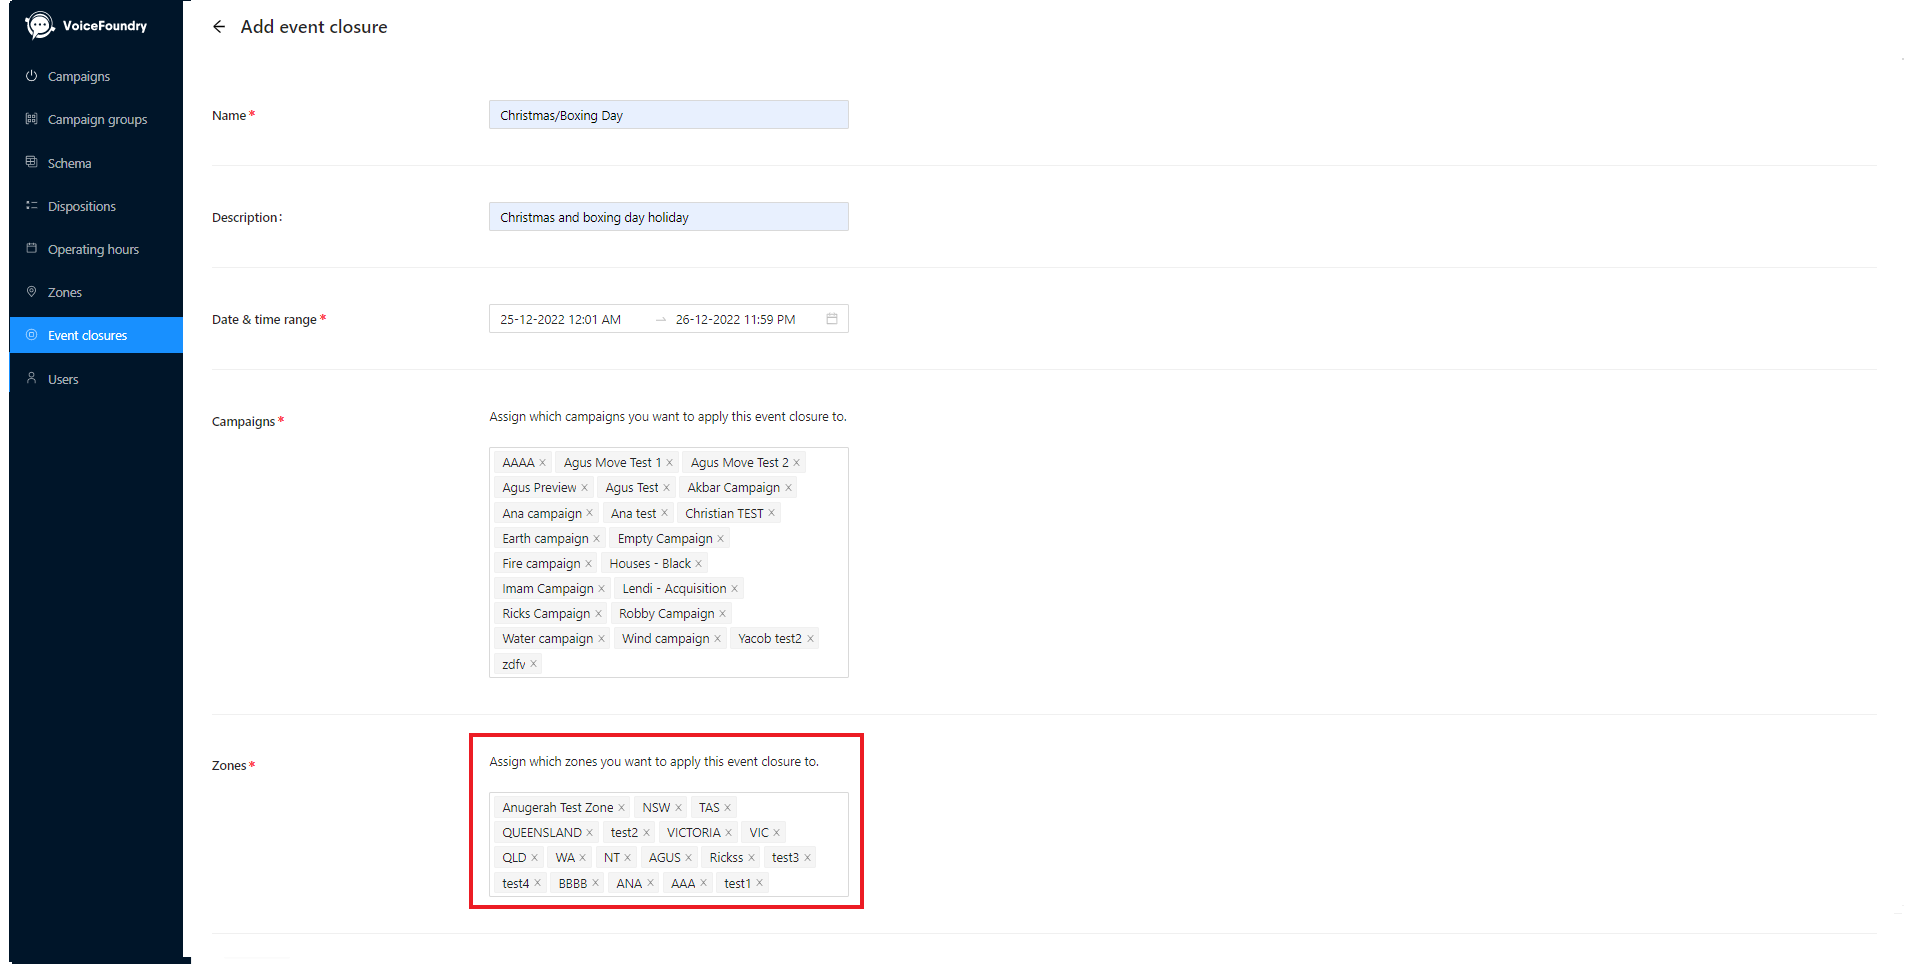
You can assign single, multiple, or all zones. As this is the Christmas/Boxing Day holiday, I will assign all zones to this event
Step 7 - Save your event
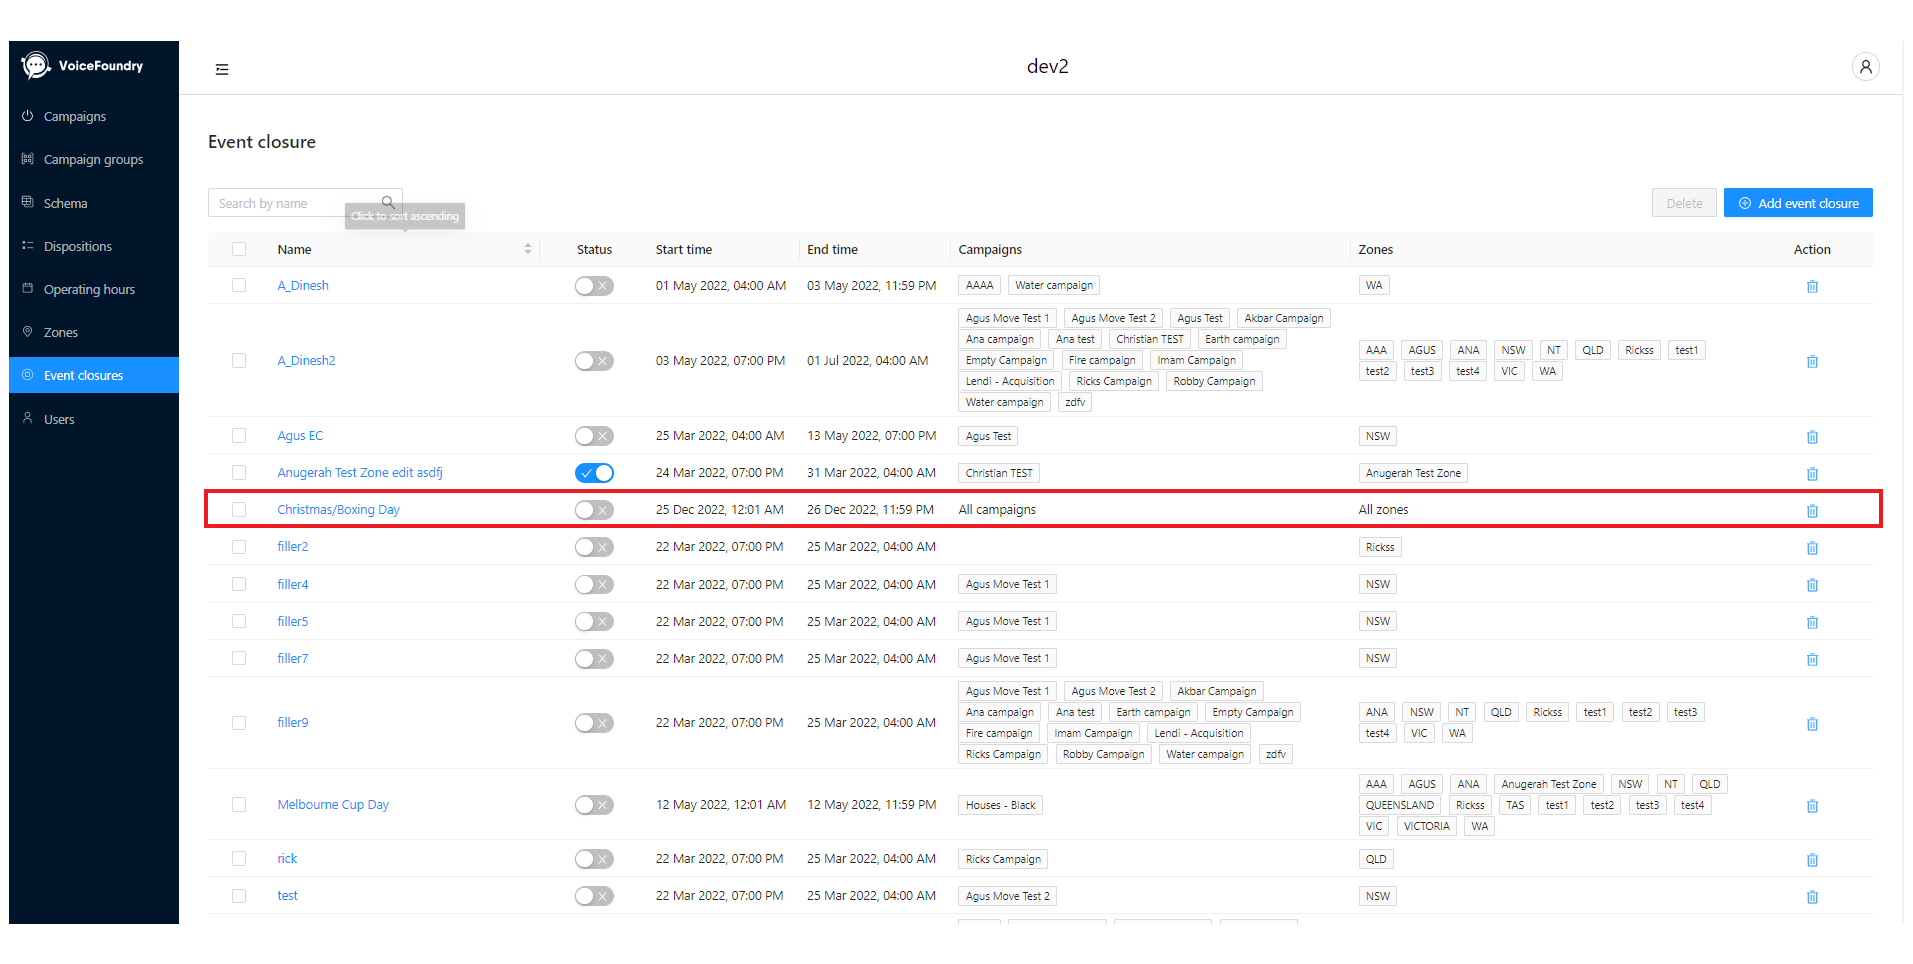
After you save your event, it will appear in the Event Closure list
Step 8 - Activate your event
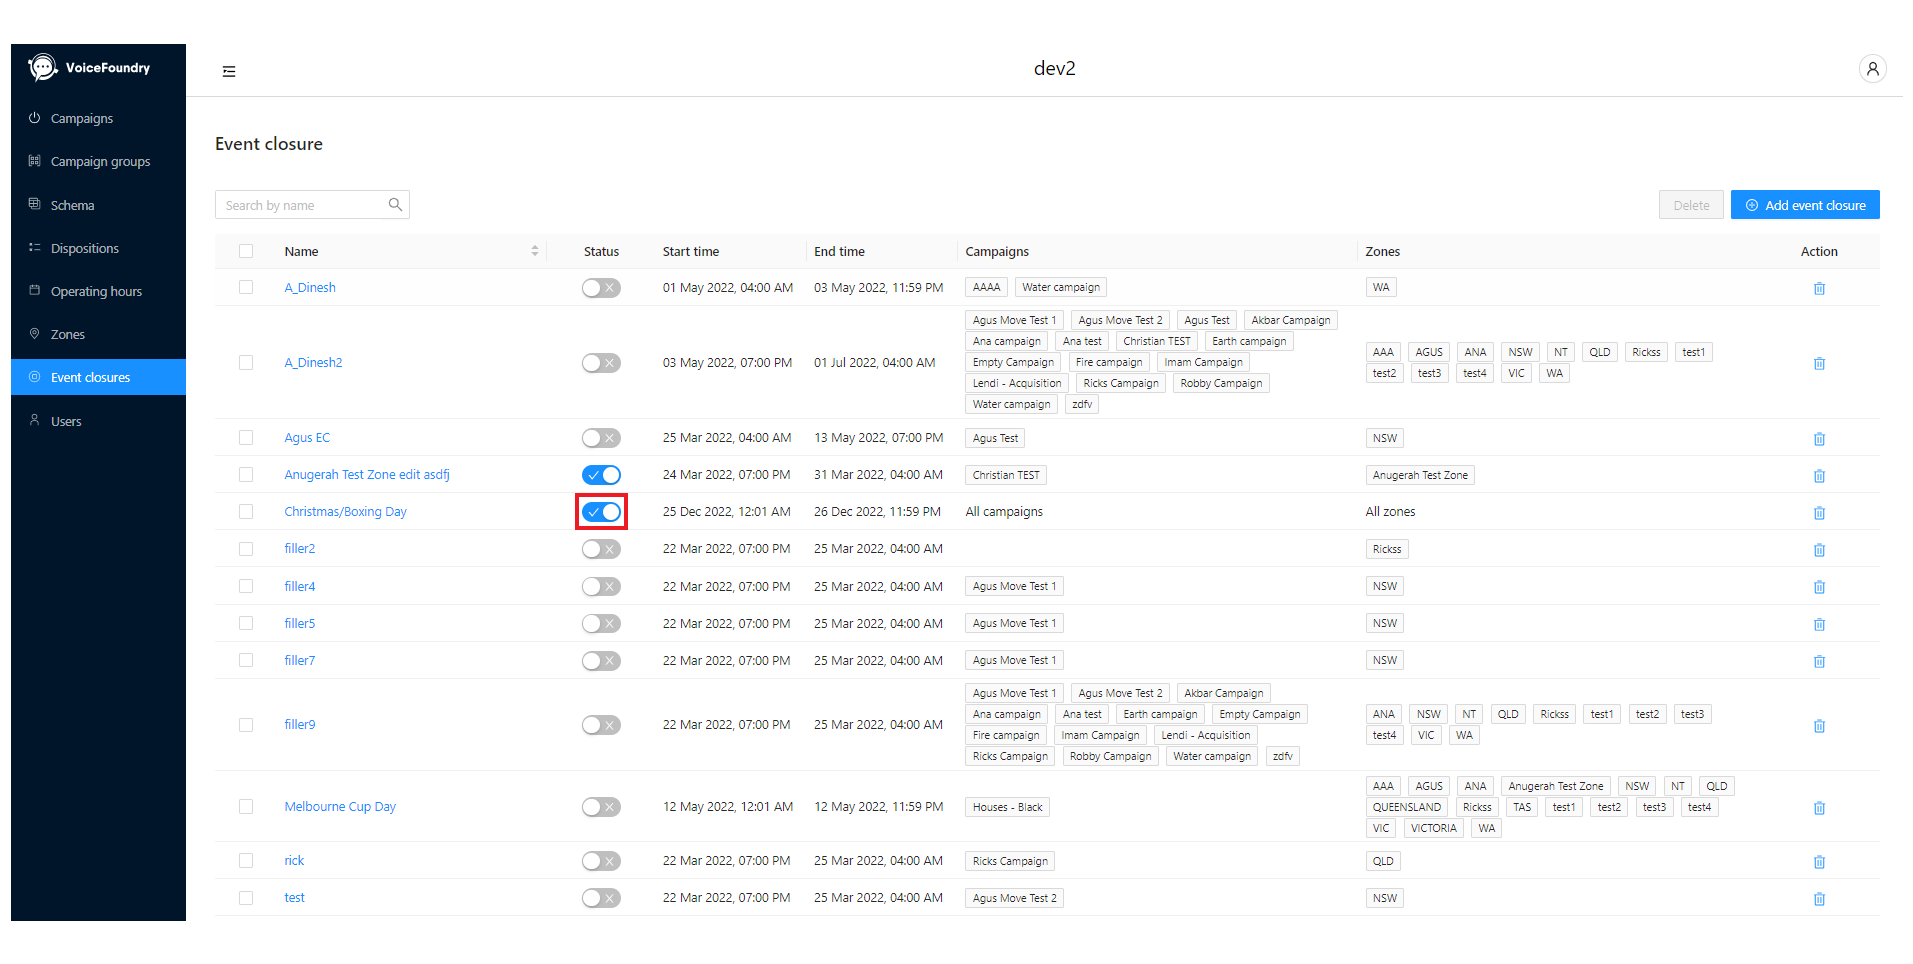
By clicking the “Status” slider, you can turn your event on or off. Events save in the OFF state. Turn this on as per below to activate your event
Editing/Deleting Event
The edit and delete process for events is very similar to the creation process.
Deleting an Event
To delete a single event, simply click the Delete button (7) against the event. To delete multiple events, select them using the radio buttons, and click the Delete button (7)

Edit an event
To edit an event, click the event’s name hyperlink, make your edits to the event, and press save.
Conclusion
Now that your event is active, it will stop dialling for the selected zones, for the selected campaigns, at the configured time. It will stop any records from being dialled where the zone in the event matches the zone in the record, at the specified time
