v1.0 - Campaign Groups
Campaign Group Introduction
Now that we have setup our campaigns, we need a way to assign these campaigns to agents. This is where Campaign Groups come into play. Campaign Groups allow you to take one, or many, campaigns, prioritise them, set weightings against them, and assign them to your agents.
Campaign Groups are created in the OCM Administration portal, and assigned to agents in the VoiceFoundry Agent Desktop. A visual representation of this is below:
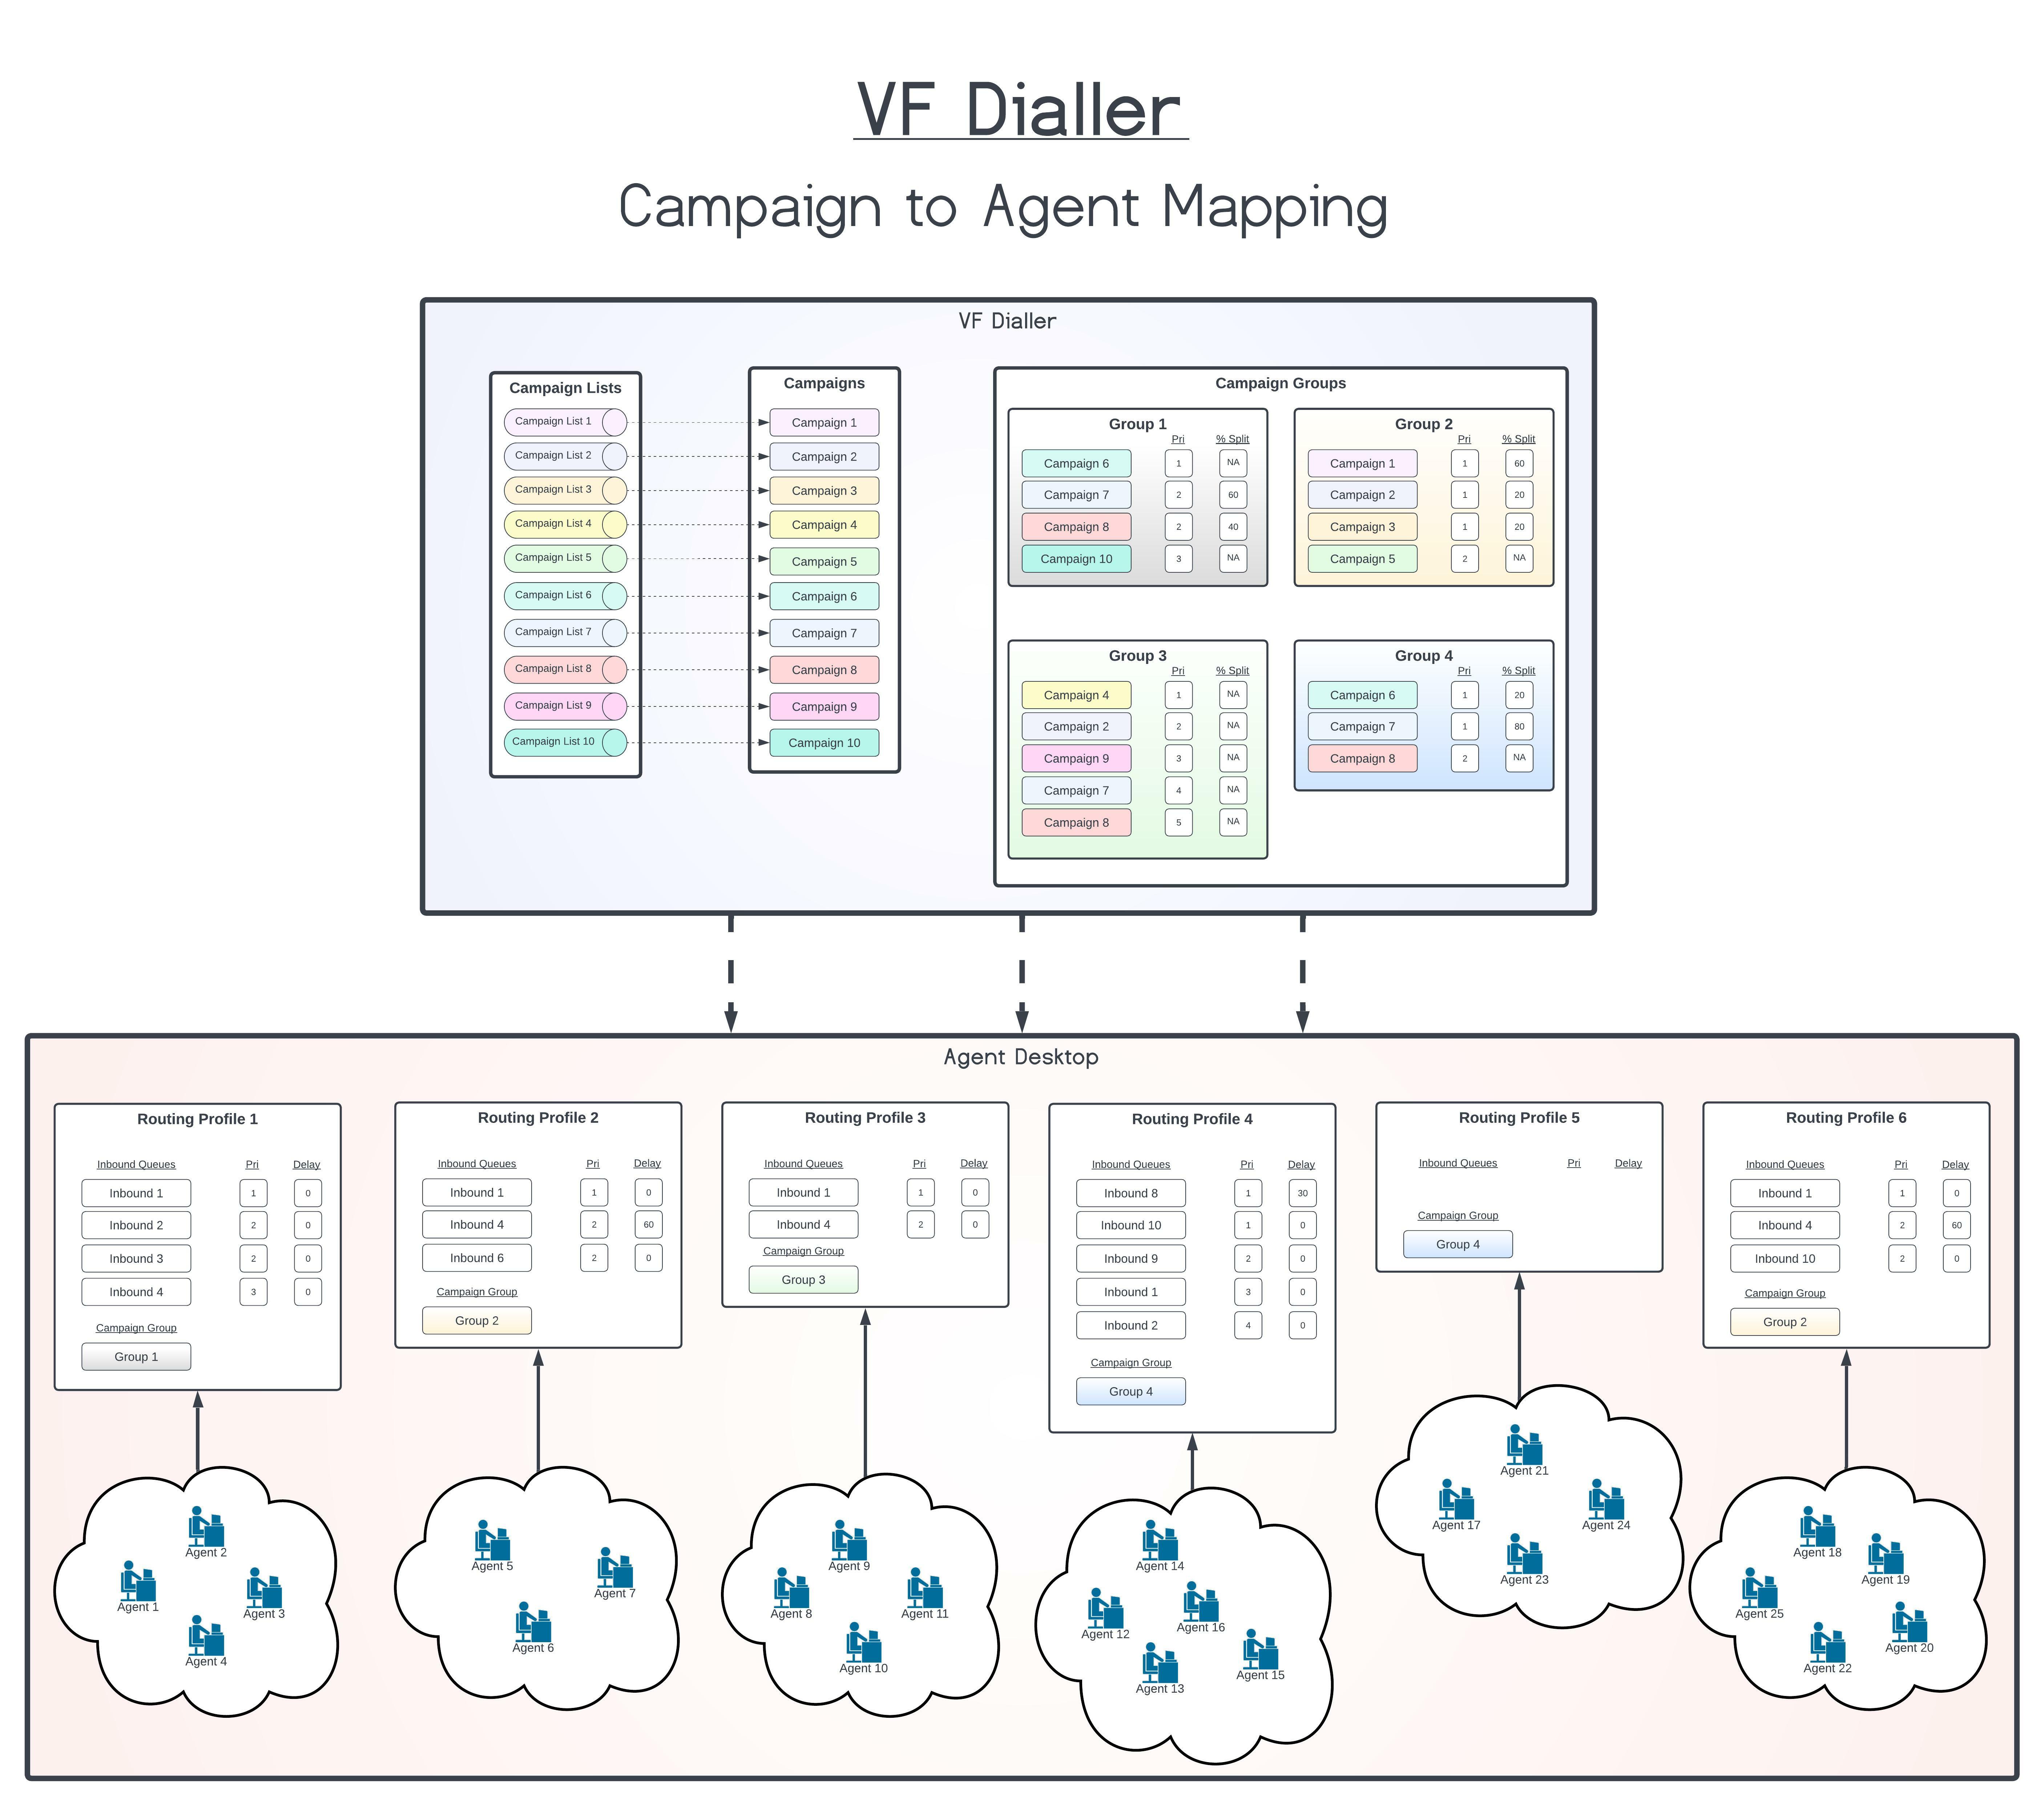
Lets now take a closer look at Campaign Groups, and how they function.
Priorities and % Allocation
It’s important to understand how Priorities, and % Allocation works, and how they interact, before we continue.
The idea of these concepts is that you should be able to assign agents multiple campaigns, but when we assign multiple campaigns to an agent, how do we prioritise them between each other? What do we do if two campaigns have the same priority? How do we therefore route records from campaigns, at the same priority, to an agent? This is where priorities and % allocation comes in.
Priority
Priority determines the priority of records from a certain campaign, being delivered to agents assigned to the campaign group. You assign priorities numerically. Let’s consider the following example:
Campaign 1 = Priority 1
Campaign 2 = Priority 2
In this example, the agent would be routed calls from Campaign 1 first, until all records in Campaign 1 have been exhausted. After that point, agents will then be routed calls from Campaign 2.
% Allocation
% Allocation determines the split of calls to be routed to an agent for two (or more) campaigns with the same priority. % Allocation will split records on average (over a period of time) so that you can have 2 campaigns at the same priority, but still ensure you are dialling records from both campaigns at the assigned priority. Lets look at this example:
Campaign 1 = Priority 1, 60%
Campaign 2 = Priority 1, 40%
Campaign 3 = Priority 2, 100%
In the above scenario, when an agent becomes available to take calls, the system will check that there are records in Campaign 1 and 2. Assuming there are records available to dial, the dialler will, for the next 10 calls, send 6 from Campaign 1, and 4 from Campaign 2, until there are no longer any records in either campaign. If Campaign 1 were to run out of records before Campaign 2, the dialler would just dial records from Campaign 2, until Campaign 2 is exhausted. After the first priority campaigns have been exhausted of records, the dialler will then send agents records from Campaign 3 only.
You can add multiple campaigns and priorities in a campaign group, and make these as complex or as simple as you like. You can also add the same campaign to multiple campaign groups.
Configuration
Step 1 - Navigate to Campaign Groups
As mentioned, Campaign Groups are firstly configured in the OCM Administration portal. To get to this section, click on the “Campaign Groups” item on the navigation ribbon (1), and “Add Campaign Group” (2)

Note: You can also edit any campaign group by clicking the hyperlink assigned to the group name.
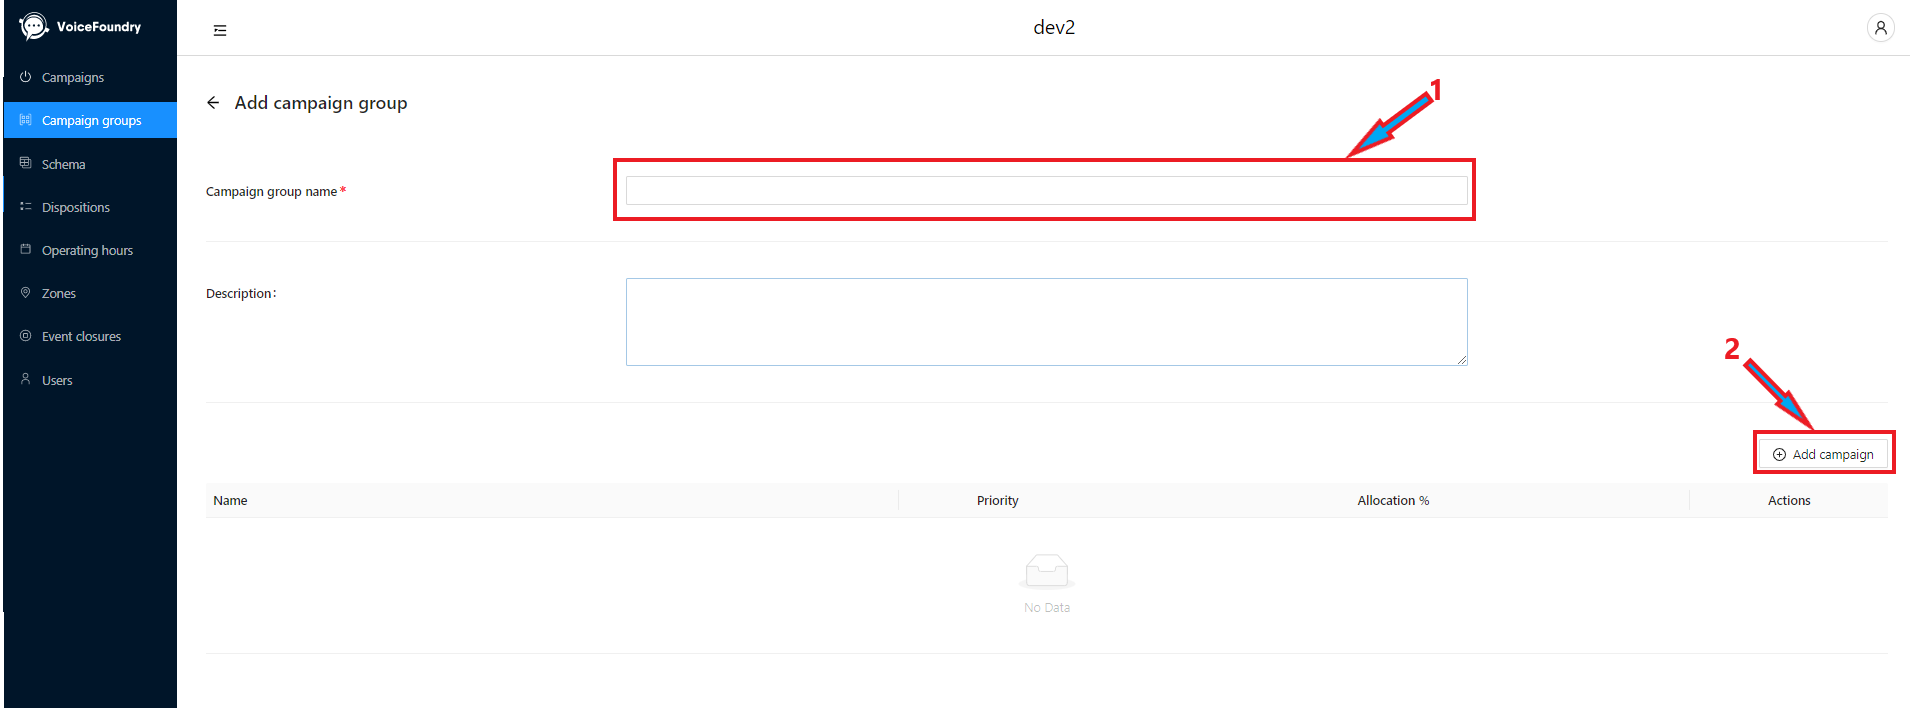
Step 2 - Create and name your new campaign group
After clicking the Add Campaign Group button, you will be presented with options for naming your campaign group (1) and adding campaigns to this group (2). You will only be able to add already created campaigns to the group:
Step 3 - Add a campaign to your group
To begin configuration, click the “Add Campaign” button, which will pop up the campaign selection modal:
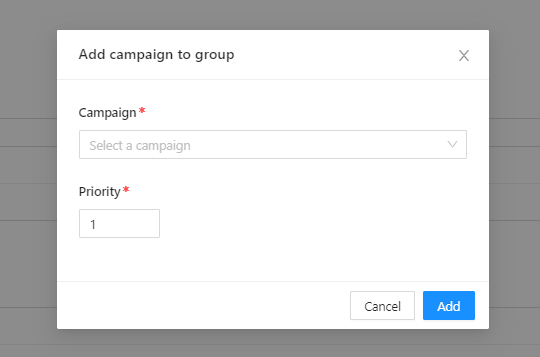
Select your campaign, and the priority of the campaign you would are adding, and then click “Add”:
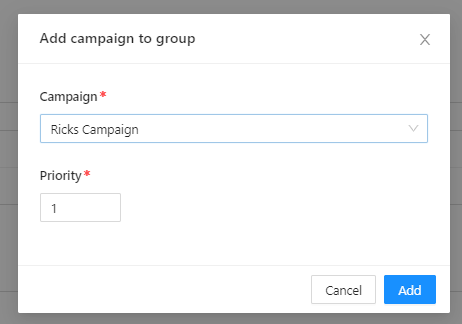
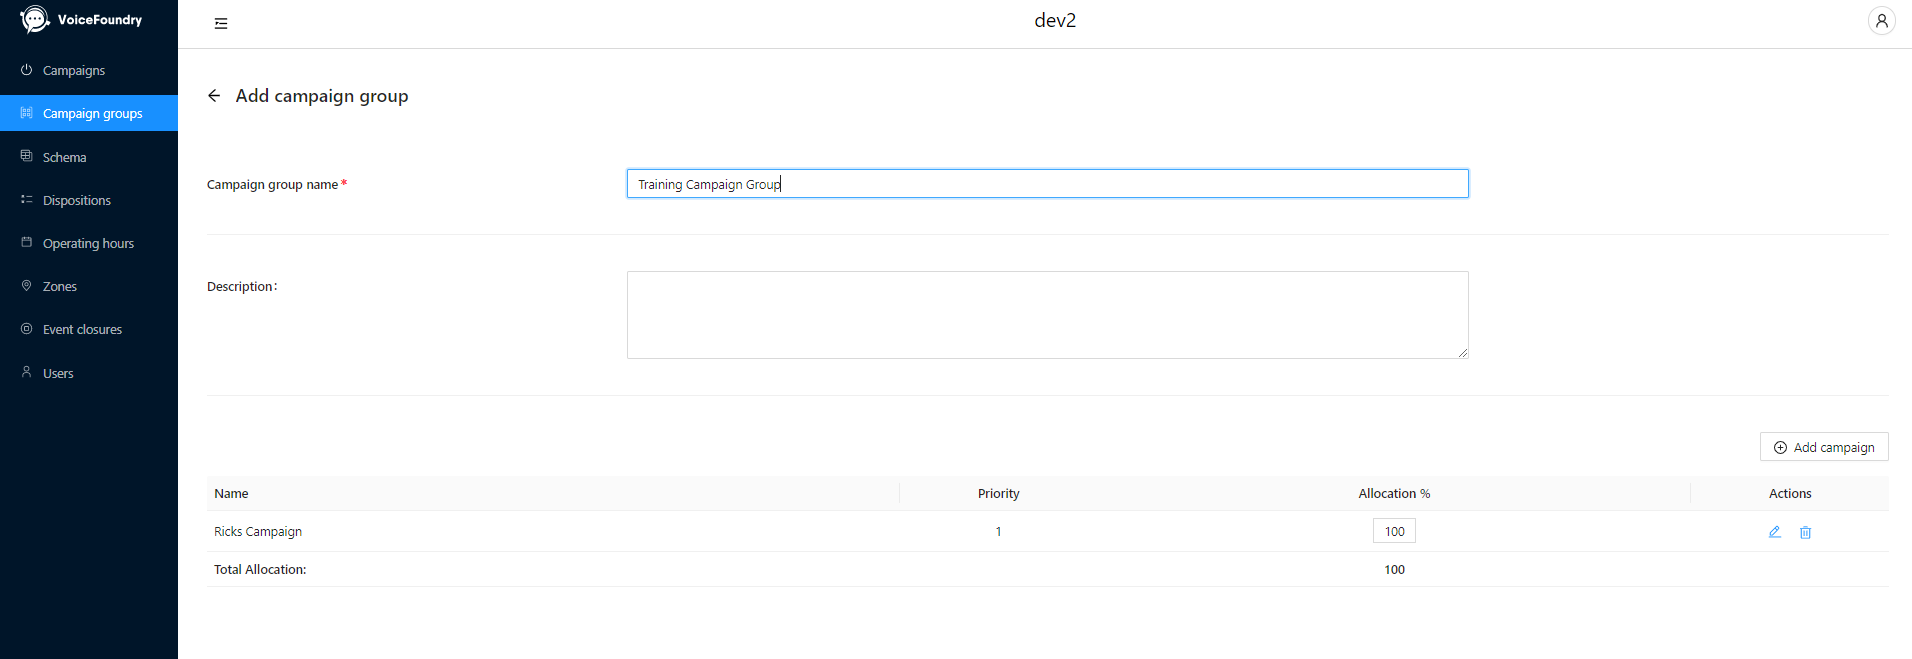
After clicking “Add”, your campaign will appear on the list below:
Step 4 - Add more campaigns to your group (if required)
Repeat step 3 until you have all campaigns you require assigned to your group. Perform this step if you require more than 1 campaign added to your group.
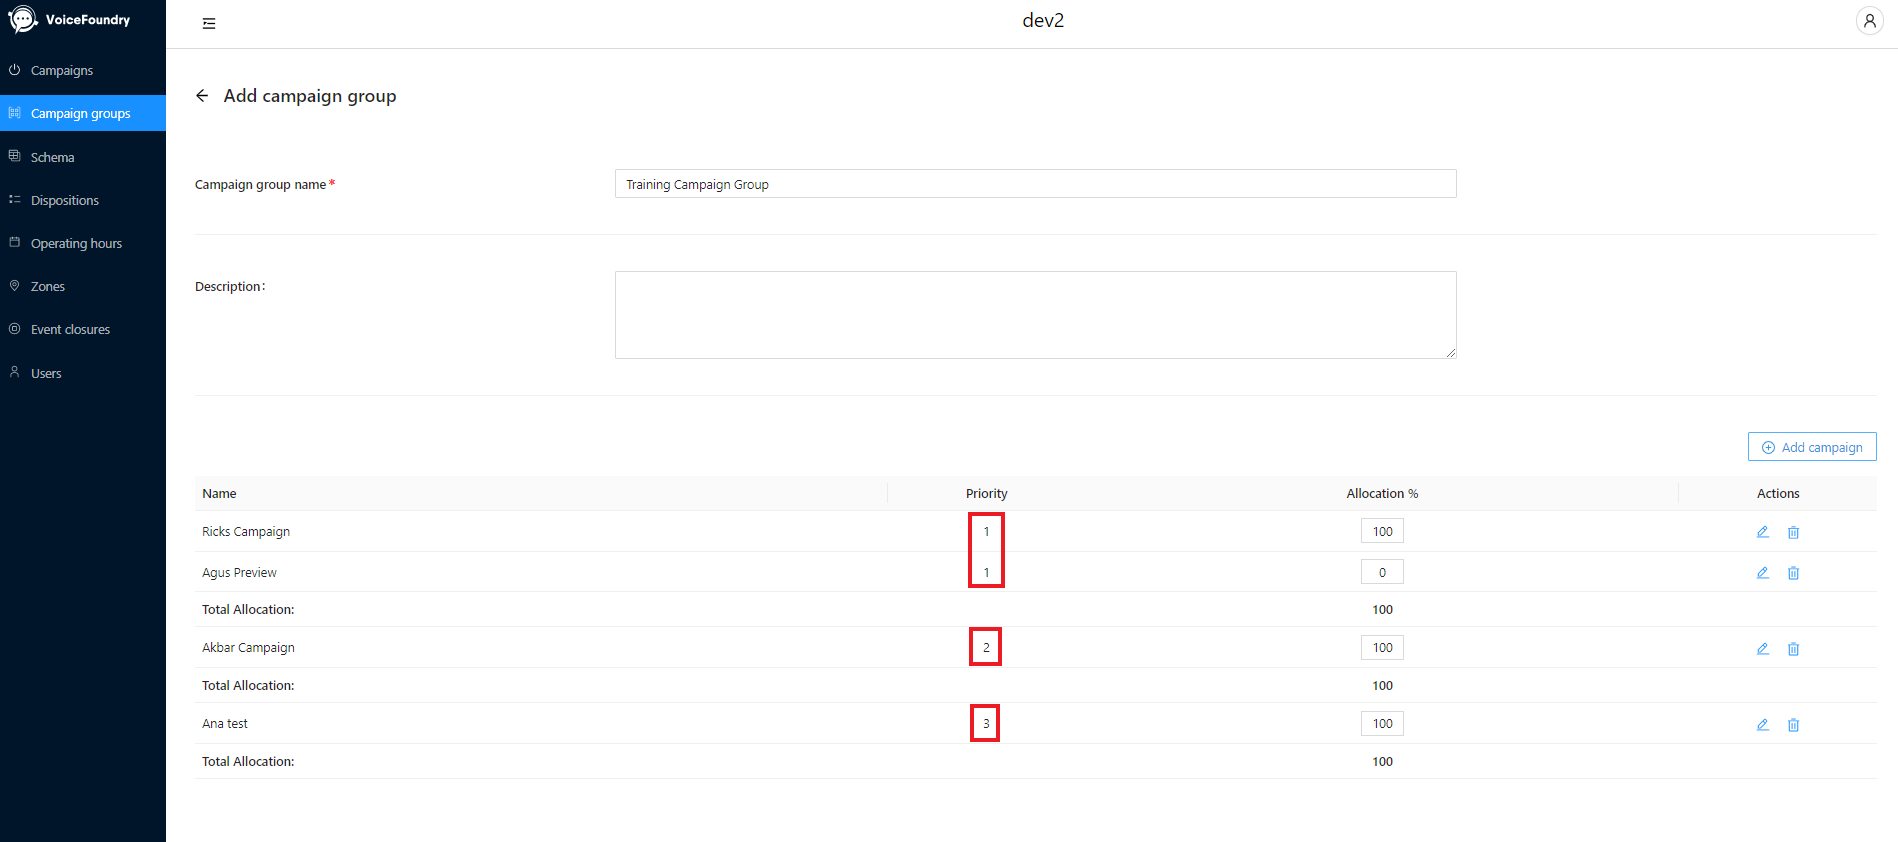
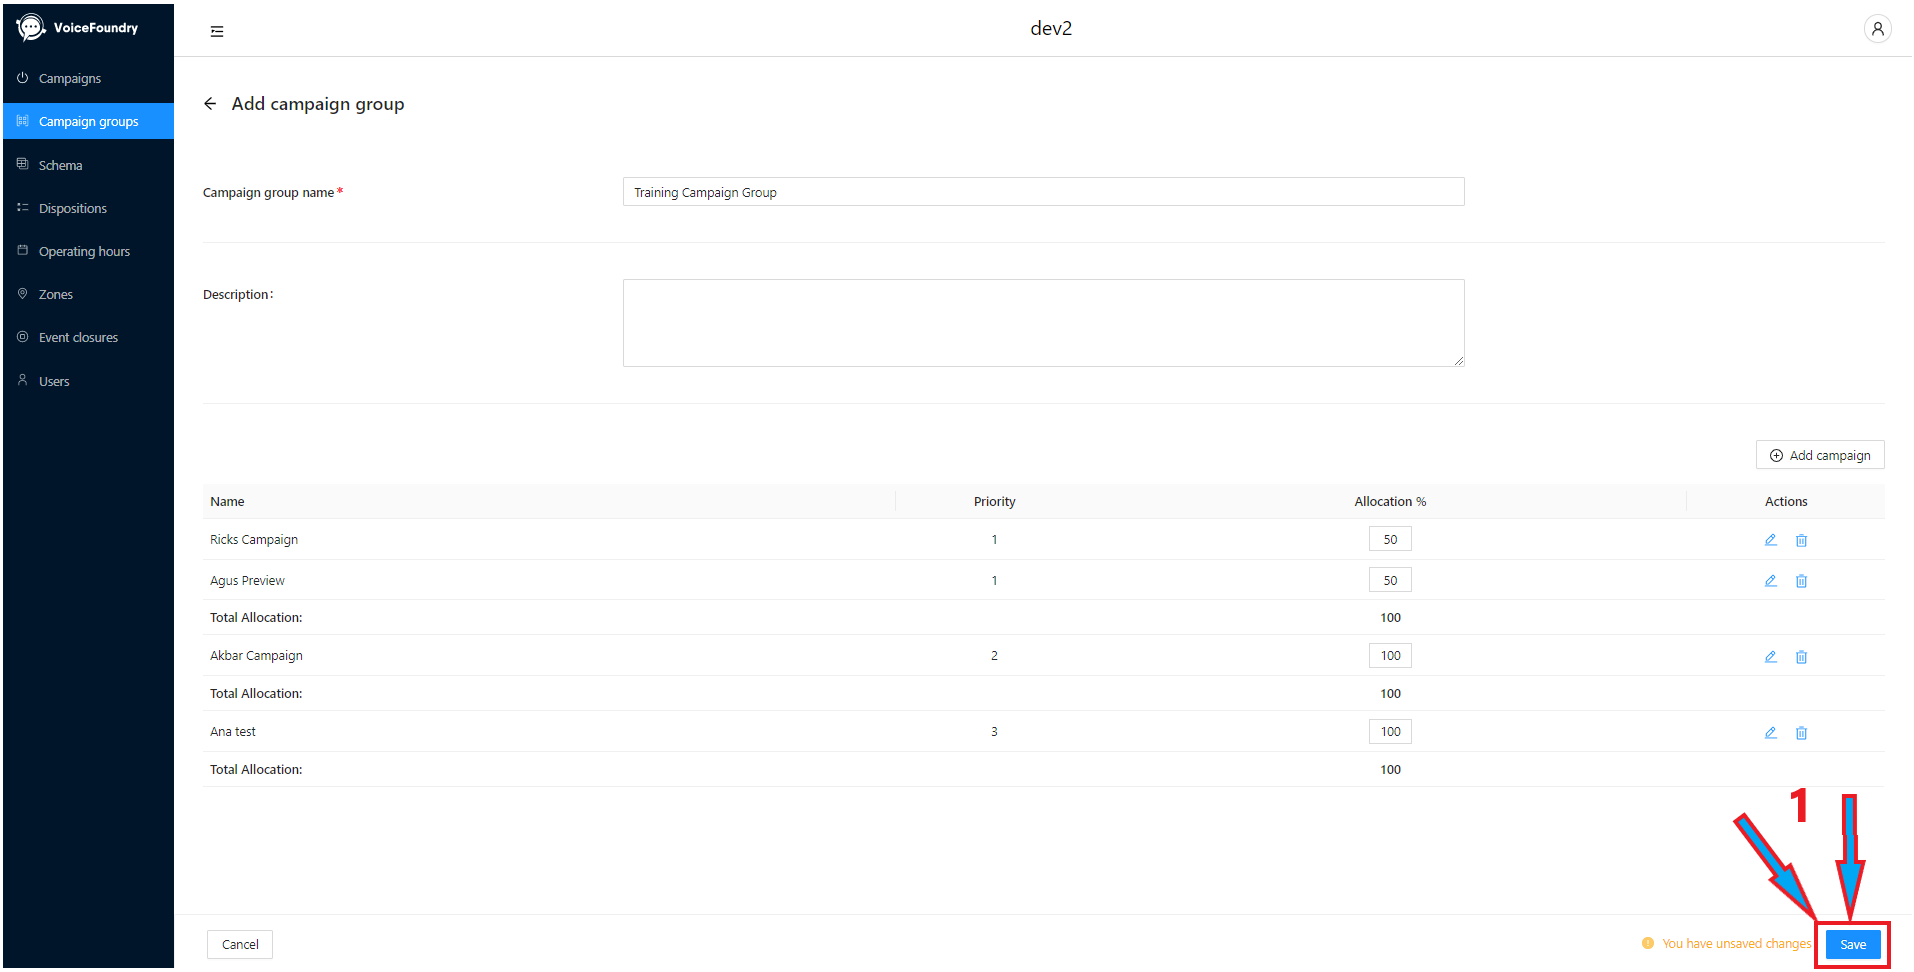
Below, I have added 4 campaigns to the group, at different priorities:
“Rick’s Campaign”, and “Agus Preview” have been added at a priority 1
“Akbar Campaign” has been added as a priority 2
“Ana Test” has been added as a priority 3
Step 5 - Set your % Allocation
If you have two or more campaigns added at the same priority, you will need to set the % allocation for these campaigns. This can be done by clicking the Allocation % (1) box assigned to each campaign, and resetting the values so that the “Total Allocation” (2) equals 100% for that particular priority.
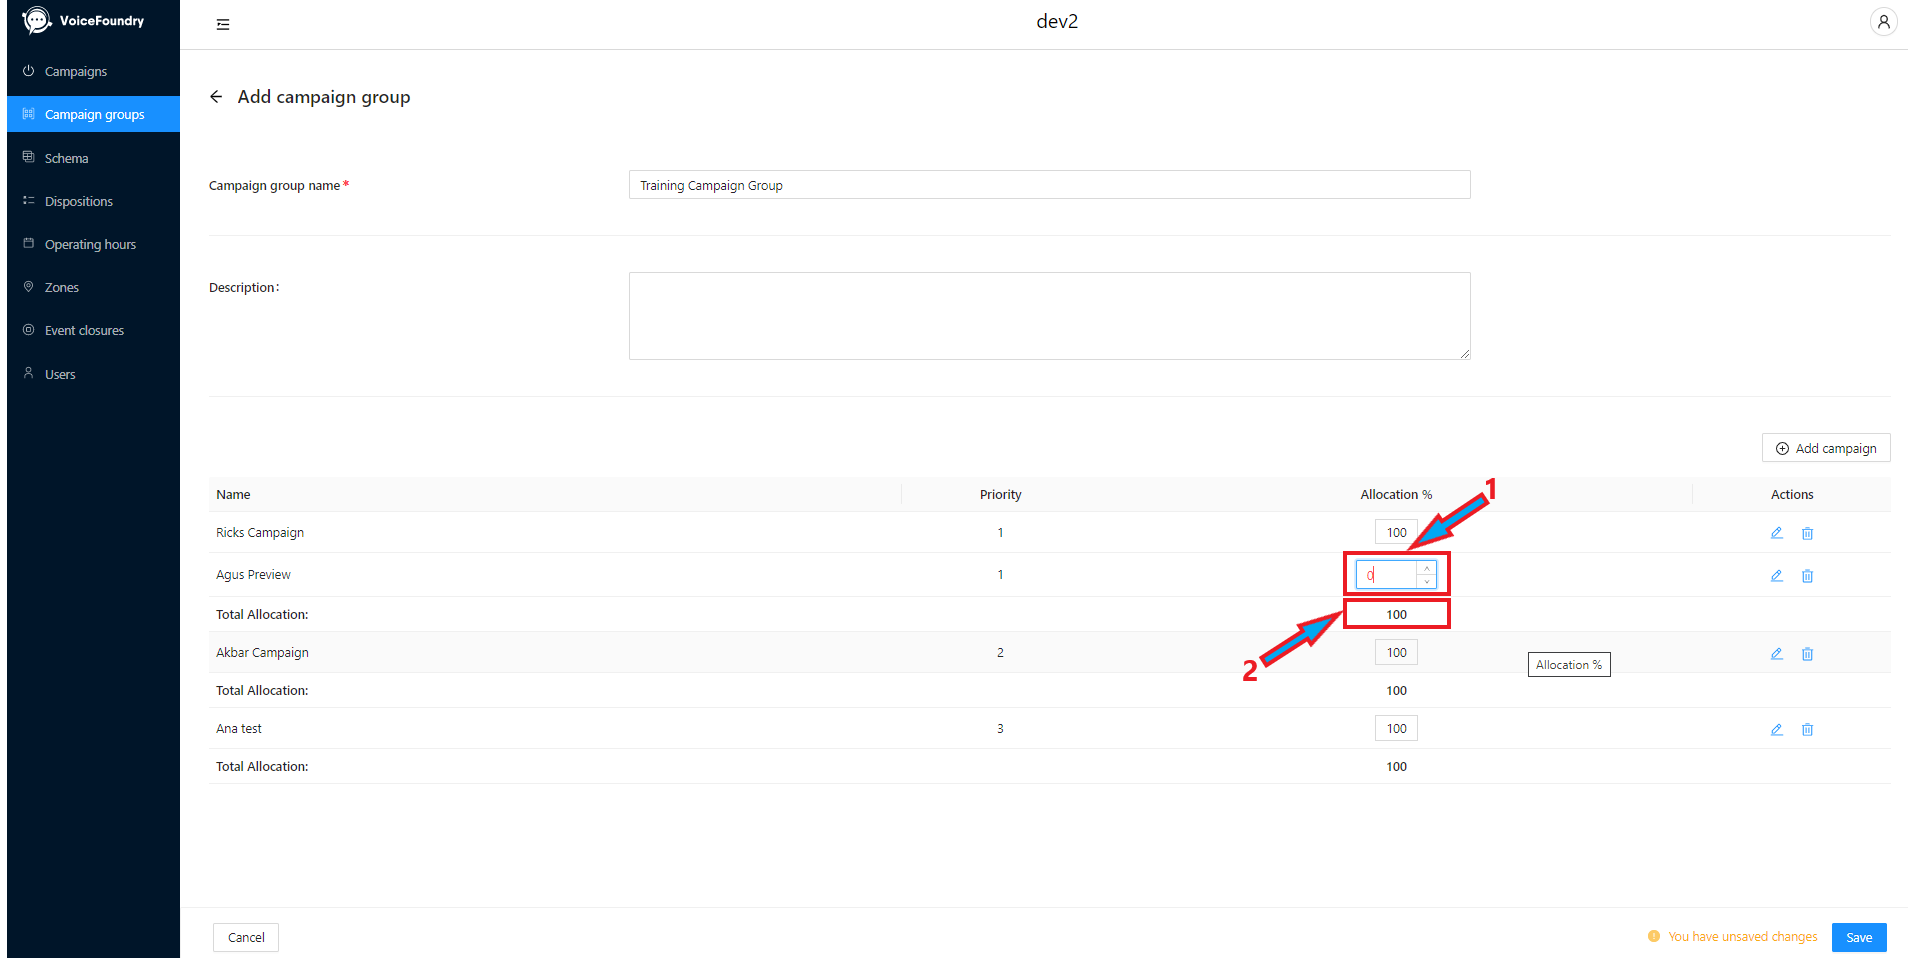
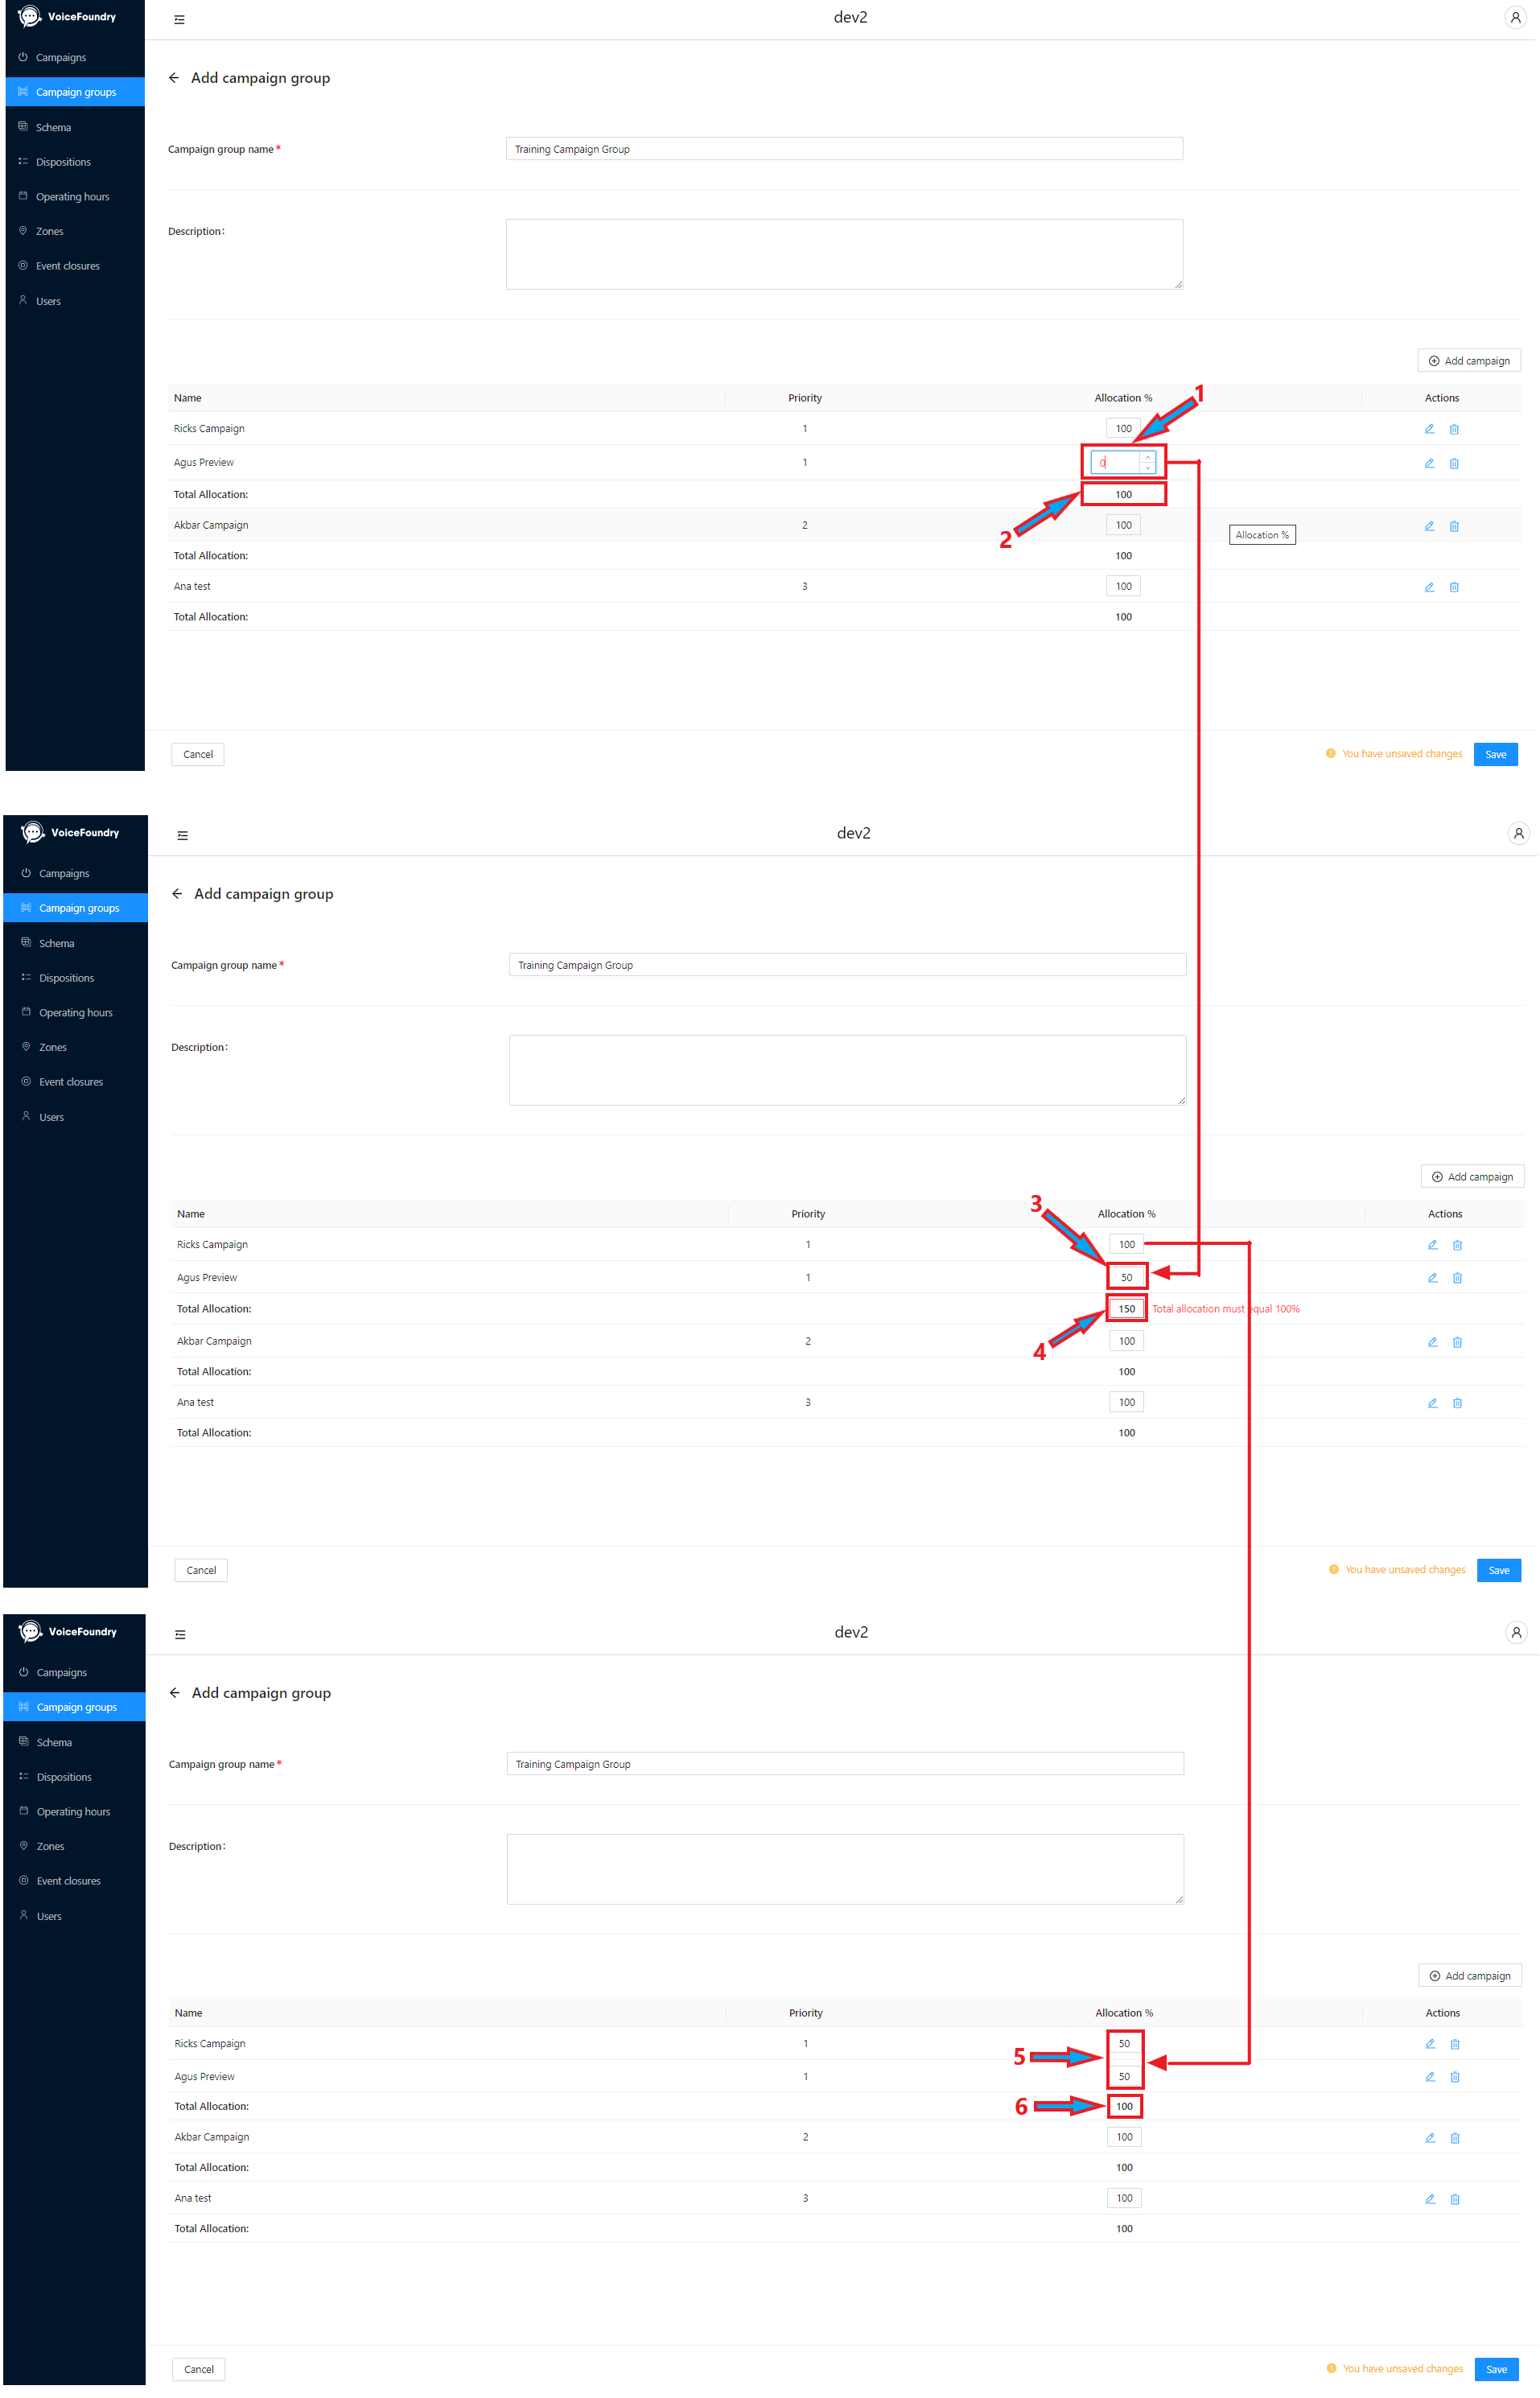
In the screenshot below, I began by changing the clicking the Allocation % for the “Agus Preview” campaign (1). You’ll notice that the Total Allocation for the Priority 1 group starts at 100%.
I then changed the Allocation % for the “Agus Preview” campaign to 50% (3). This caused the Total Allocation for the Priority 1 group to increase to 150% (4). This throws an error, and the dialler asks me to correct this
To correct this, I changed the Allocation % for “Ricks Campaign” to 50%, while keeping the allocation for “Agus Preview” at 50% also (5).
This removed the error, and made the Total Allocation 100% again (6).
Continue this process so that all of your Total Allocations per group equal 100%.
Step 6 - Save your group
This step is easy - simply save your group (1) once you have finished creating it:
Step 7 - Open Agent Desktop and navigate to Routing Profiles
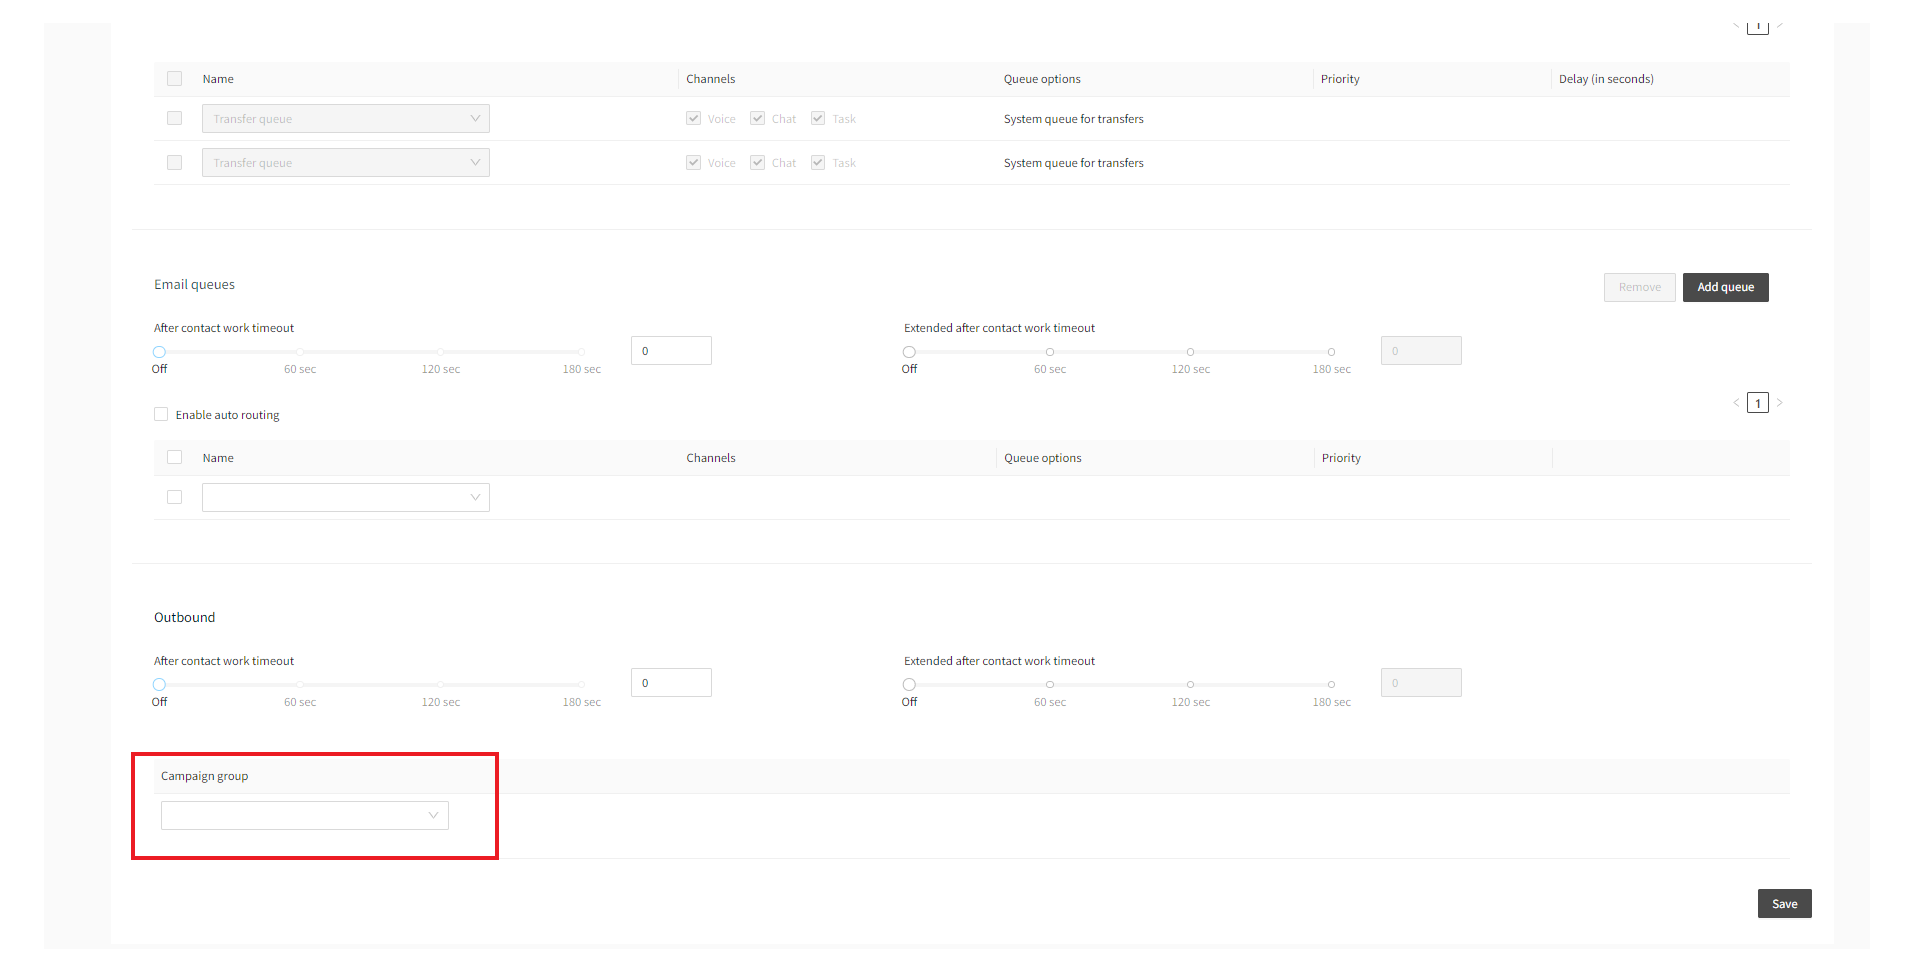
This step is performed in the VoiceFoundry Agent Desktop console. Select the routing profile you would like to add the Campaign Group to - note the “Campaign Group” heading in the “Outbound” section:
Step 8 - Add the campaign group to the routing profile
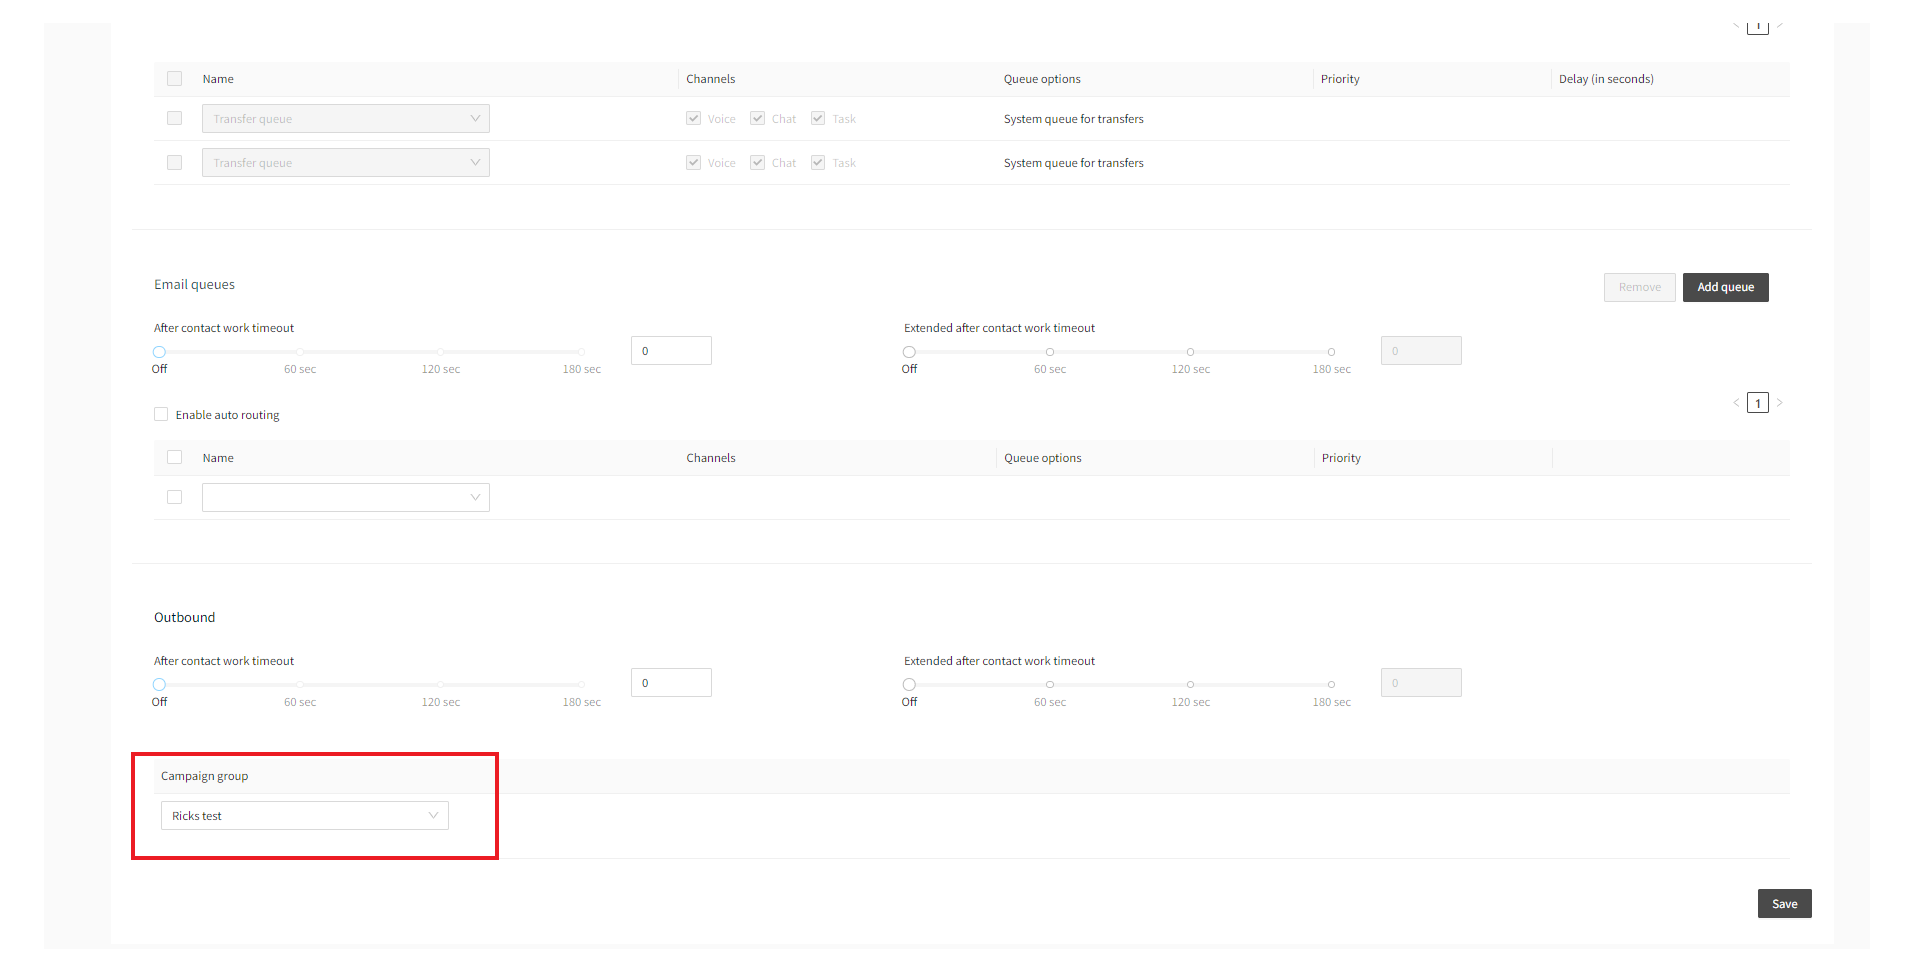
Select your campaign group from the drop down box
Step 9 - Click Save in the Routing Profile
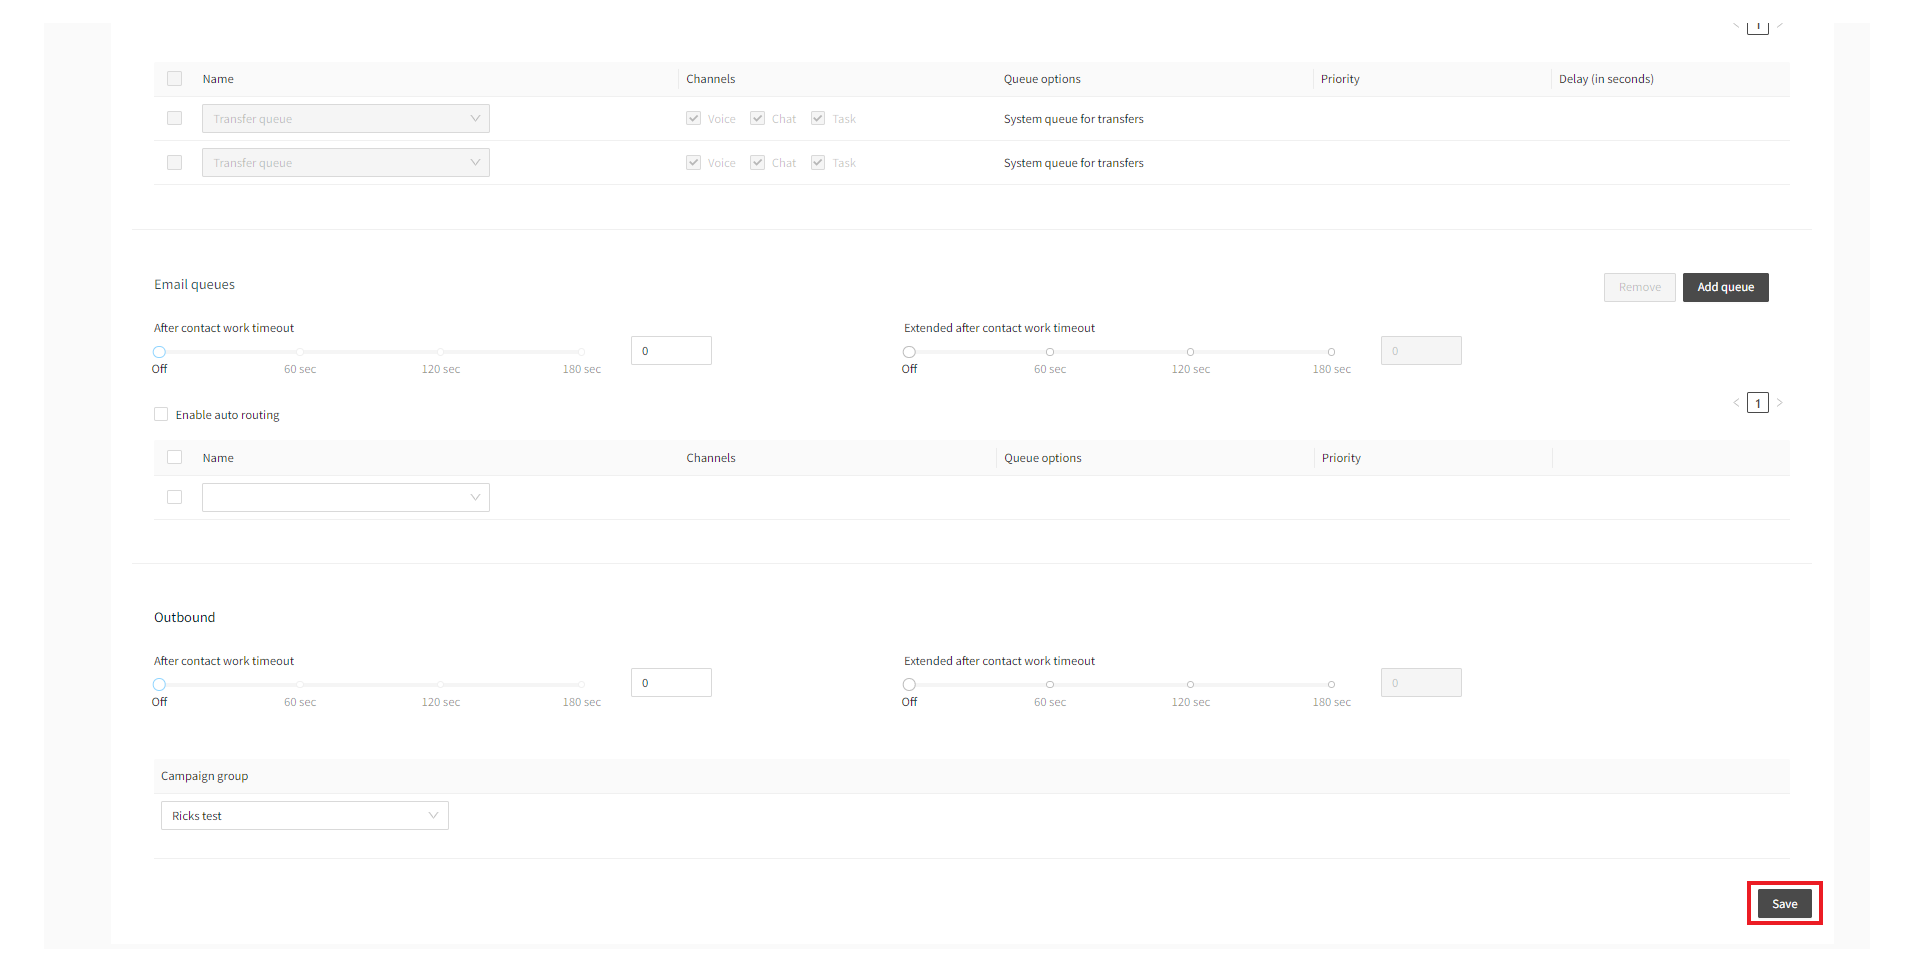
Click Save to save the routing profile
Step 10 - Add agents to the routing profile
This step is covered in detail in the Agent Desktop training module
