Routing profiles
A routing profile determines what types of contacts an agent can receive and the routing priority. While queues are a 'waiting area' for contacts, a routing profile links queues to agents. When you create a routing profile, you specify which queues will be in it. You can also specify whether one queue should be prioritised over another.
Each agent is assigned to one routing profile.
A routing profile can have multiple agents assigned to it.
Add a routing profile
To add a routing profile, go to Admin > routing profiles.
Click on Add routing profile.
Enter or select the following details:
Name.
Description.
Enabling channels: click on the toggle buttons to enable that channel (voice, chat, task, email, outbound campaigns & agent scheduled callbacks) for this routing profile. Note: at least one Connect channel (voice, chat or task) must be enabled in a routing profile.
For chat and task channels, you can set the maximum number of contacts an agent can work on at the same time (between 1 to 5).
Enabling auto-accept: this applies to the voice chat, task and email channels. Turning auto-accept on would mean that any contact offered to an agent would automatically be accepted within the Agent Desktop, without the agent having the option to accept or reject the contact.
Default outbound queue: choose a queue to be associated with outbound calls placed by the agents.
Scheduled callbacks auto-dial timeout: set how many seconds agents have to preview a scheduled callback before the outbound call is made. Enter 0 if you don’t want to set an auto-dial timeout.
Voice, chat and task queues:
Click on the Add queue button and use the dropdown menu to choose a queue you've already set up. Repeat this step to add more queues.
To remove a queue, click on the checkbox next to the queue and click on the Remove button.
Channels: choose whether the queue is for chat, voice, task, or all three.
Queue options (outbound CLI): select whether you want this queue to be optionally chosen by an agent when making an outbound call.
Priority: specify the order in which contacts are to be handled for that queue. For example, a contact in a queue with a priority of 2 would be a lower priority than a contact in a queue with a priority of 1.
Delay: enter the minimum amount of time a contact should be in the queue before they are routed to an available agent.
After contact work timeout: set how many seconds agents have for after contact work before their status automatically changes to available. Setting a time of 0 means an agent will indefinitely stay in after contact work.
Extended after contact work timeout: set the number of seconds you allow your agents to extend their after contact work time. An agent can extend their after contact work time multiple times. Enter 0 if you don’t want to set an extended after contact work timeout.
Email queues:
Click on the Add queue button and use the dropdown menu to choose a queue you've already set up. Repeat this step to add more queues.
To remove a queue, click on the checkbox next to the queue and click on the Remove button.
Channels: in order for an email from that queue to be routed to an agent, this checkbox must be selected.
Queue options (compose email): select whether you want this queue to be optionally chosen by an agent when composing an outbound email.
Priority: specify the order in which contacts are to be handled for that queue. For example, a contact in a queue with a priority of 2 would be a lower priority than a contact in a queue with a priority of 1.
After contact work timeout: set how many seconds agents have for after contact work before their status automatically changes to available. Setting a time of 0 means an agent will indefinitely stay in after contact work.
Extended after contact work timeout: set the number of seconds you allow your agents to extend their after contact work time. An agent can extend their after contact work time multiple times. Enter 0 if you don’t want to set an extended after contact work timeout.
Outbound:
Click on the Add campaign button and use the dropdown menu to choose a campaign you've already set up in contactSPACE. Repeat this step to add more campaigns.
To remove a campaign, click on the checkbox next to the queue and click on the Remove button.
Priority: specify the order in which contacts are to be handled for that queue. For example, a contact in a queue with a priority of 2 would be a lower priority than a contact in a queue with a priority of 1.
After contact work timeout: set how many seconds agents have for after contact work before their status automatically changes to available. Setting a time of 0 means an agent will indefinitely stay in after contact work.
Extended after contact work timeout: set the number of seconds you allow your agents to extend their after contact work time. An agent can extend their after contact work time multiple times. Enter 0 if you don’t want to set an extended after contact work timeout.
Click on Add profile.
Note: If the queues for all channels are set with the same priority (e.g. priority 1), then contacts will be routed to agents in the following order:
Voice, chat and task queues
Email queues
Outbound queues
Edit a routing profile
To edit a routing profile, go to Admin > Routing profiles.
Click on the name of the routing profile you want to edit.
The following fields can be edited.
Name.
Description.
Enabling channels: click on the toggle buttons to enable that channel (voice, chat, task, email, outbound campaigns & agent scheduled callbacks) for this routing profile. Note: at least one Connect channel (voice, chat or task) must be enabled in a routing profile.
For chat and task channels, you can set the maximum number of contacts an agent can work on at the same time (between 1 to 5).
Enabling auto-accept: this applies to the voice chat, task and email channels. Turning auto-accept would mean that any contact offered to an agent would automatically be accepted within the Agent Desktop, without the agent having the option to accept or reject the contact.
Default outbound queue: choose a queue to be associated with outbound calls placed by the agents.
Scheduled callbacks auto-dial timeout: set how many seconds agents have to preview a scheduled callback before the outbound call is made. Enter 0 if you don’t want to set an auto-dial timeout.
Voice, chat and task queues:
Click on the Add queue button and use the dropdown menu to choose a queue you've already set up. Repeat this step to add more queues.
To remove a queue, click on the checkbox next to the queue and click on the Remove button.
Channels: choose whether the queue is for chat, voice, task, or all three.
Queue options (outbound CLI): select whether you want this queue to be optionally chosen by an agent when making an outbound call.
Priority: specify the order in which contacts are to be handled for that queue. For example, a contact in a queue with a priority of 2 would be a lower priority than a contact in a queue with a priority of 1.
Delay: enter the minimum amount of time a contact should be in the queue before they are routed to an available agent.
After contact work timeout: set how many seconds agents have for after contact work before their status automatically changes to available. Setting a time of 0 means an agent will indefinitely stay in after contact work.
Extended after contact work timeout: set the number of seconds you allow your agents to extend their after contact work time. An agent can extend their after contact work time multiple times. Enter 0 if you don’t want to set an extended after contact work timeout.
Email queues:
Click on the Add queue button and use the dropdown menu to choose a queue you've already set up. Repeat this step to add more queues.
To remove a queue, click on the checkbox next to the queue and click on the Remove button.
Channels: in order for an email from that queue to be routed to an agent, this checkbox must be selected.
Queue options (compose email): select whether you want this queue to be optionally chosen by an agent when composing an outbound email.
Priority: specify the order in which contacts are to be handled for that queue. For example, a contact in a queue with a priority of 2 would be a lower priority than a contact in a queue with a priority of 1.
After contact work timeout: set how many seconds agents have for after contact work before their status automatically changes to available. Setting a time of 0 means an agent will indefinitely stay in after contact work.
Extended after-contact work timeout: set the number of seconds you allow your agents to extend their after-contact work time. An agent can extend their after-contact work time multiple times. Enter 0 if you don’t want to set an extended after contact work timeout.
Outbound:
Click on the Add campaign button and use the dropdown menu to choose a campaign you've already set up in contactSPACE. Repeat this step to add more campaigns.
To remove a campaign, click on the checkbox next to the queue and click on the Remove button.
Priority: specify the order in which contacts are to be handled for that queue. For example, a contact in a queue with a priority of 2 would be a lower priority than a contact in a queue with a priority of 1.
After contact work timeout: set how many seconds agents have for after contact work before their status automatically changes to available. Setting a time of 0 means an agent will indefinitely stay in after contact work.
Extended after contact work timeout: set the number of seconds you allow your agents to extend their after contact work time. An agent can extend their after contact work time multiple times. Enter 0 if you don’t want to set an extended after-contact work timeout.
Click on Save.
Configuring scheduled callbacks in a routing profile
If you want to have agent or queued scheduled callbacks assigned to your routing profile, follow the below steps.
Agent scheduled callbacks
Enable the Voice and Task channels in your routing profile. As all scheduled callbacks are routed to agents as a Task interaction, you will need this channel enabled in order for agents to be routed scheduled callbacks.
Enable the Scheduled callbacks (agent) channel in your routing profile. This only applies if you want agent-scheduled callbacks assigned to your routing profile.
By default, the outbound call will be made from the default outbound queue that is set in the agent’s routing profile. If you want to set a queue for the outbound call to be made from, include the queue name in the queueName attribute when sending a callback record to the DDB. If you do set an outbound queue, you will need to make sure this queue has been added to the routing profile, and that you select the voice and task channel checkboxes for that queue.
Queued scheduled callbacks
Enable the Voice and Task channels in your routing profile. As all scheduled callbacks are routed to agents as a Task interaction, you will need this channel enabled in order for agents to be routed scheduled callbacks.
Add the queue that callbacks are being assigned to. Make sure you select the voice and task channel checkboxes for this queue.
Routing profile versioning
For businesses that require agents to be assigned to different Routing profiles at certain times of the day or certain days of the week, rather than creating a different Routing profile for each configuration you can now create one Routing profile with multiple versions. When an administrator activates a certain version of a Routing profile, all agents assigned to that routing profile will automatically start receiving contacts as per the configuration of that version. Using Routing profile versioning means administrators can easily activate different Routing profile versions throughout the day without needing to update an agent’s user profile.
Routing profile versioning will need to be enabled in your account before you can start using this feature. Speak to an administrator for assistance.
Add a routing profile version
Once you have created a routing profile, it will automatically be set as the default version.

To add a version to your profile, click on the add icon next to the default tab.

Enter a unique name for your routing profile version, then click on Add.
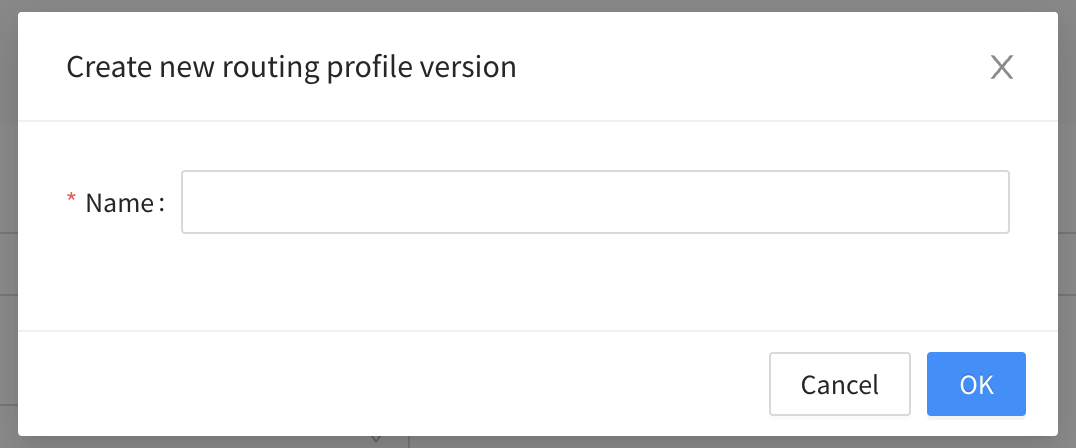
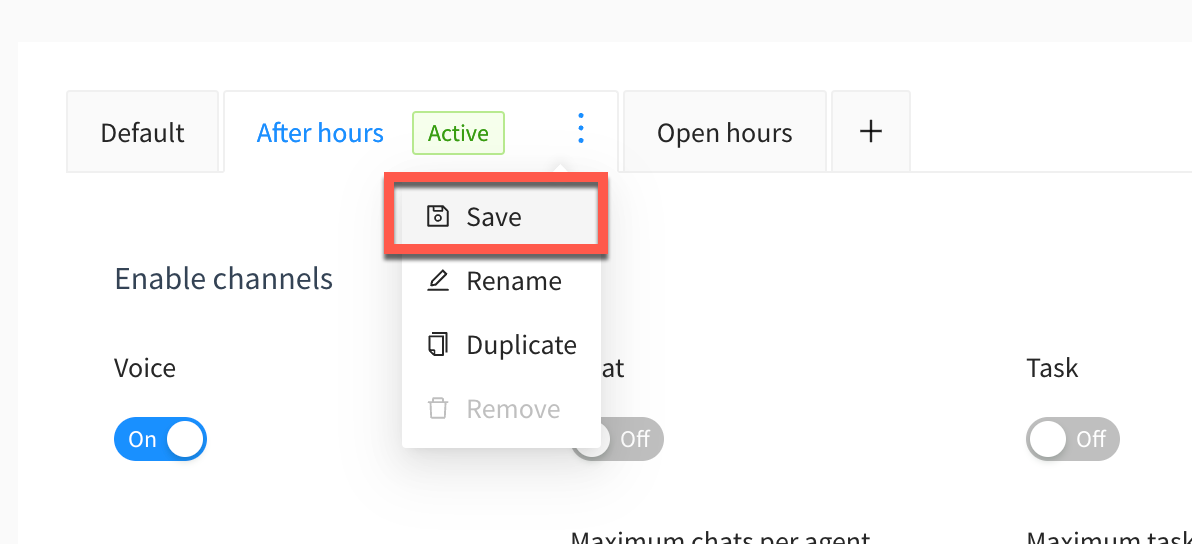
You can then configure the routing profile as required and click on Save within the tab or at the bottom of the screen.
Activating a routing profile version
To activate a routing profile version:
Click on the tab of the routing profile version you want to activate.
Click on the ellipsis icon within the tab and select Activate.
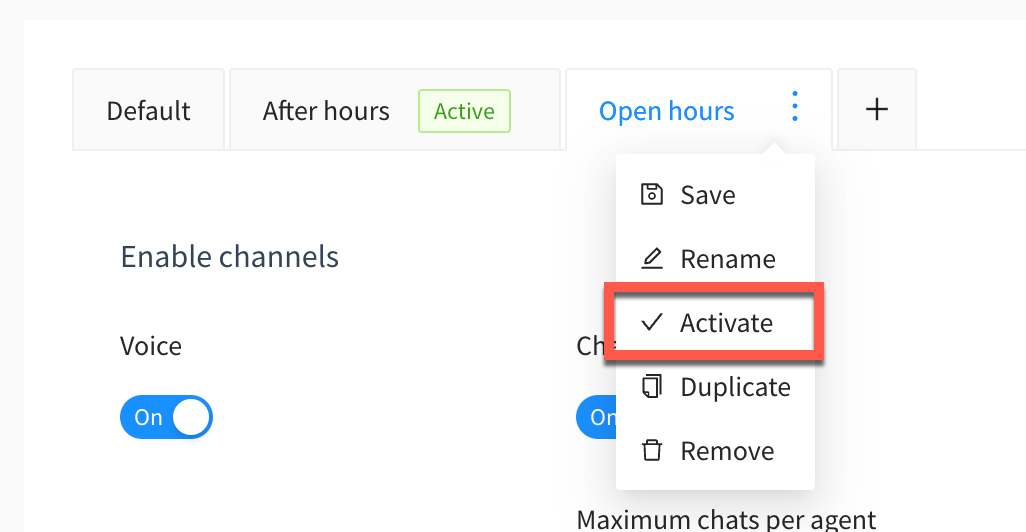
Note: Any routing profile version you activate will remain active until you activate another routing profile version.
Renaming a routing profile version
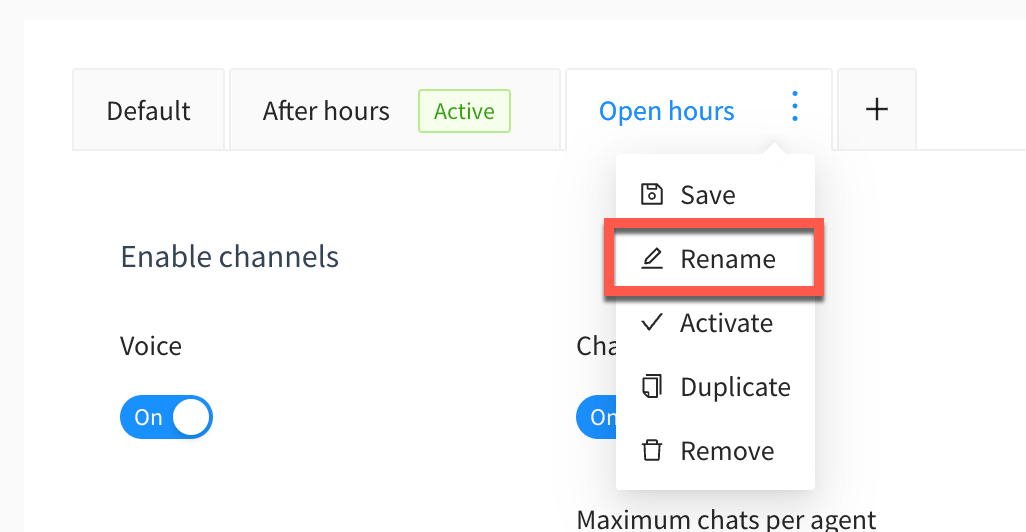
To rename a routing profile version:
Click on the tab of the routing profile version you want to rename.
Click on the ellipsis icon within the tab and select Rename.
Enter a name then click on Ok.
Duplicating a routing profile version
To duplicate a routing profile version:
Click on the tab of the routing profile version you want to duplicate.
Click on the ellipsis icon within the tab and select Duplicate.
Enter a name then click on Ok.
Configure the routing profile as required and click on Save within the tab or at the bottom of the screen.
.png?inst-v=ff267536-0793-47b5-be49-0a77e65ce182)
Removing a routing profile version
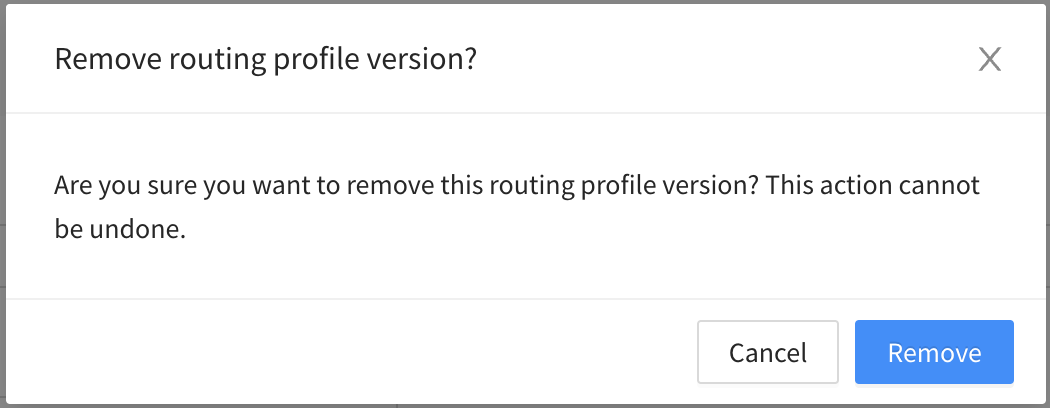
To remove a routing profile version:
Click on the tab of the routing profile version you want to remove.
Click on the ellipsis icon within the tab and select Remove.
.png?inst-v=ff267536-0793-47b5-be49-0a77e65ce182)
Click on Remove within the modal.
Routing profile scheduling
You can set up schedules for your routing profile versions allowing different versions of your routing profile to become active based on the day and time you specify.
Routing profile scheduling will need to be enabled in your account before you can start using this feature. Speak to an administrator for assistance.
To configure your routing profile’s schedule, go to your routing profile and click on the Schedule button.

Note: You must add at least one routing profile version to your schedule before you can turn it on.
Add a routing profile schedule
To add a routing profile version to your schedule, click on Add.
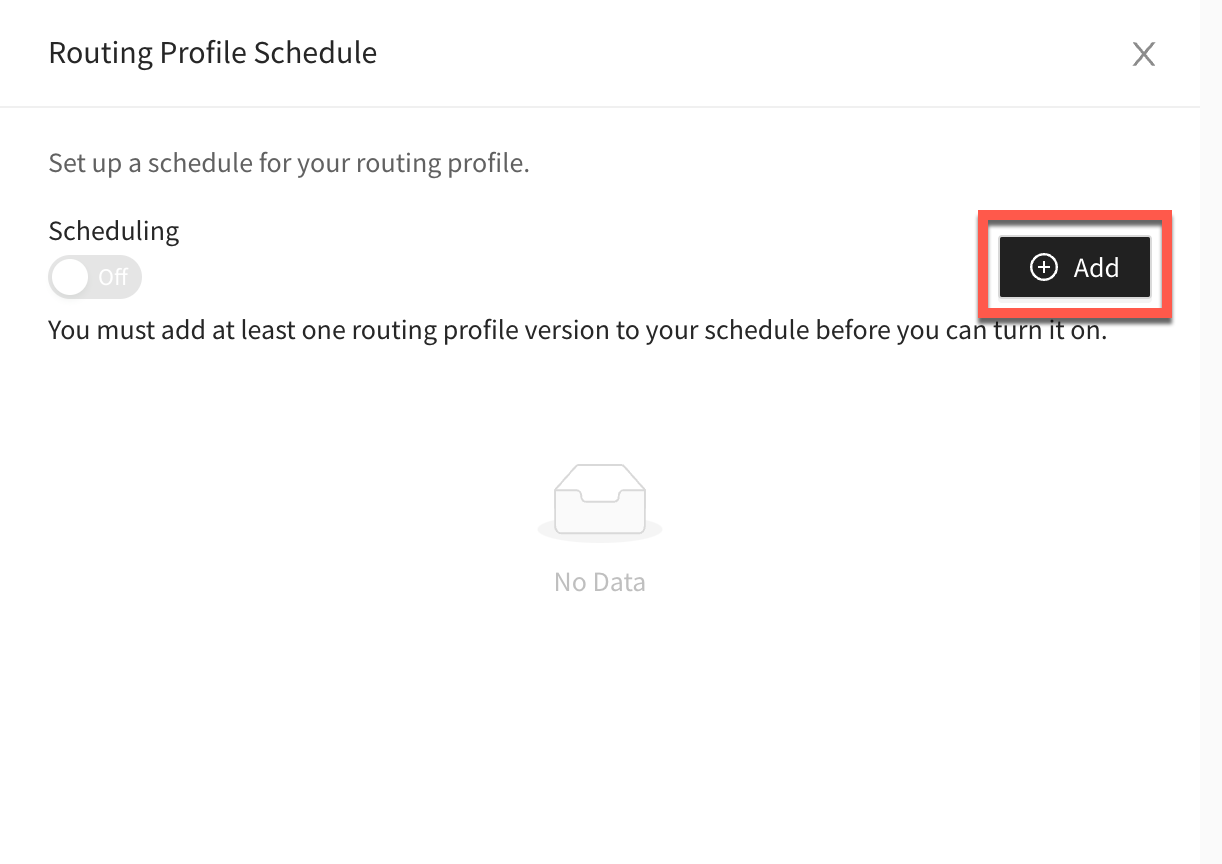
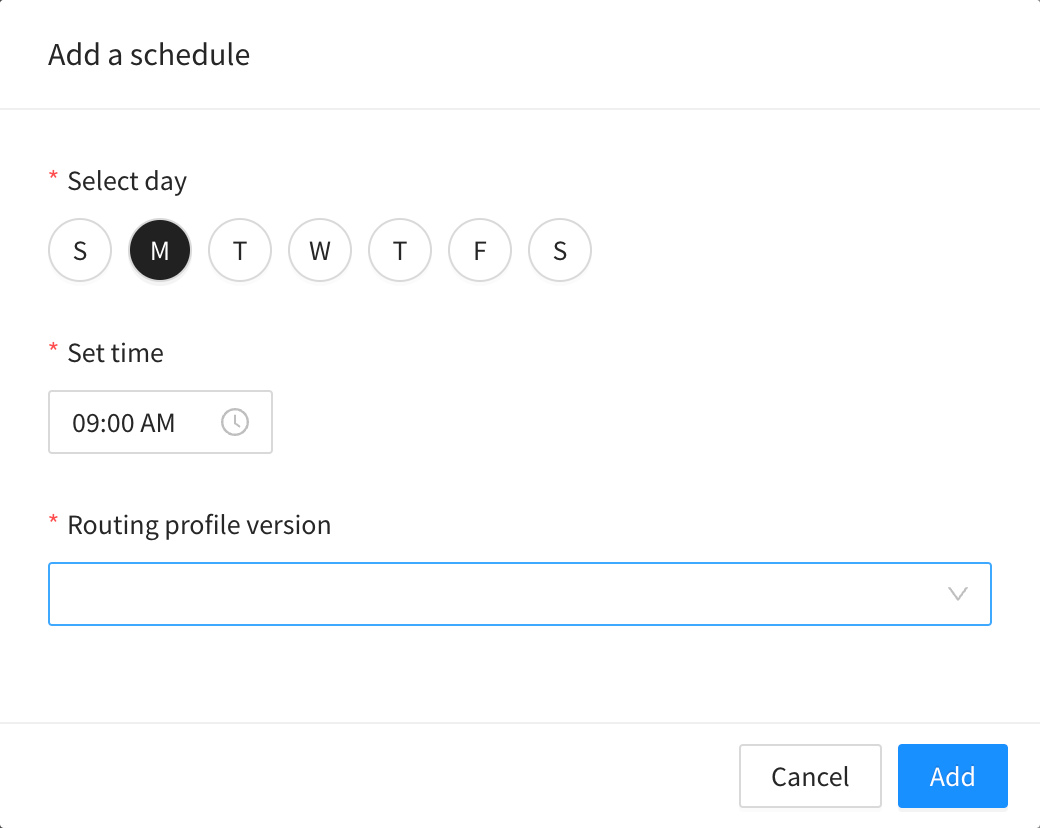
Within the modal select the day, time and routing profile version you want to schedule. Click on Add.
Enabling routing profile scheduling
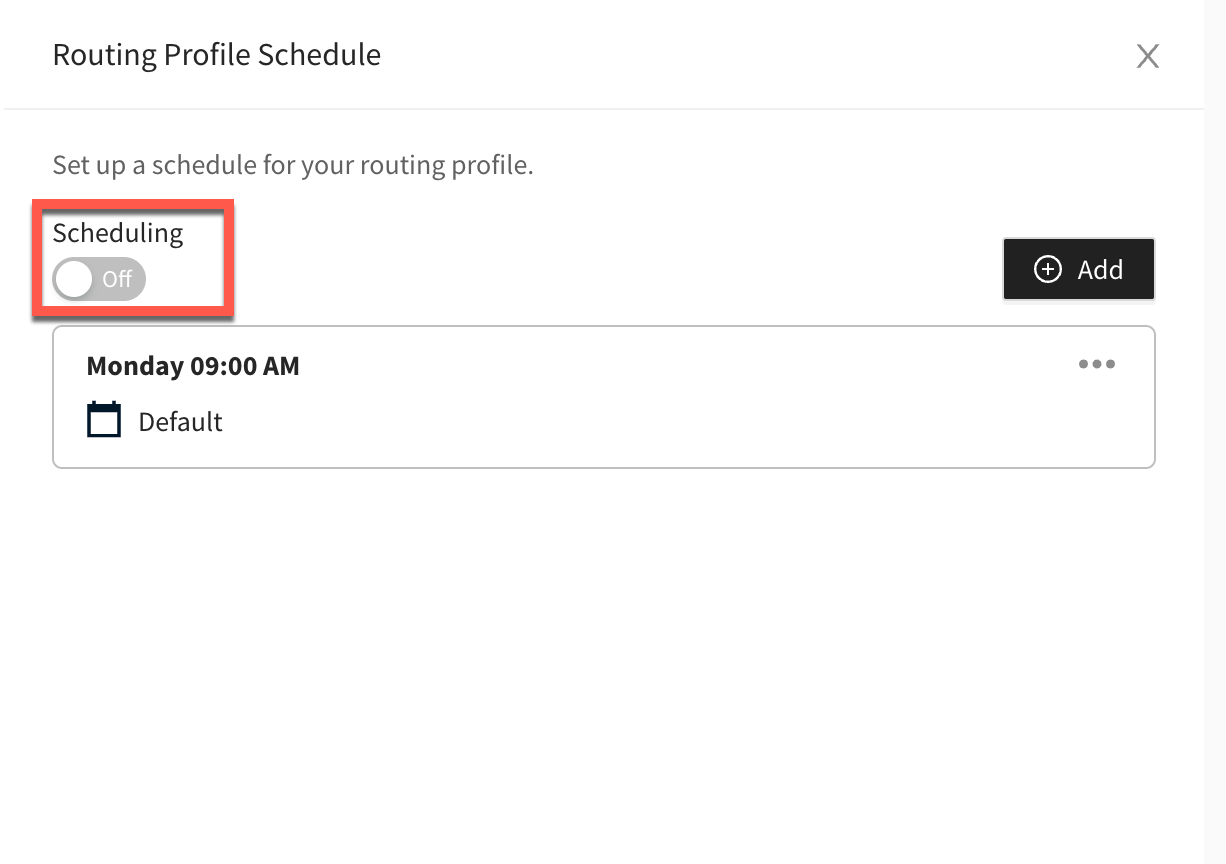
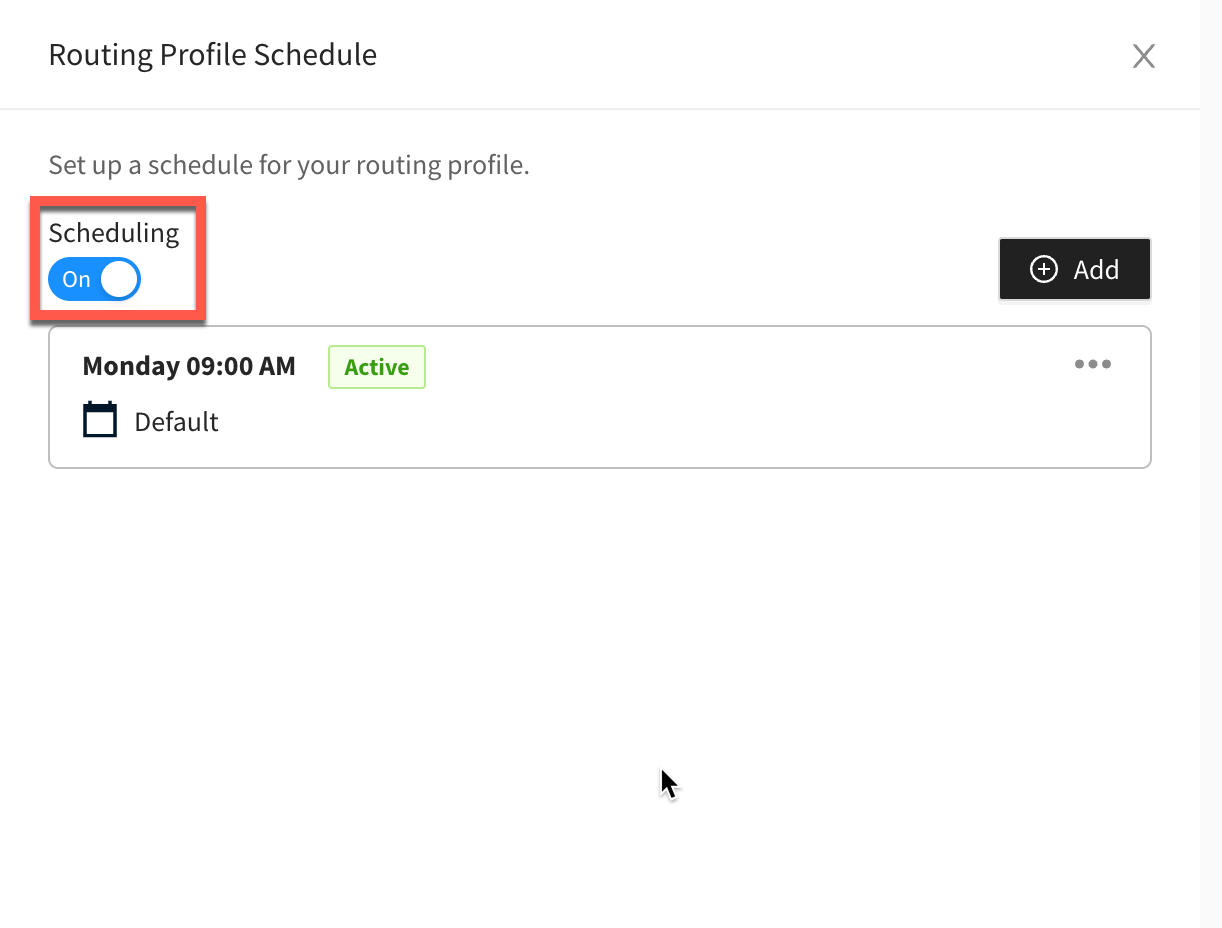
Once you have added at least one routing profile version to your schedule you can enable routing profile schedule by clicking on the Scheduling toggle button and setting it to on.
Disabling routing profile scheduling
To disable a routing profile’s schedule click on the Scheduling toggle button and setting it to off.
Editing a routing profile schedule
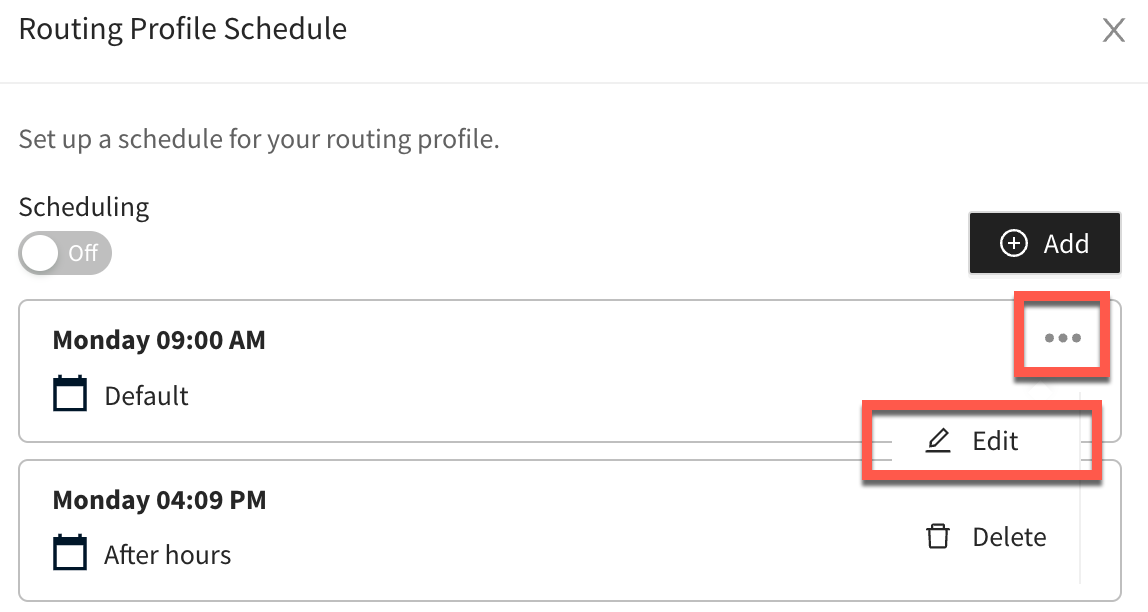
To edit a routing profile schedule, click on the ellipsis icon within the schedule and click on Edit.
Removing a routing profile schedule
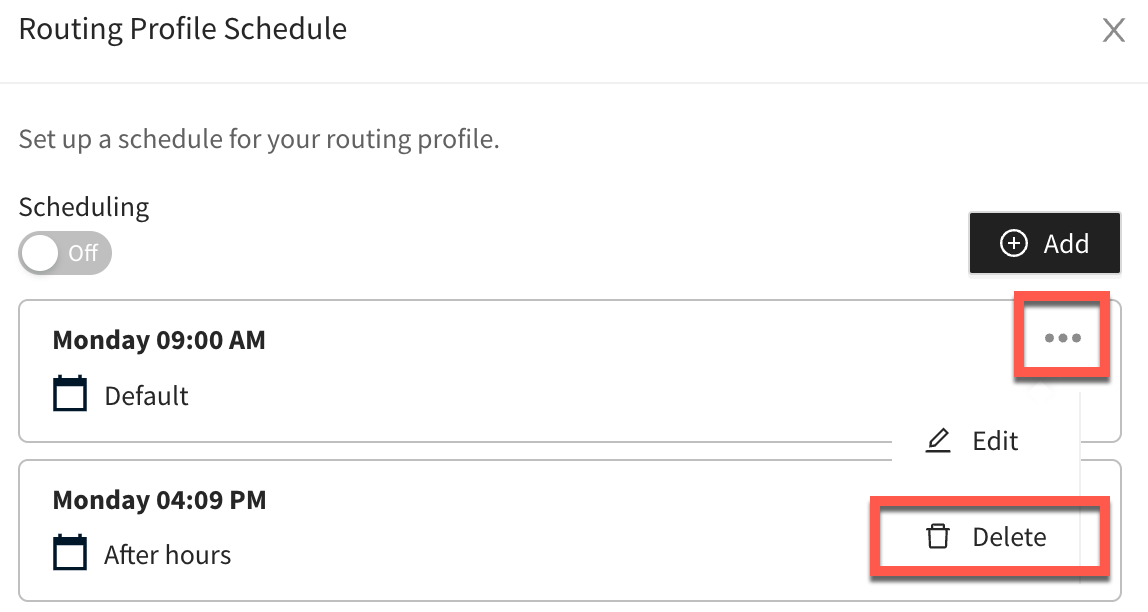
To remove a routing profile schedule, click on the ellipsis icon within the schedule and click on Delete.
Add or edit routing profiles in bulk from an .xlsx file
You can also add or edit routing profiles in a bulk import. To do so, go to Admin > Routing profiles, hover over the ellipsis icon and click on Upload.
Click on Download template to download the import template.
Add your routing profiles to the template and click on the Choose file button to upload it to the Agent Desktop.
Check for any errors that are listed and re-upload the template if required.
Click on Save.
