Banners and events
Add a banner or event
To add a banner or event, go to Admin > Operating hours > Banner and events.
Click on Add banner or event.
Enter or select the following details:
First name.
Prompt.
Time zone.
Start date & time to end date & time.
Type.
Destination.
Assign to:
All calls: choose this option is you want to apply this banner or event to all calls.
Queue(s): choose this option if you want to apply this banner or event to one or more queues.
Phone number(s): choose this option if you want to apply this banner or event to one or more phone numbers.
Click on Add.
Edit a banner or event
To edit a banner or event, go to Admin > Operating hours > Banner and events.
Click on the name of the banner or event you want to edit.
The following fields can be edited.
First name.
Prompt.
Time zone.
Start date & time to end date & time.
Type.
Destination.
Assign to:
All calls: choose this option is you want to apply this banner or event to all calls.
Queue(s): choose this option if you want to apply this banner or event to one or more queues.
Phone number(s): choose this option if you want to apply this banner or event to one or more phone numbers.
Click on Save.
Enable or disable a banner or event
By default, any newly created banner or events will be set to disabled. To enable a banner or event go to Admin > Operating hours > Banner and events.
Click on the status toggle button for that banner or event. To disable the banner or event, click on the toggle button again.
Note: No two banner or events that are assigned to the same queues OR phone numbers OR all calls and have an overlapping time range can be enabled at the same time.
Remove a banner or event
To remove a banner or event, go to Admin > Operating hours > Banner and events.
Select the checkbox next to the name of the banner or event you want to remove and click on Remove.
A modal will appear confirming you want to remove the selected banner or event. Click on Remove.
Remove multiple banner or events
To remove multiple banner or events, go to Admin > Operating hours > Banner and events.
Select the checkboxes next to the names of the banner or events you want to remove and click on Remove.
A modal will appear confirming you want to remove the selected banner or events. Click on Remove.
Add or edit banner and events in bulk from a .xlsx file
You can also add or edit banner and events in a bulk import. To do so, go to Admin > Operating hours > Banner and events, hover over the ellipsis icon and click on Upload.
Click on Download template to download the import template.
Add your banner or events to the template and click on the Choose file button to upload it to the Agent Desktop.
Check for any errors that are listed and re-upload the template if required.
Click on Save.
Verify the banner or events then click on Save.
Recurring banner and events
Recurring banner and events can be set up for events that occur on a weekly, monthly or yearly basis.
Setting up a recurring banner or event
Within the add banner or event closure screen, click on the Occur’s once dropdown and select one of the following options:
Repeat weekly
Repeat monthly
Repeat yearly
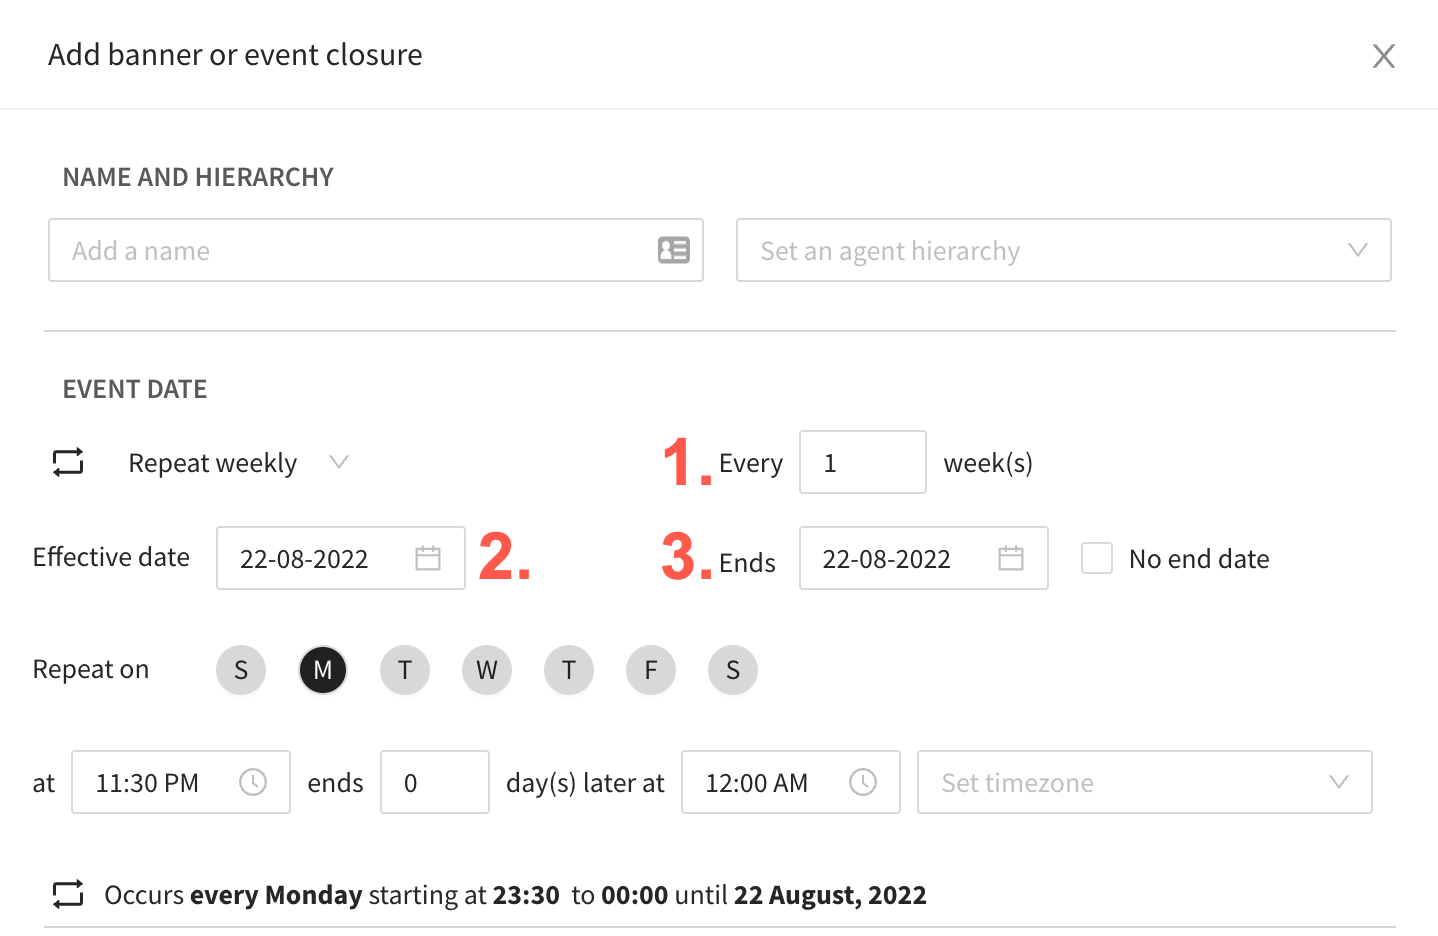
Enter or select the following details:
Every x weeks/months: Set how often the event should repeat.
Effective date: This is the start date of the event and is also used to determine the applicable days you can select for monthly and yearly repeating events.
End date: This is the last day you event will occur. Select the checkbox if you don’t want to set an end date.
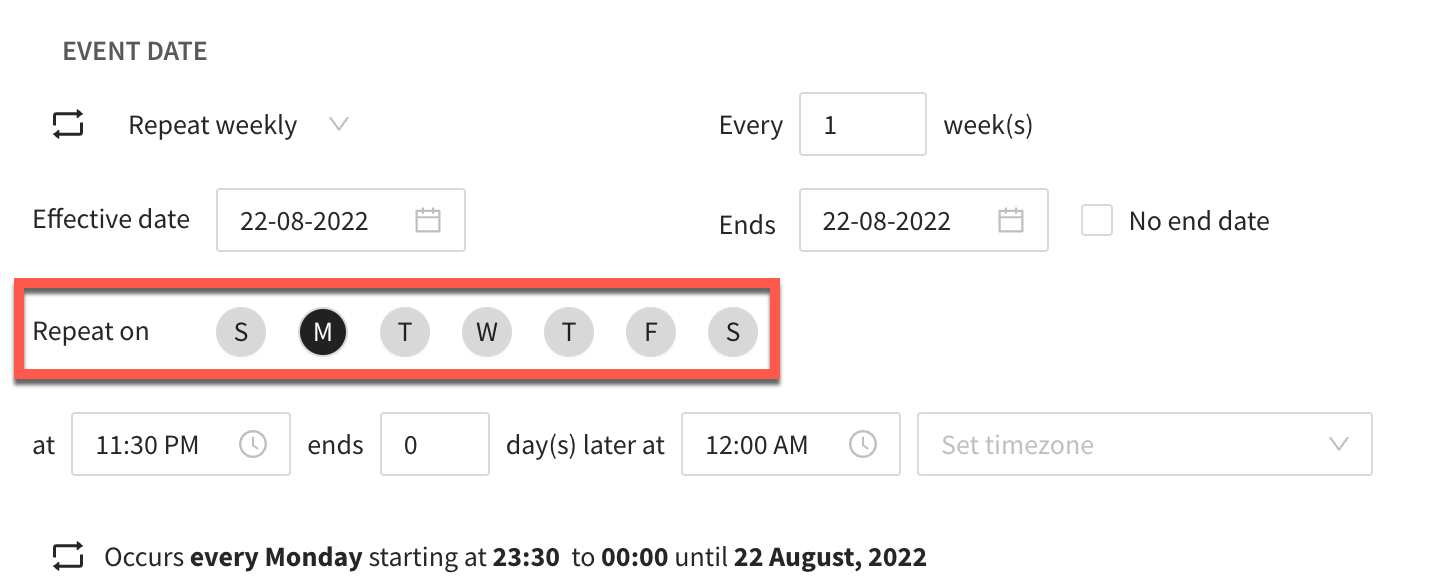
Weekly repeating events
Select the day or days you want this event to repeat on.
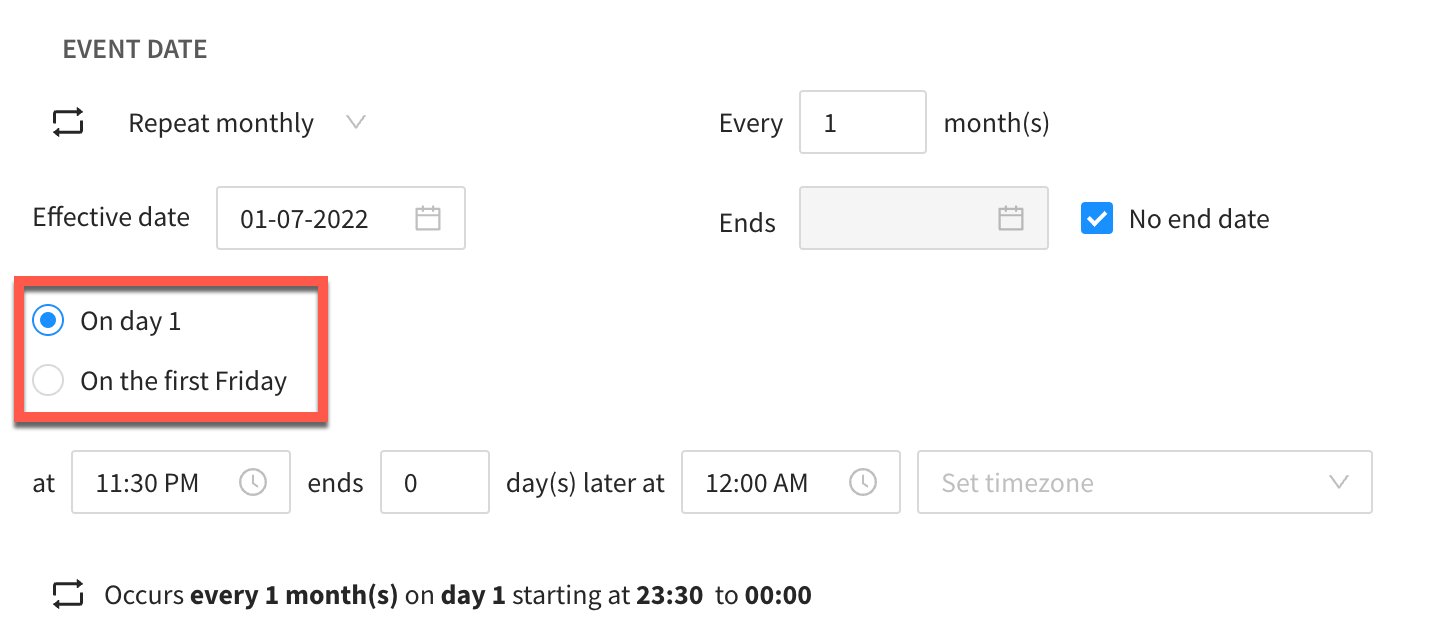
Monthly repeating events
Select which day of the month you want this event to repeat on. The options displayed are dependant upon the effective date.
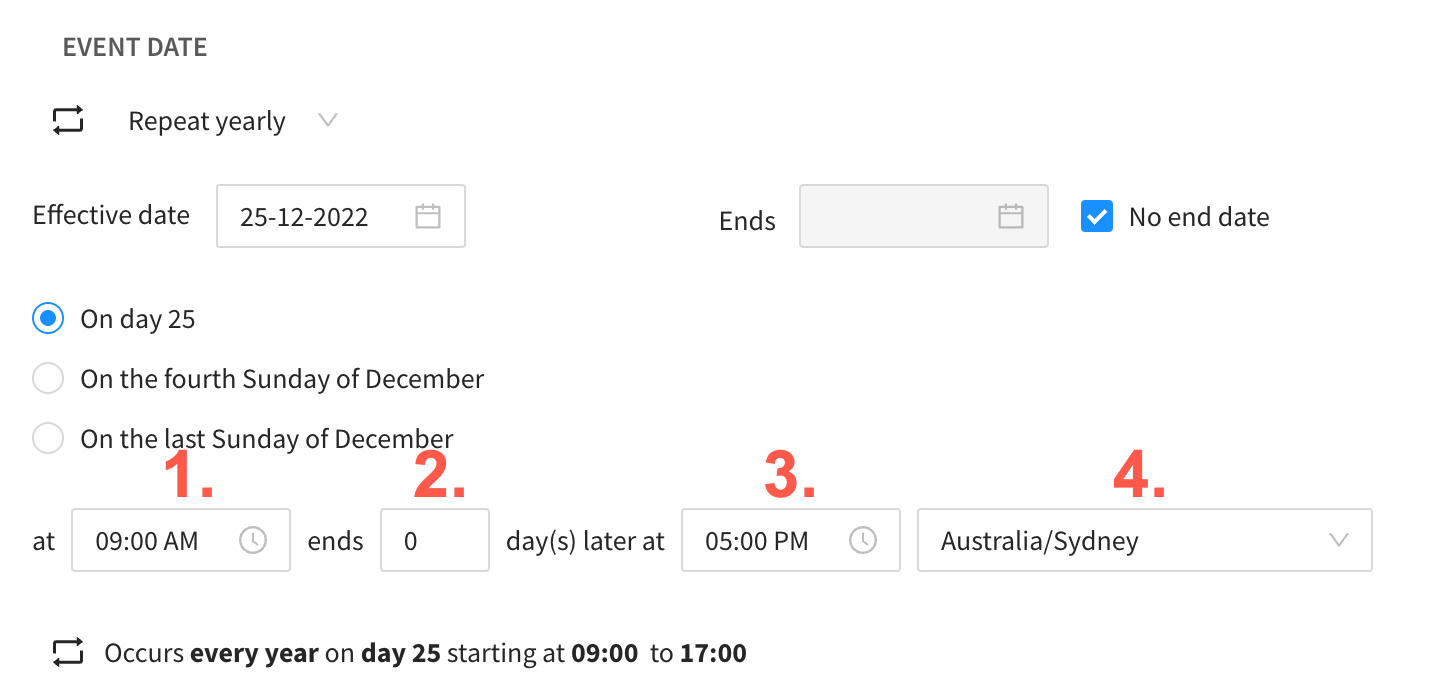
Yearly repeating events
Select the day of the year you want this event to repeat on. The options displayed are dependant upon the effective date.
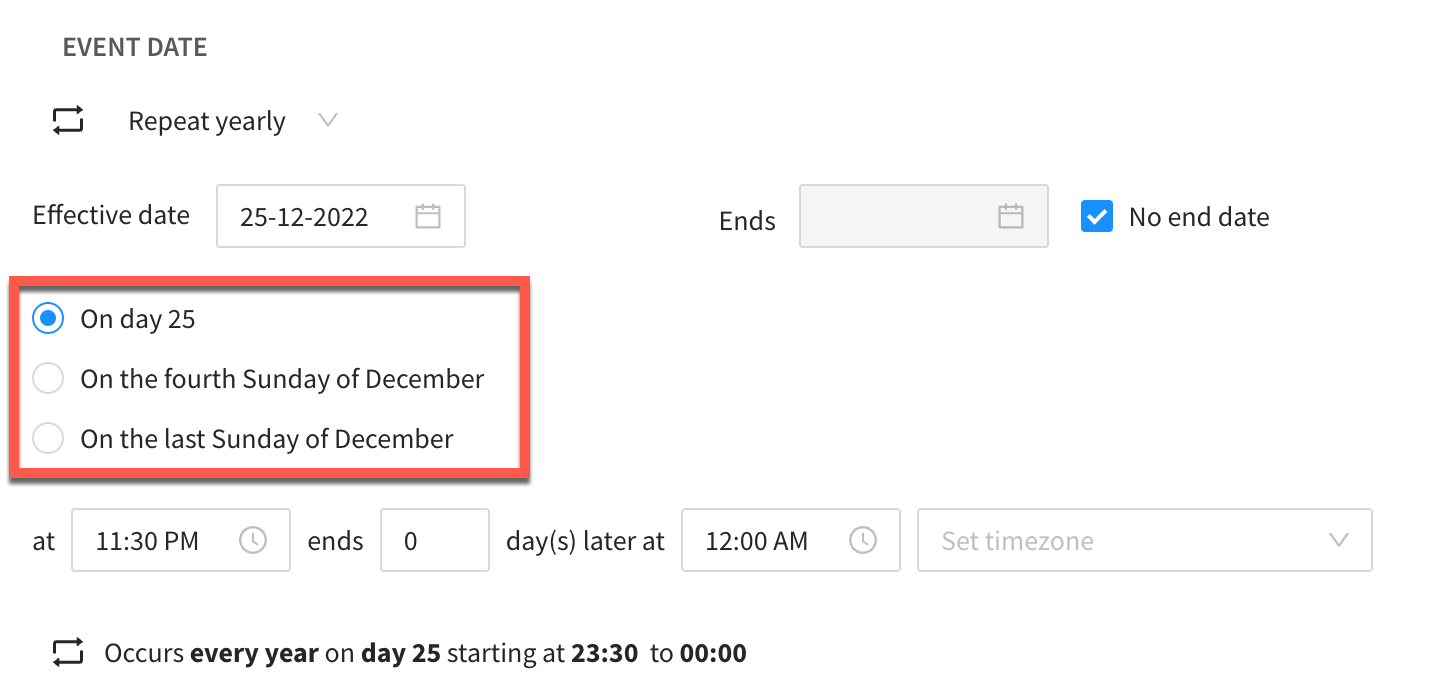
Enter or select the following details:
Start time
Ends x day(s) later: set a value here for events that go over multiple days, otherwise leave as 0.
End time
Timezone
