Amazon Connect Setup for Chat Attachments
VoiceFoundry Agent Desktop now has the ability to manage chat attachments through the standard AWS chat API (streams). While this does not require anything different to a non-Agent Desktop deployment of Connect with chat, we are documenting the requirements here to facilitate upgrades for existing customers.
This is currently a manual process.
Steps
Create an S3 bucket
Assign CORS policy to S3 bucket (see below section Assign CORS Policy)
Setup Amazon Connect for chat attachments (see below section Amazon Connect Setup)
Assign CORS Policy
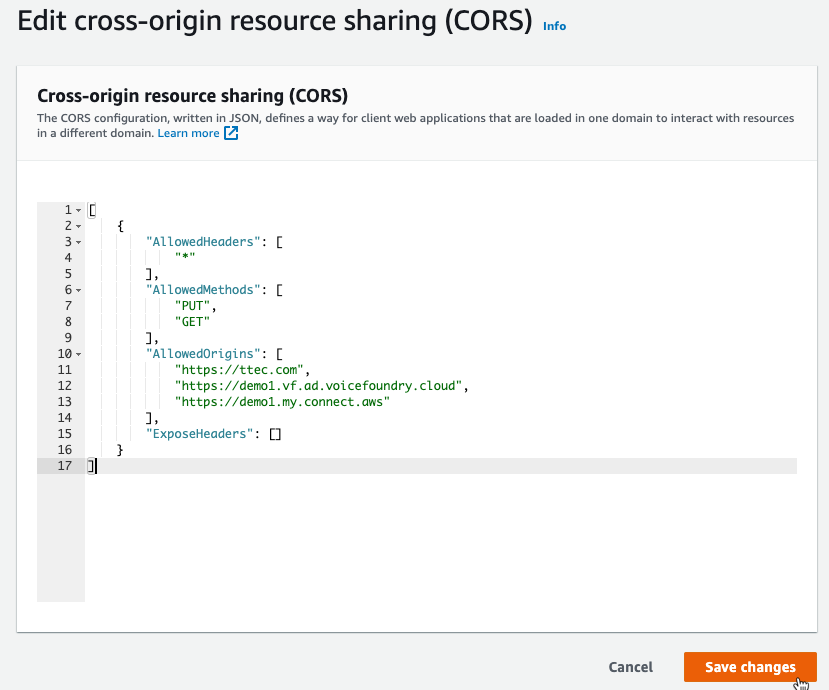
Once an S3 bucket is created for storing chat attachments, a CORS policy must be attached to the bucket to allow the upload/download of attachments from the applications. This includes website hosting the chat widget, Agent Desktop instance, and the standard CCP URL (in case the standard CCP is used as a fallback).
In the following example, we are using these values:
Website - https://voicefoundry.cloud
Agent Desktop - https://demo1.vf.ad.voicefoundry.cloud
CCP - https://demo1.my.connect.aws
[
    {
        "AllowedHeaders": [
            "*"
        ],
        "AllowedMethods": [
            "PUT",
            "GET"
        ],
        "AllowedOrigins": [
            "https://voicefoundry.cloud",
            "https://demo1.vf.ad.voicefoundry.cloud",
            "https://demo1.my.connect.aws"
        ],
        "ExposeHeaders": []
    }
]
This policy should be assigned by going to the permission tab in the S3 bucket.

Then scrolling to the bottom where the CORS setup is, and click edit.

Lastly, paste in the policy as per the above and click save.

Amazon Connect Setup
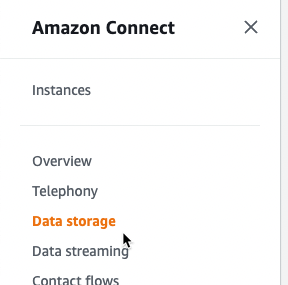
Setting up attachment storage in Connect requires navigating to the specific Connect instance, and selecting the Data Storage option from the menu.

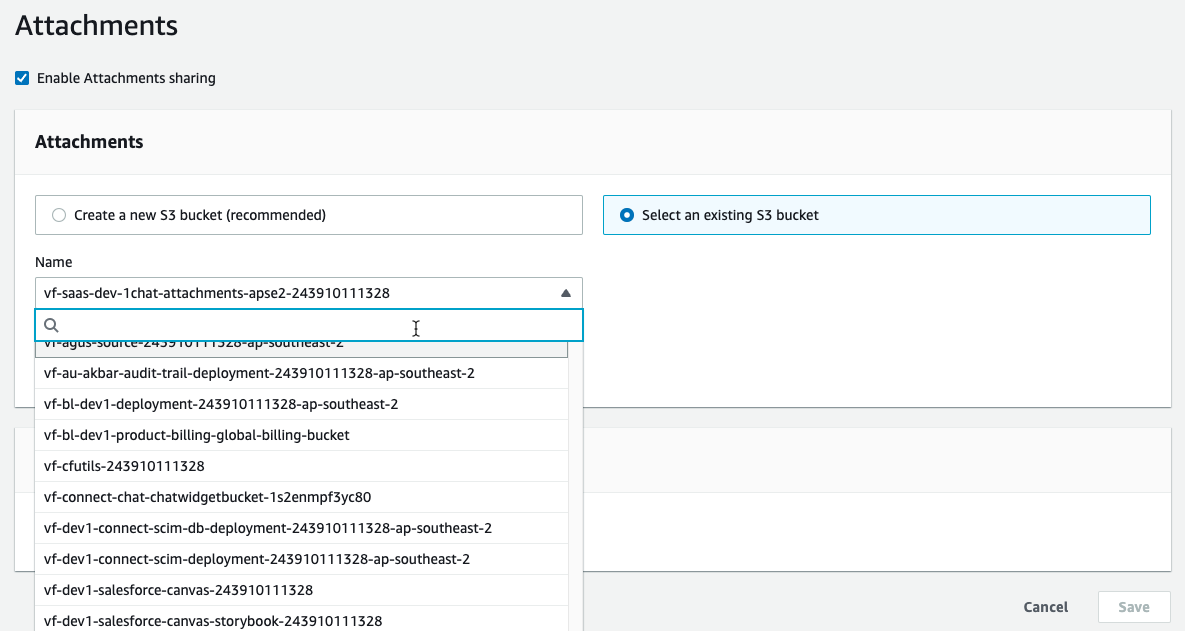
Scroll to the bottom where you will see the Attachments section as per below. Click on Edit.

Select the check box to enable attachments, then select “Use existing bucket” and select the bucket you created in step 1.

Click save.
