Amazon Connect configuration
Configure your Connect instance
To configure your Amazon Connect instance go to Config > Connect.
Under Connect, enter or select the following details:
Login URL: enter either your Connect login URL or your Connect SSO URL
Connect domain: select the domain type of your Connect instance.
Connect region: select the region of your Connect instance.
Default country code: select the country code you want to automatically apply when making outbound calls.
Enable CCP: make sure this is enabled.
Enable outbound queue selection: make sure this is enabled.
Click on Save.
Chat widget size
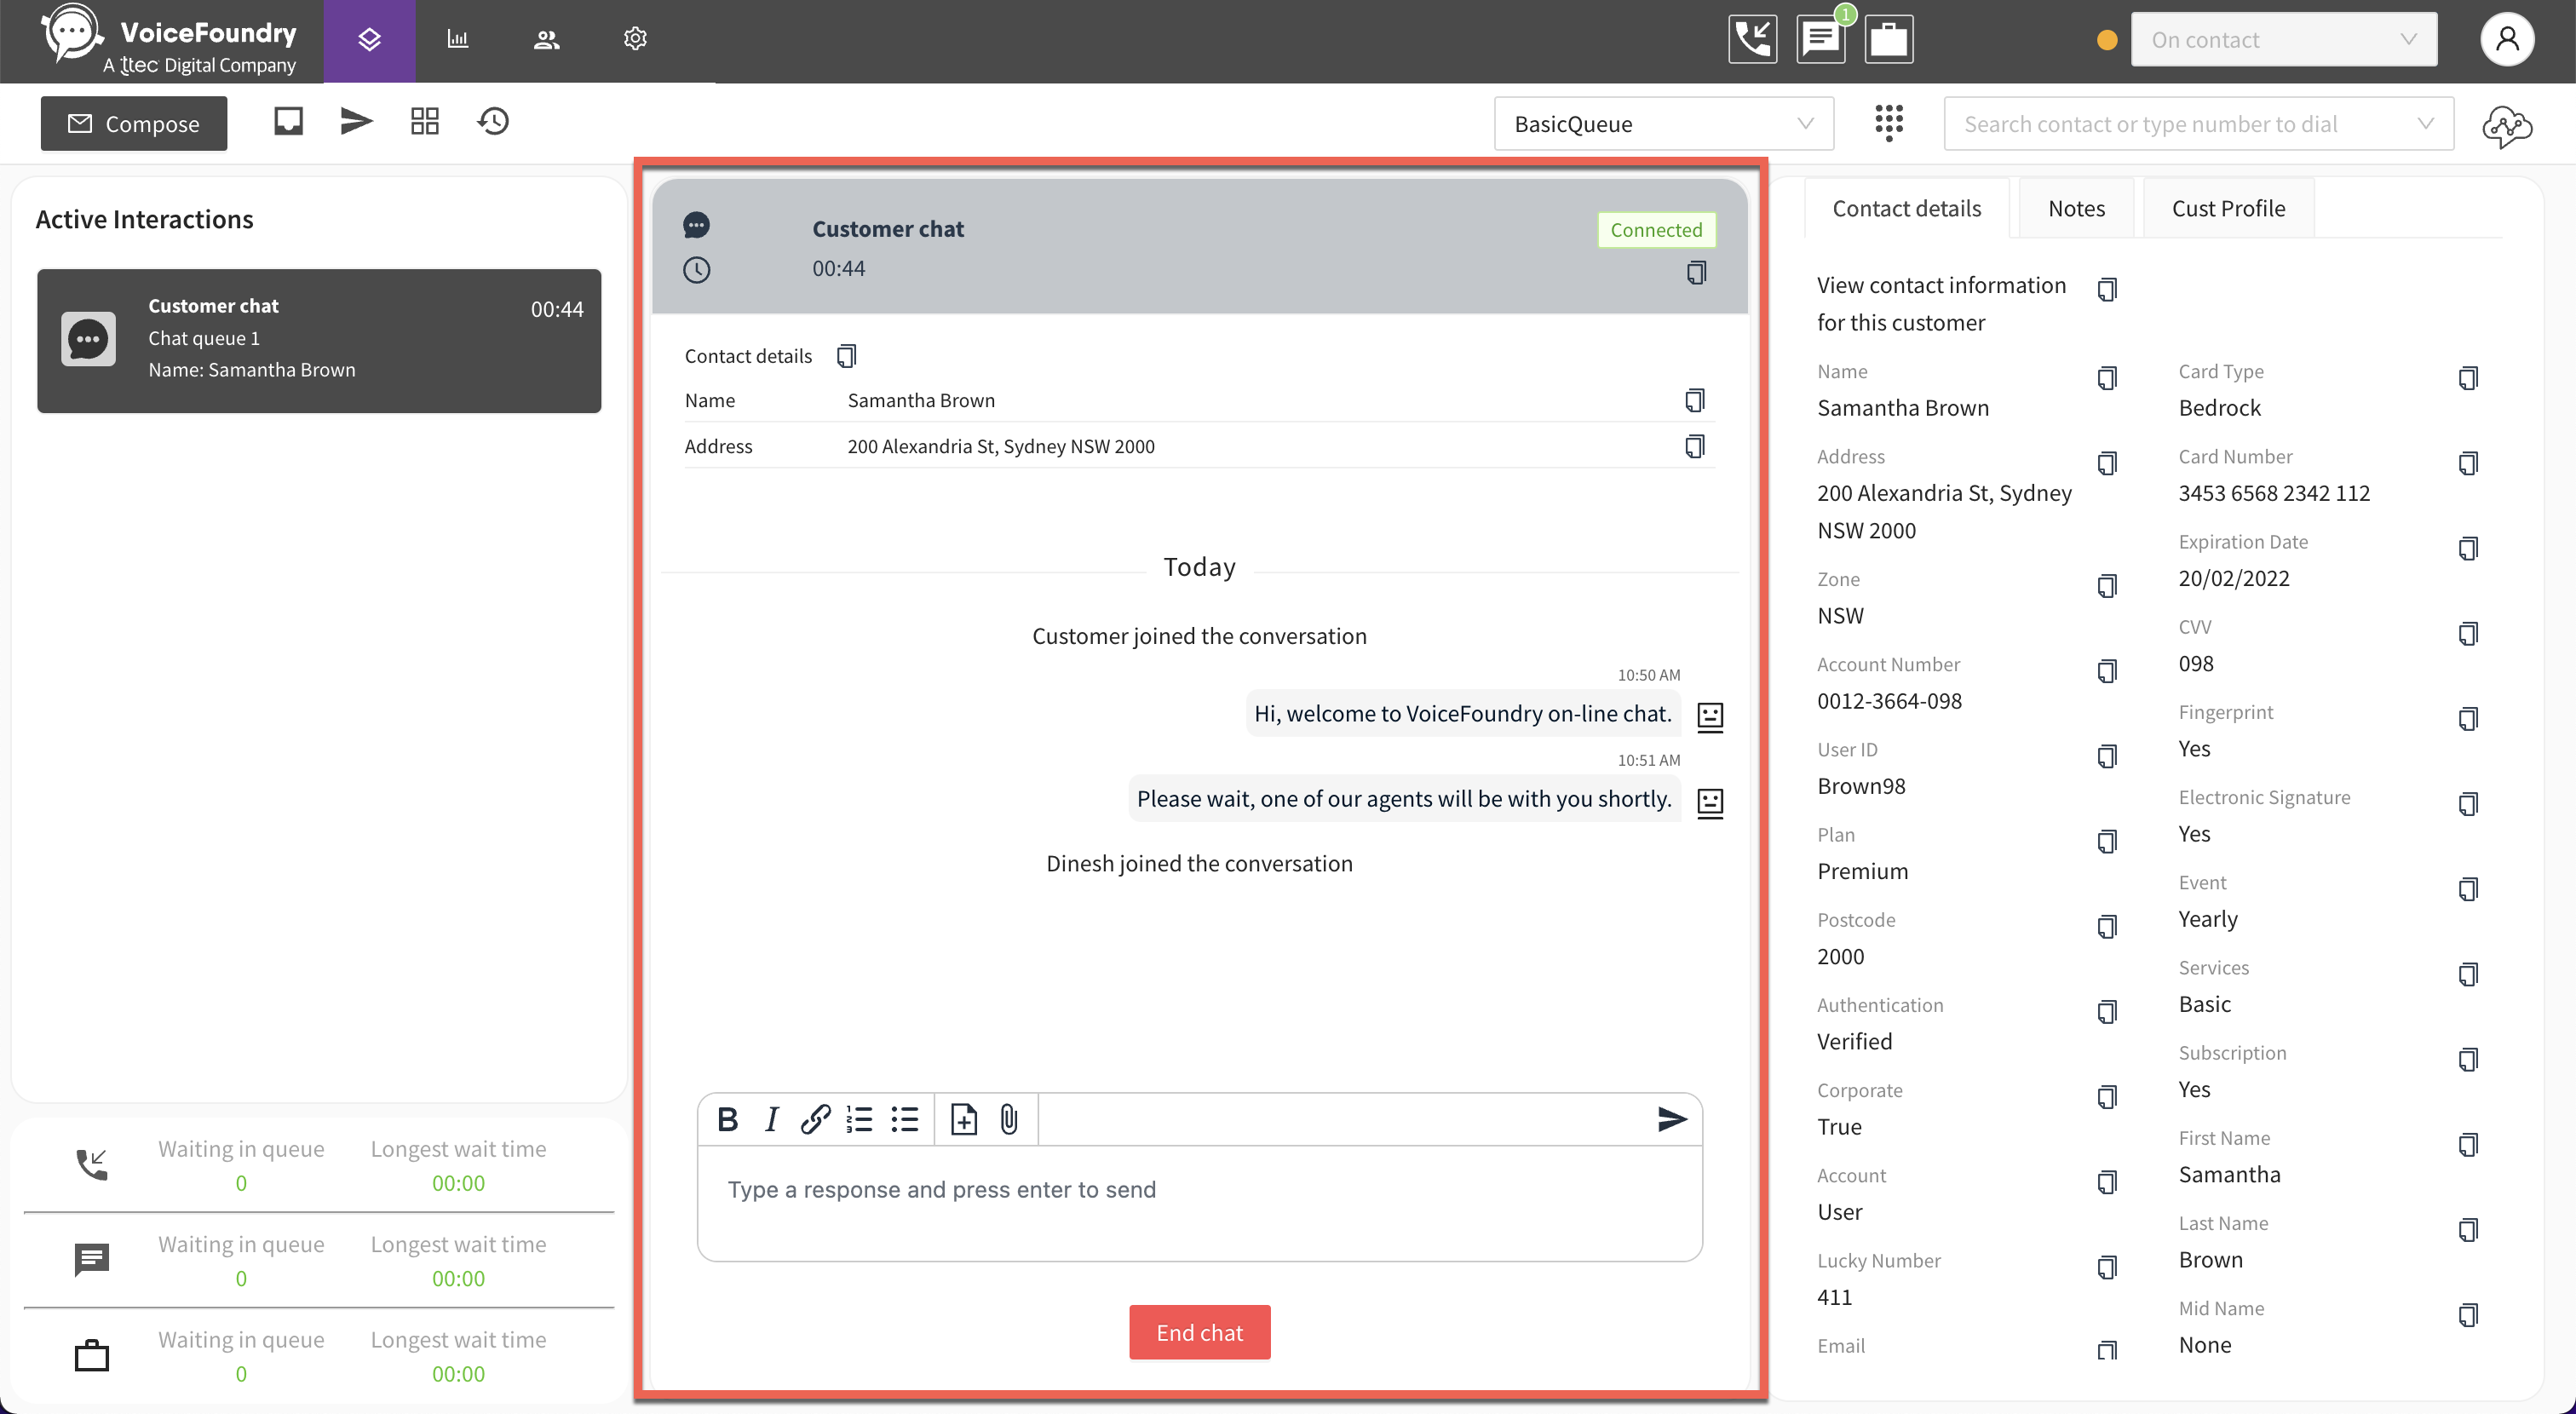
Use the slider to set the width of the contact card for chats within the interaction screen. A higher setting results in a wider contact card for chats.


Heartbeat
Auto sign out will need to be enabled in your account before you can start using this feature. Speak to an administrator for assistance.
Heartbeats are used to track how long an agent has been in a certain status (e.g. On contact or Break) and can be used to automatically change a user's status to offline after a certain amount of time has passed. This can be useful if an agent closes their browser but hasn’t properly signed out of the Agent Desktop.

Heartbeat interval
Set the length of time for one heartbeat (seconds).
Missed heartbeat trigger
Set the amount of heartbeats that need to occur before an agent's status changes to Offline.
Add contact attributes
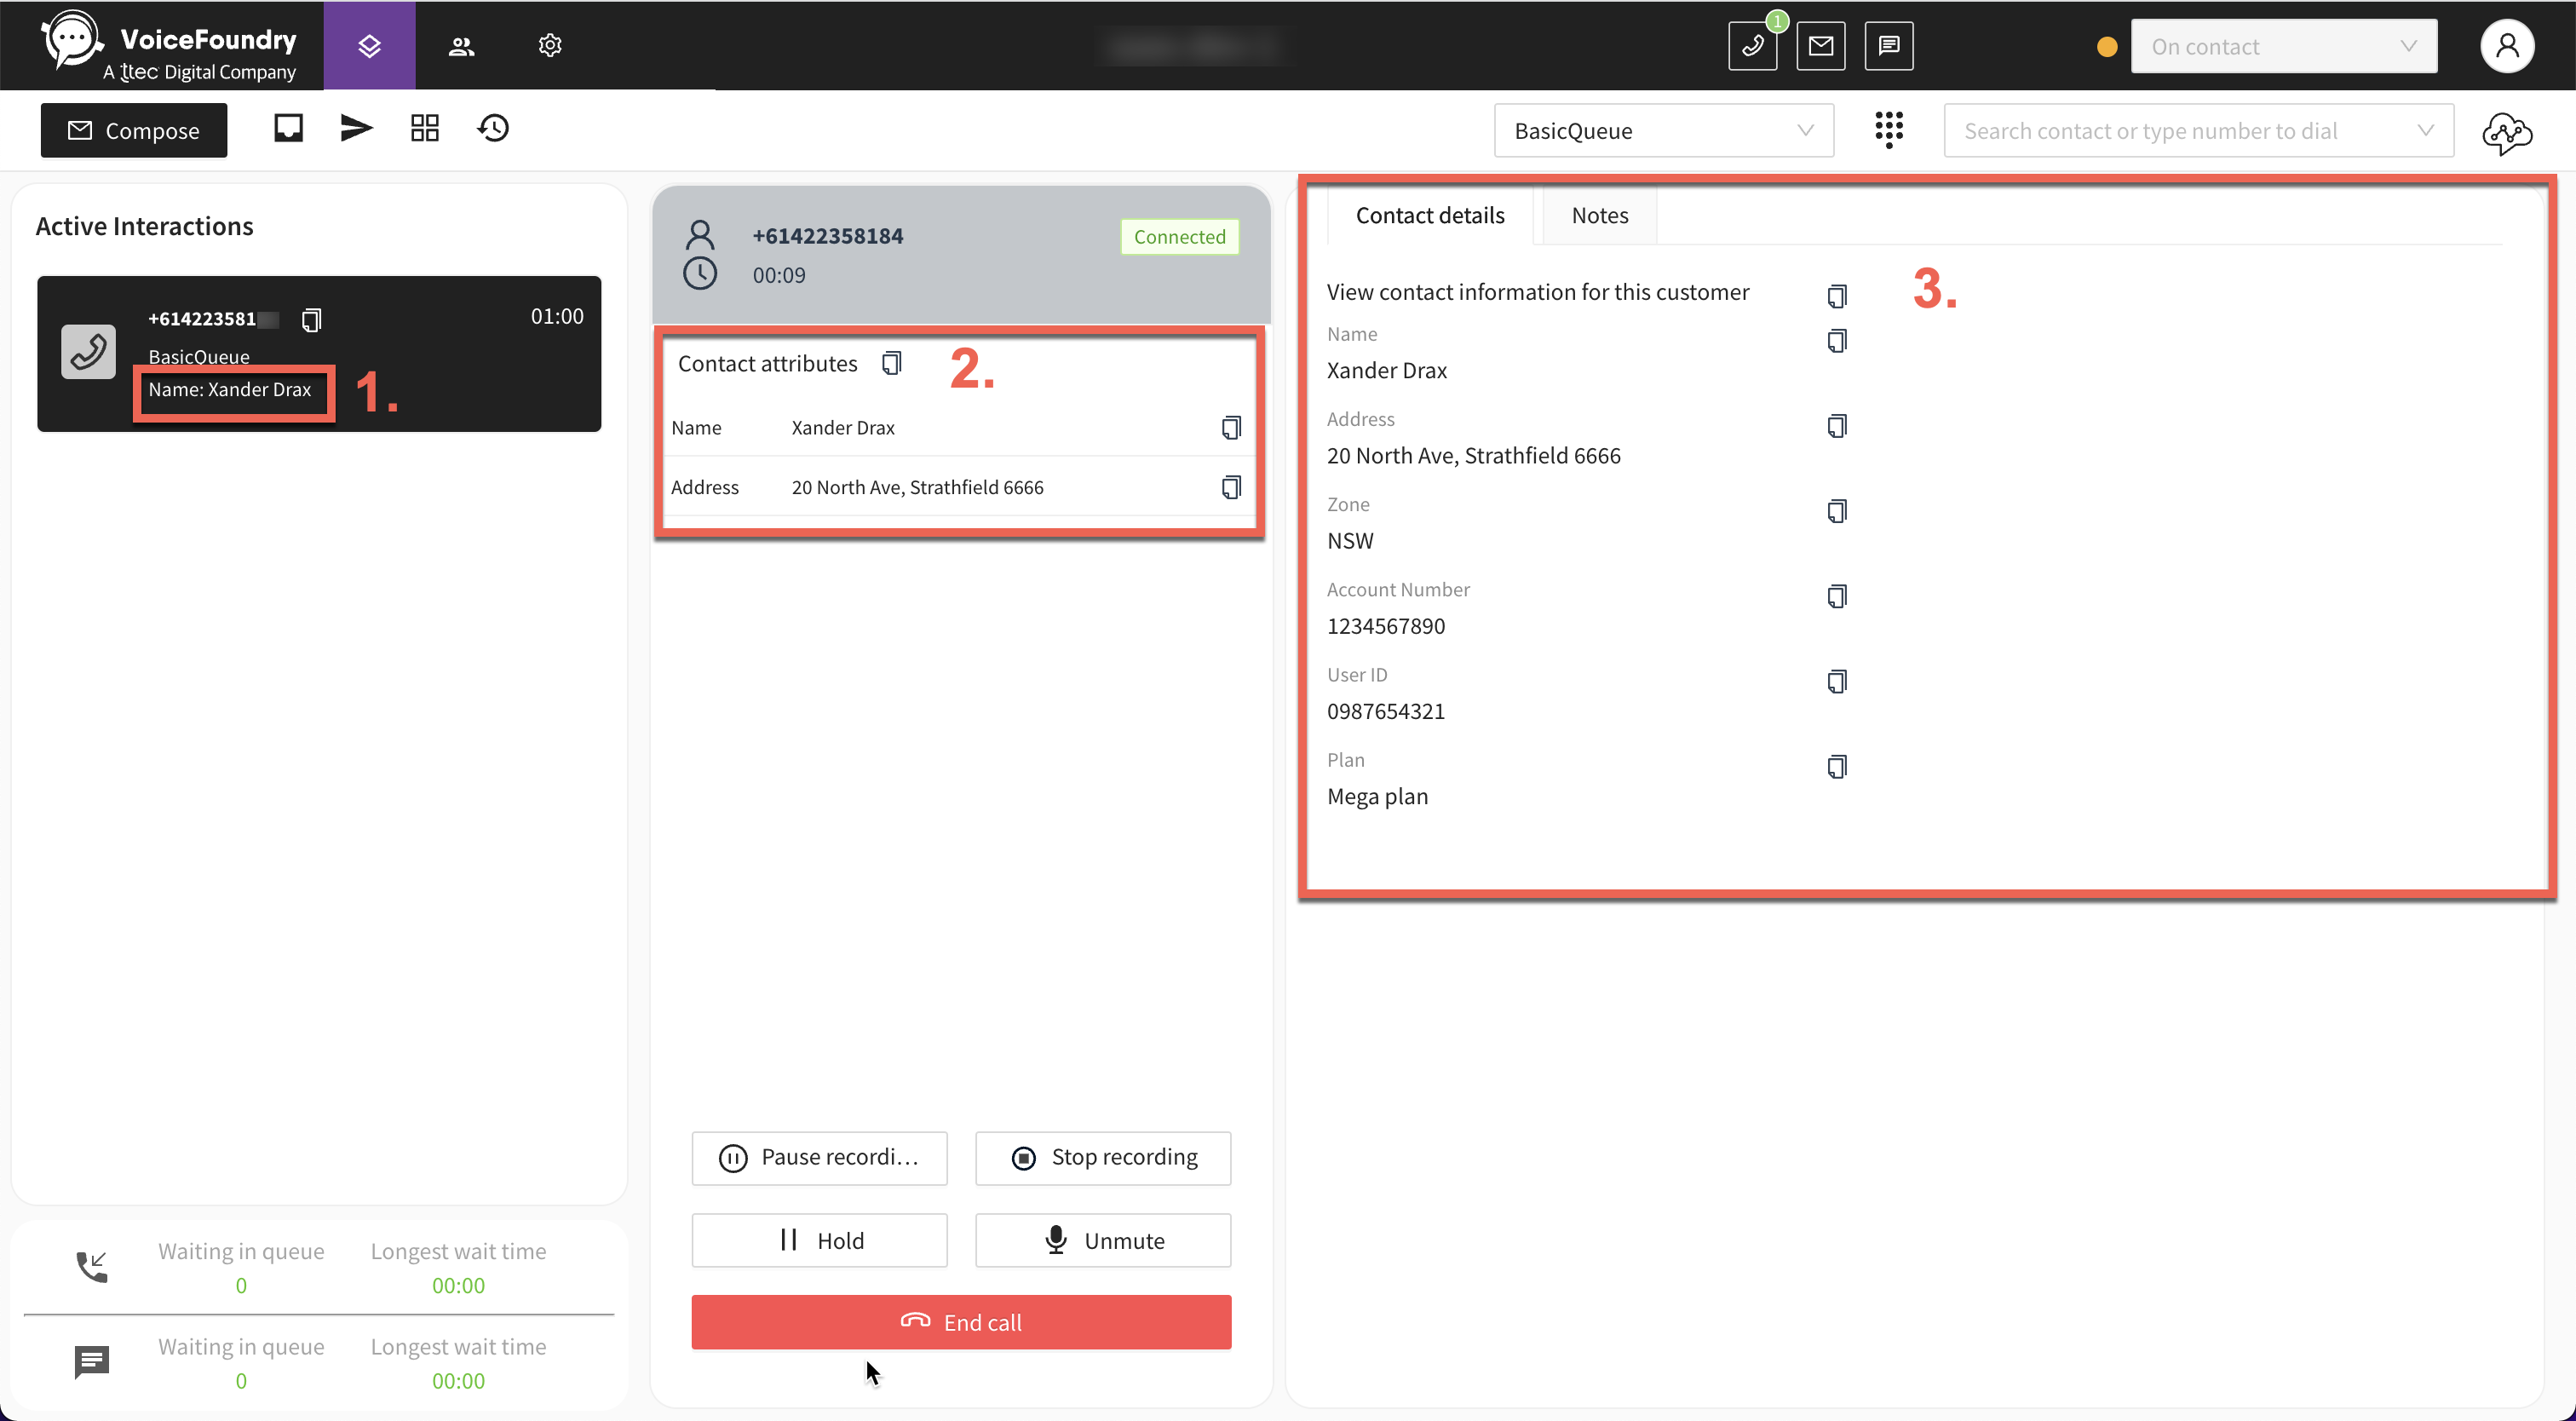
You can display the value of a contact attribute within:
The interaction card
The contact card (up to a maximum of four)
A tab on the right hand side of the Interaction screen.

Only contact attributes with a value will be displayed within the Interaction screen.
To set the contact attributes you want to display within the Agent Desktop, go to Config > Connect.
Under Display contact attributes, click on the Add attribute button and enter the following:
Contact attribute name: this needs to tie back exactly to the contact attribute in Connect (e.g. policy_holder).
Contact attribute display name: this is how the contact attribute name will be displayed within the Interaction screen (e.g. Policy Holder).
For attributes you are adding to the Interaction screen, you will also need to set whether the attribute should be displayed within the Contact card or tab. A maximum of four contact attributes can be displayed within the Contact card.
Click on Save.

Remove contact attributes
To remove a contact attribute, go to Config > Connect.
Under Display contact attributes, select the checkbox next to the contact attribute you want to remove and click on Remove.
A modal will appear confirming you want to remove the selected contact attribute. Click on Remove.
Click on Save.
