Agent status groups

Once you have created your agent statuses in Config > Agent status, you can then add your custom agent statuses to Agent status groups, which you then assign to a Routing profile.
If a Routing profile has an Agent status group assigned to it, any agent who is assigned that Routing profile will be able to select an agent status from that Agent status group.
Only one Agent status group can be assigned to a Routing profile at any given time.
If a Routing profile isn’t assigned to an Agent status group, any agents who are assigned to those Routing profiles will be able to select an agent status that exists within the Default Agent status group.
Add a new Agent status group

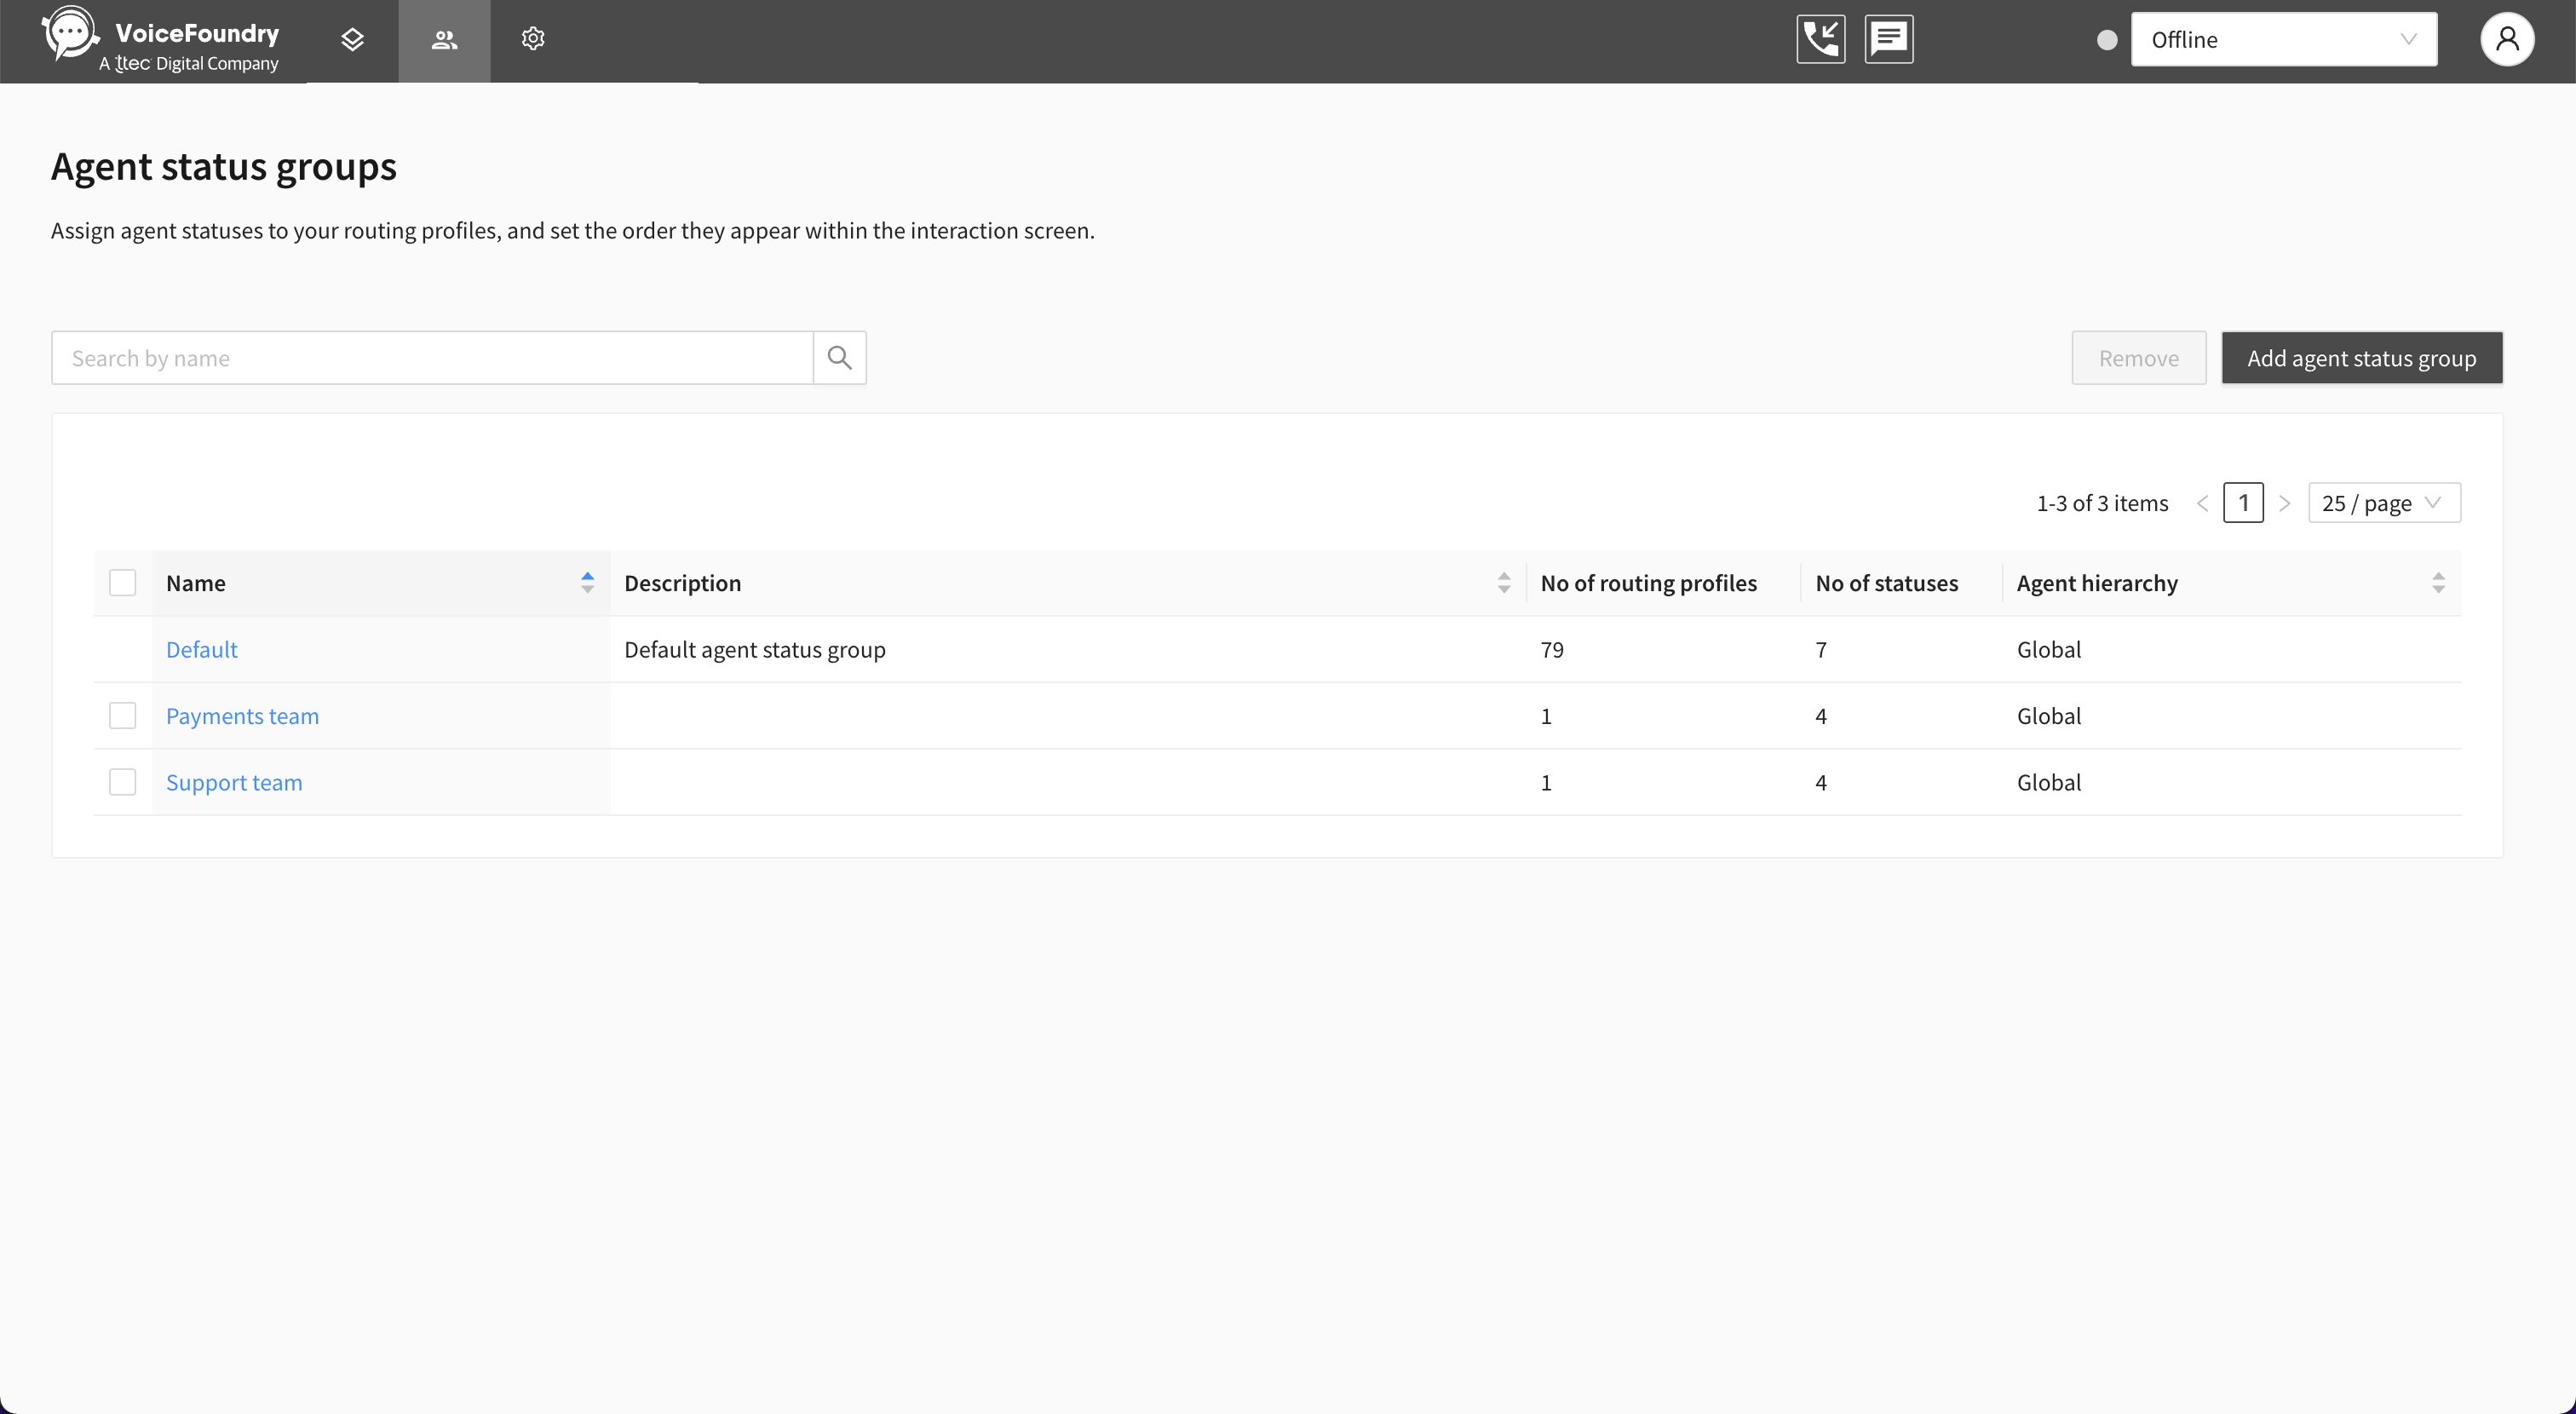
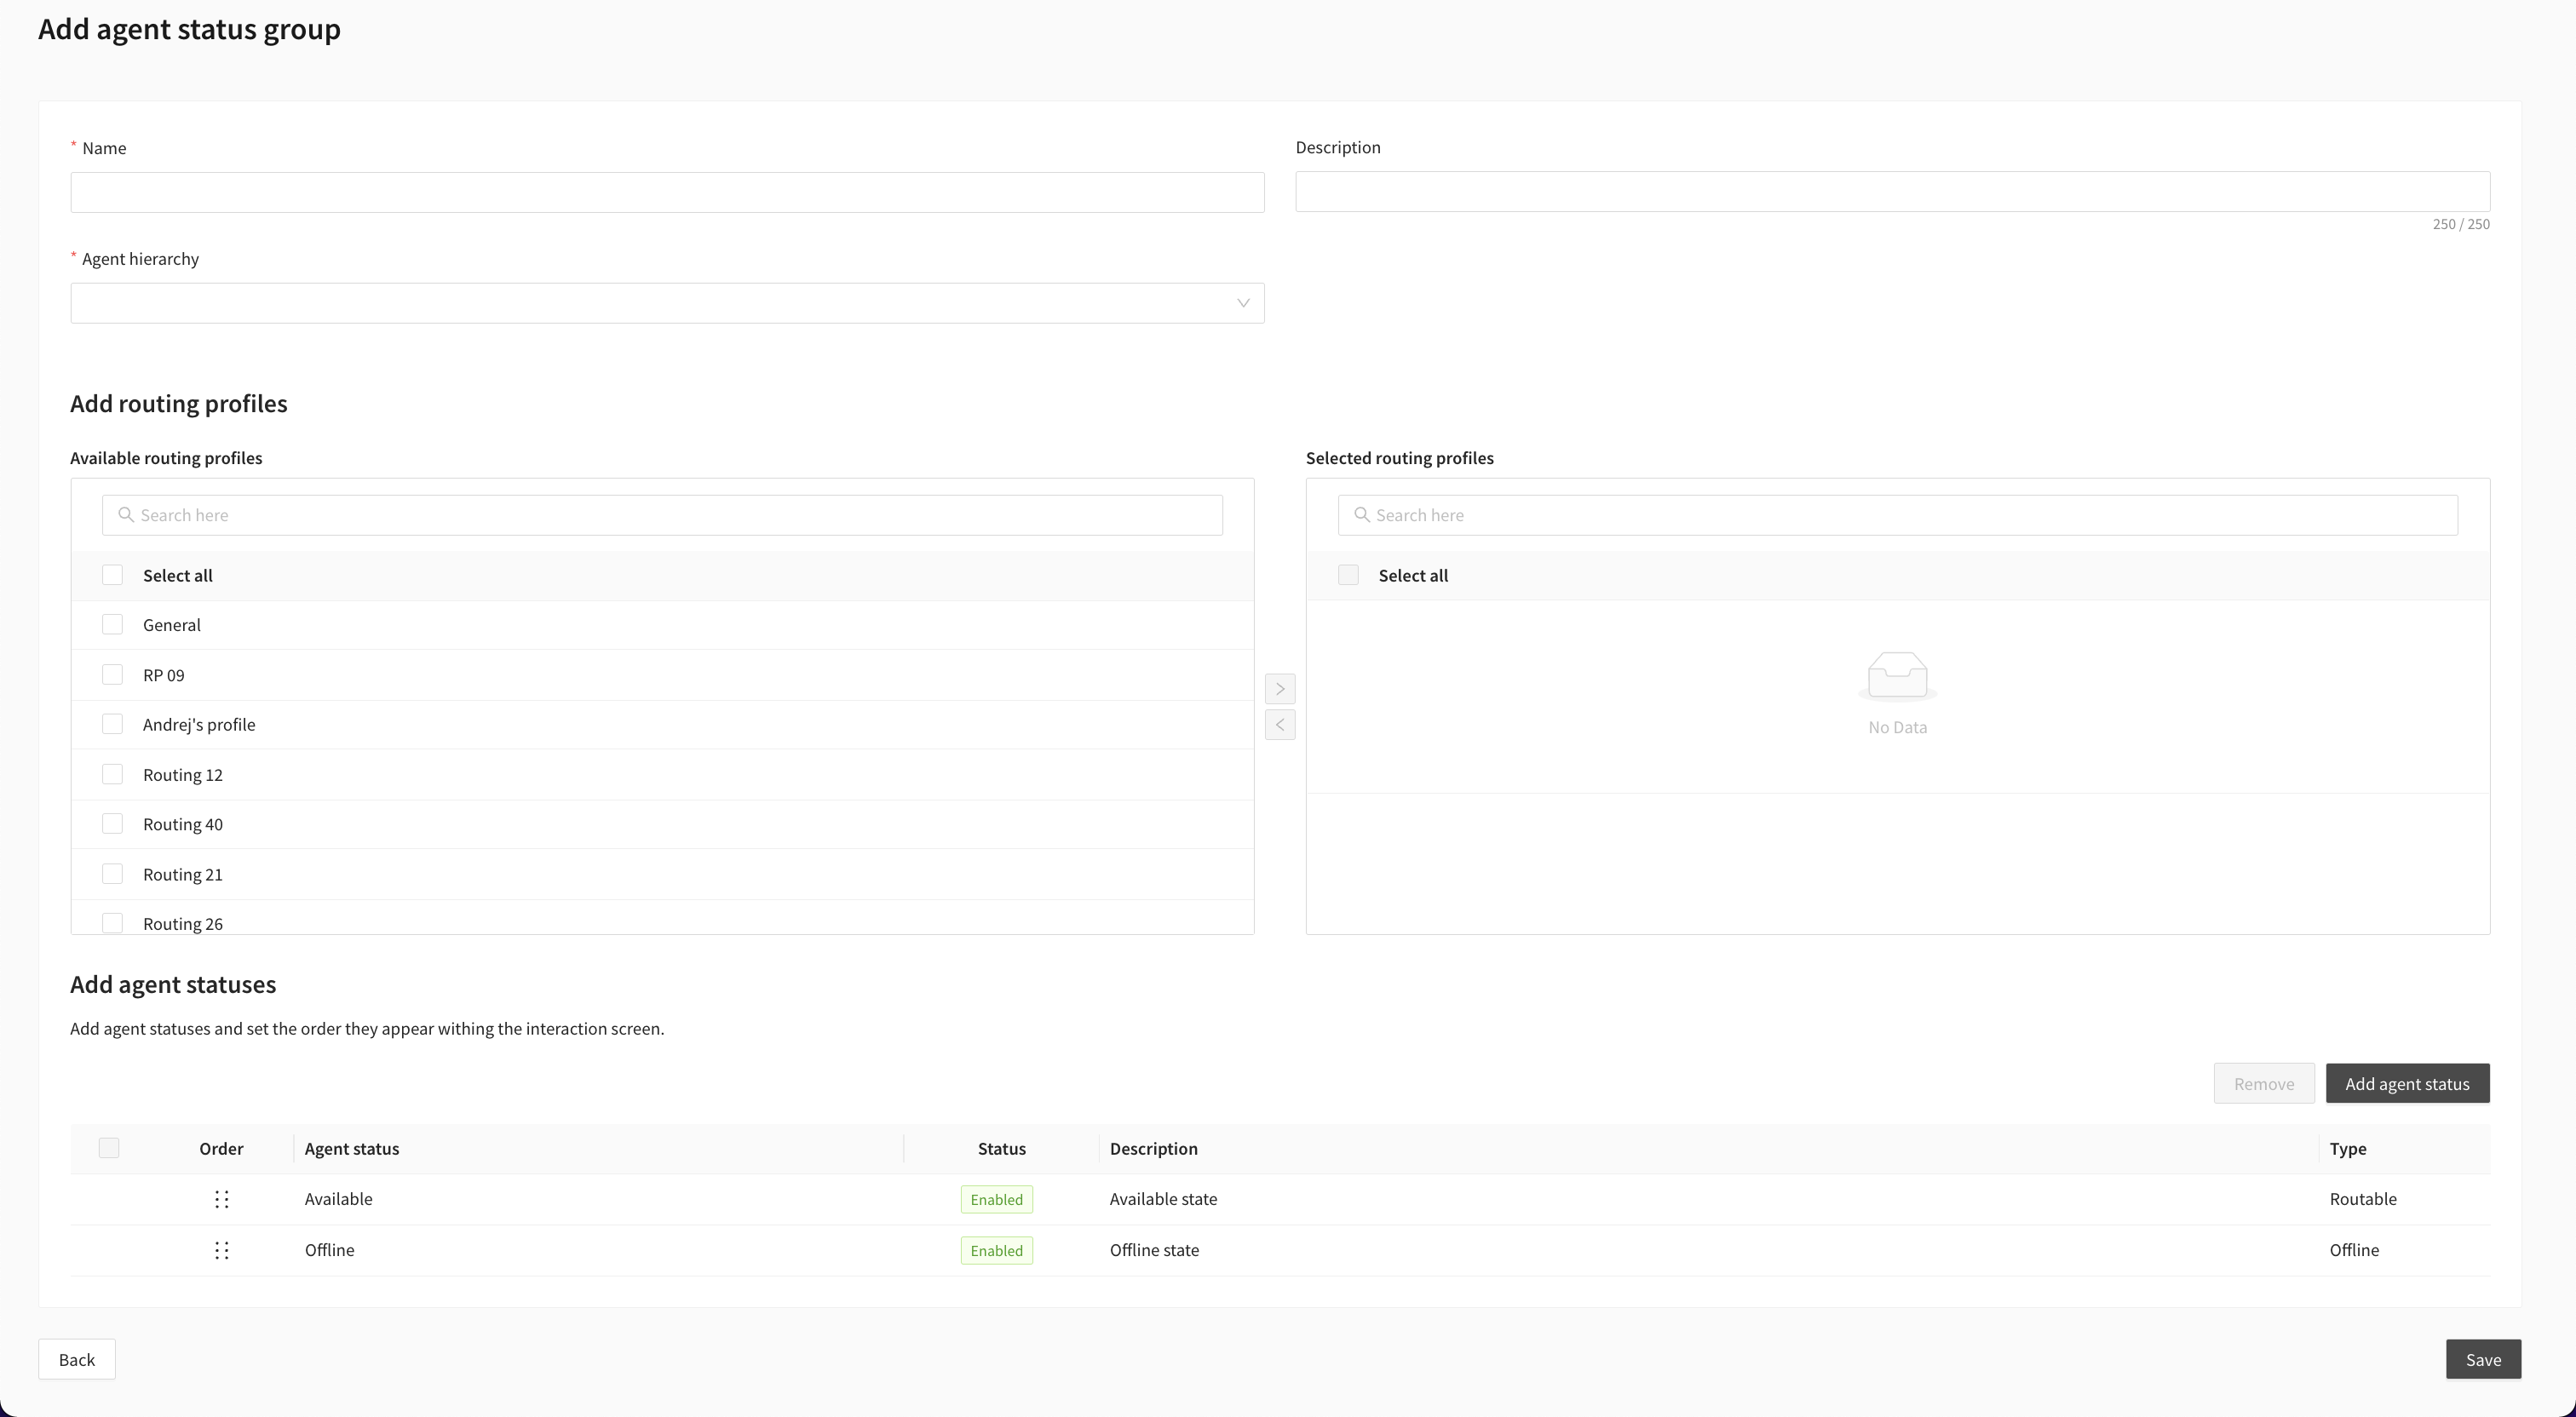
Go to Admin > Agent status groups, and click on Add agent status group.
Enter or select the following details:
Name.
Description (optional).
Agent hierarchy: required if the agent hierarchy feature is enabled in your account.
Assign Routing profiles to your Agent status group.
Add Agent statuses to your Agent status group by clicking on Add agent status.
Note: Available and Offline agent statuses cannot be removed from an Agent status group.
Click and drag the agent statuses to reorder them. The order you set them will be the order they appear within the Interaction screen.
Click on Save.
Edit an Agent status group
Go to Admin > Agent status groups, and select an Agent status group.
The following fields can be edited:
Name.
Description (optional).
Agent hierarchy: required if the agent hierarchy feature is enabled in your account.
Routing profiles: Assign Routing profiles to your Agent status group.
Add/remove custom Agent statuses.
Note: Available and Offline agent statuses cannot be removed from an Agent status group.
Click and drag the agent statuses to reorder them. The order you set them will be the order they appear within the Interaction screen.
Click on Save.
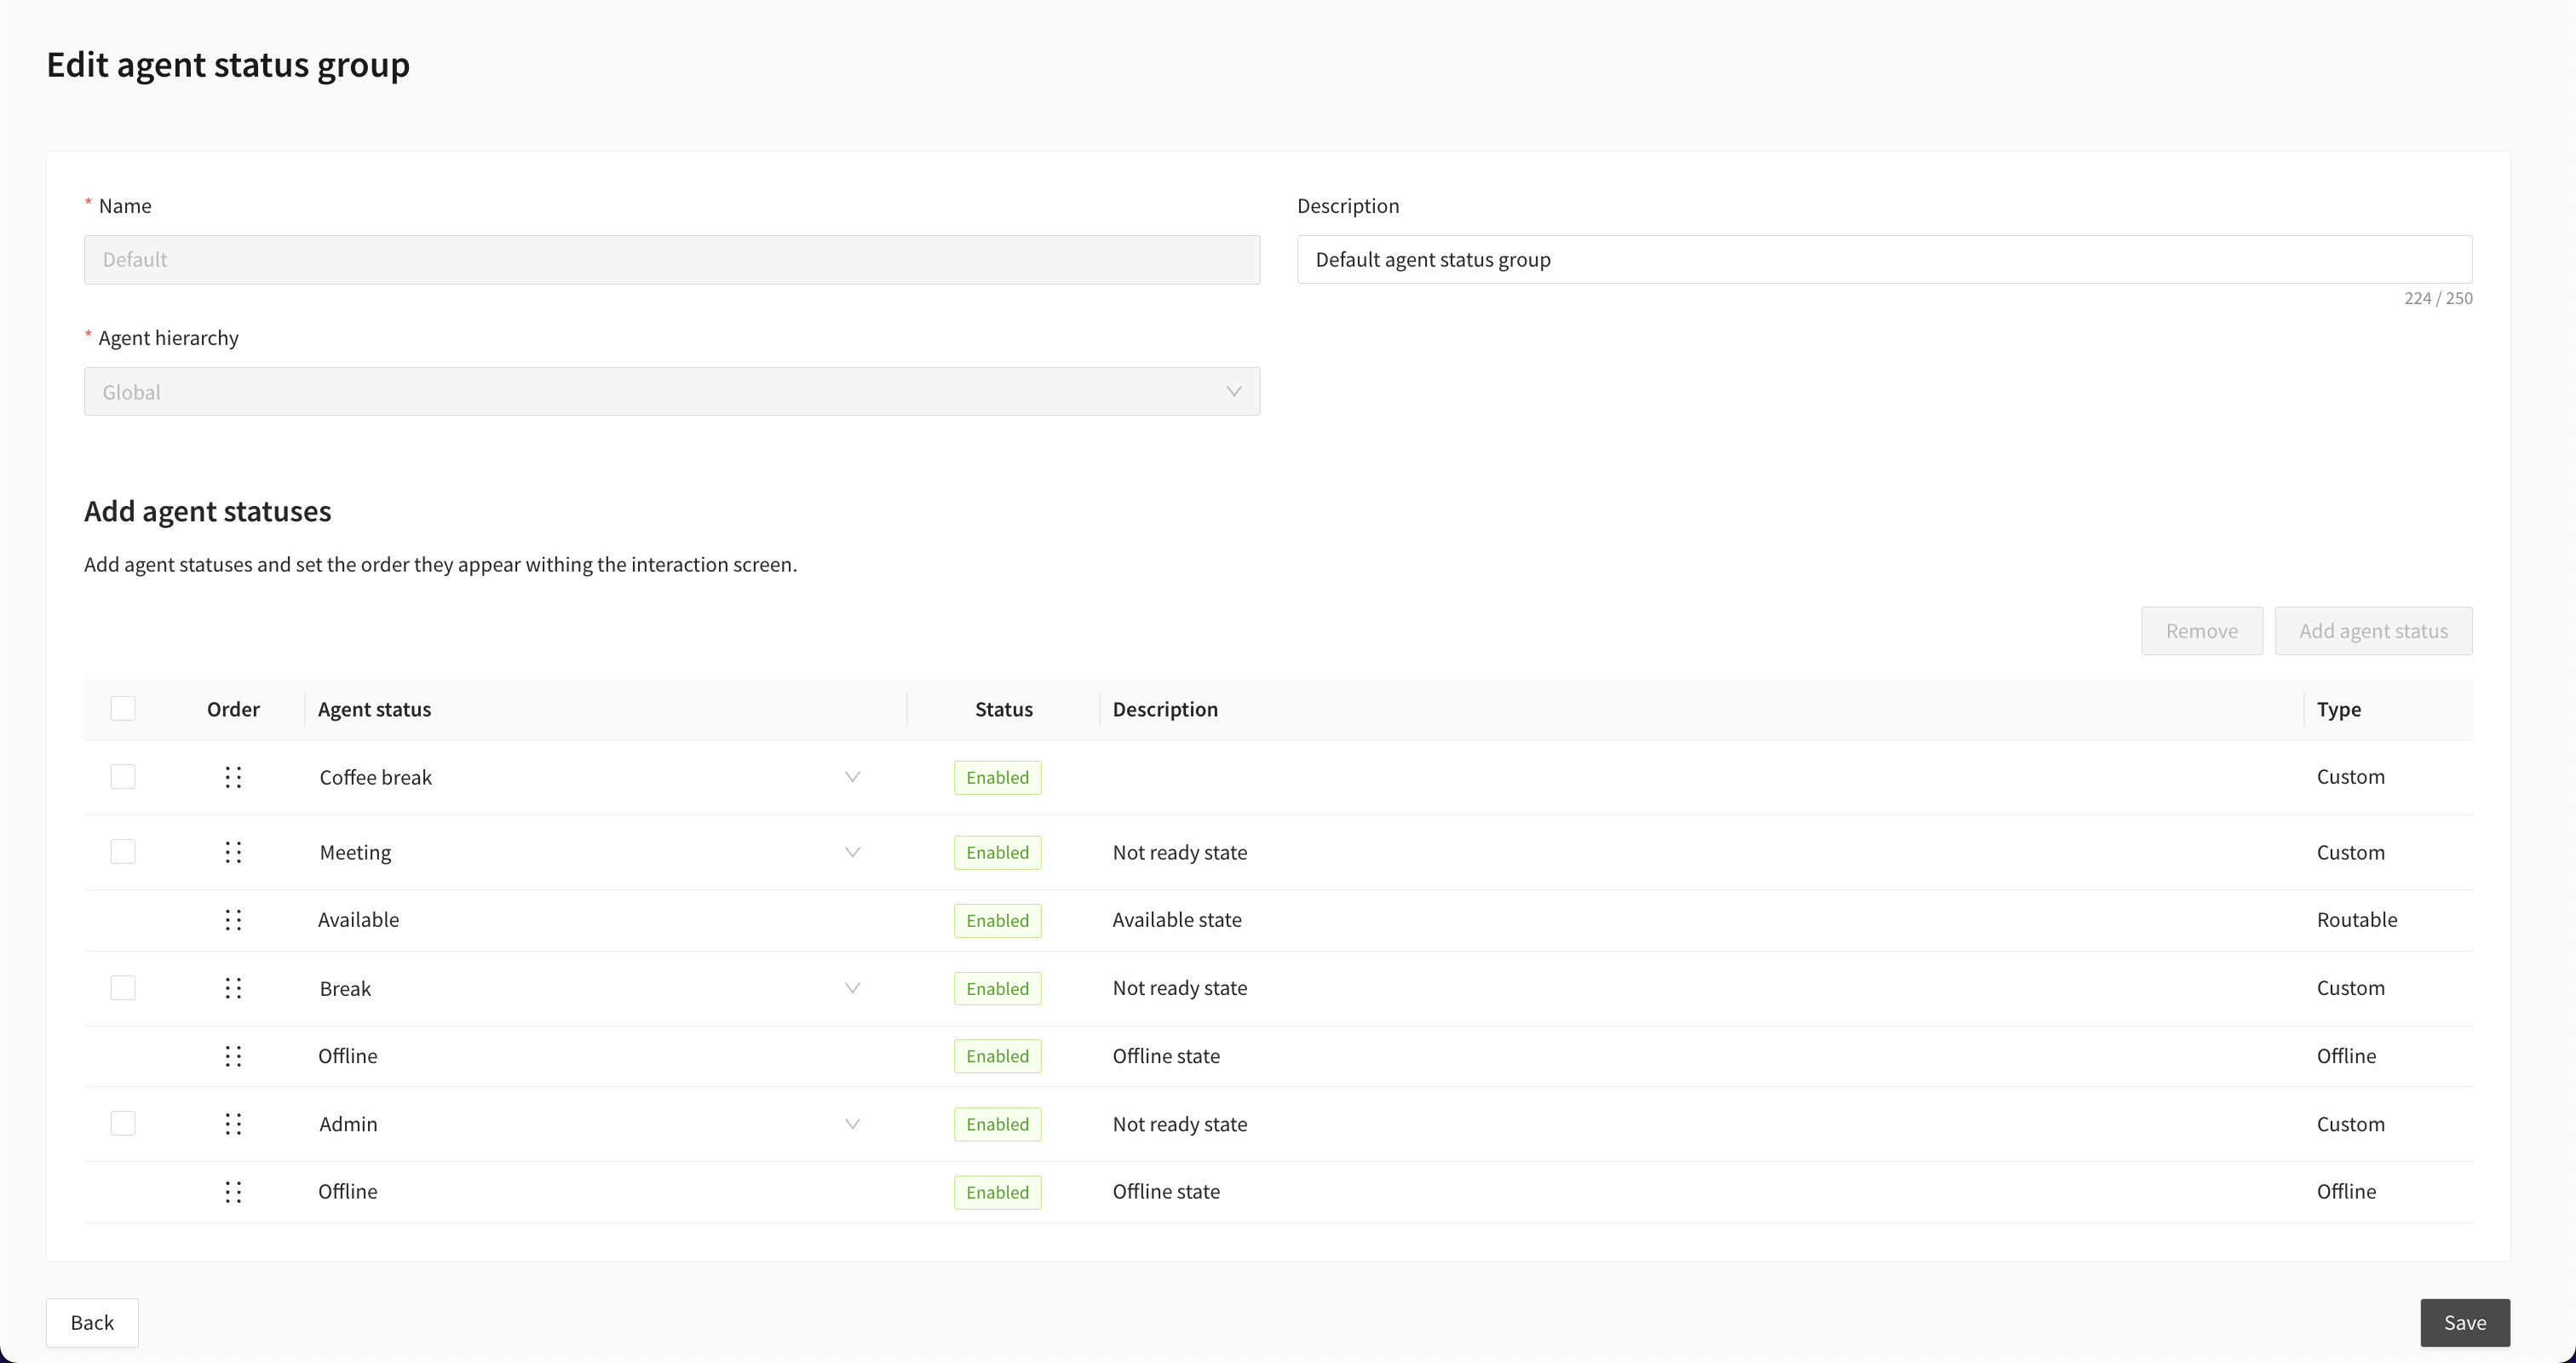
Default agent status group

The Default agent status group is used by all agents who are assigned Routing Profiles that aren’t assigned to any Agent status groups.
To edit the Default agent status group, Go to Admin > Agent status groups, and select Default.
The following fields can be edited:
Description (optional).
Add/remove custom Agent statuses.
Note: Available and Offline agent statuses cannot be removed from an Agent status group.
Click and drag the agent statuses to reorder them. The order you set them will be the order they appear within the Interaction screen.
Click on Save.
